Showing posts with label Gift Packaging. Show all posts

Thursday, May 25, 2017

Quick Gift Wrap with Julie Nutting Stamps

Need some quick gift wrap?  Just pull out your Julie Nutting Stamps, some paint and matching ribbon and you are good to go!  I used some white wrap that I picked up at Michaels for $2!  Butcher paper would work, too! 


Tip:  Stamp before wrapping.  Your will thank me for this tip!  :)  I did all the stamping and painting before I wrapped... the second time.  lol


I'm all about the wrapping when giving gifts and this was so cute and easy!  This stamp is from one of the planner stamp sets, but for larger packages, the large Julie Nutting Stamps would be fabulous!!


Be sure to stop by Michaels this week to find the stamps and other Prima Goodies!

Photobucket

Tuesday, May 23, 2017

Prima and Michaels

The final countdown is happening!!  Only 2 more days until Prima starts showing up in Michaels!  I'm really excited, especially for those of us who don't have local scrapbook stores in our areas!  We haven't had one here in YEARS!  I'm also hoping that the limited release will bring new people to our love of Prima!

I've been a huge fan of Julie Nutting for years!  I loved her even before she started designing for Prima!

I created these little favor bags using Julie Nutting planner stamps, Finnabair glitter and lots of cute stuff from Michaels!


I love all the little sayings that are included in this stamp set.  Yes, it's for Planners, but so much MORE!  My friend is hosting a 'Craft Party' soon, and we will be using these little bags for favors!  

I also wanted to remind everyone that this is FUN!  I think in trying to create the 'perfect' project, sometimes we forget why we do this and why we LOVE it! 


I hope that all of you will take a peek at Michaels soon!!  I know that I will be checking each time to see what they have of these terrific products!

Photobucket

Monday, August 29, 2016

New Julie Nutting Stamps from Prima!

This is one of the new Prima Stamps from Julie Nutting!  Although this stamp at first glance is a Halloween stamp, if you think a little outside the box, it is perfect for a masquerade theme or prom, etc.  The options are endless.  Leave the mask off and this stamp works for any formal affair!

I chose to embrace the masquerade idea for this tag.  I loved how the new Prima Rossibelle collection looked with this theme!


You can see that I added lots of dimension to my tag.  Also, check out the new Rossibelle trim!!  It added a beautiful finishing touch to my tag! 

Don't forget to check out the blog for other new things from Prima and Julie Nutting!!  There are also new dies!  You won't want to miss them!!

Photobucket

Wednesday, July 29, 2015

Prima and Julie Nutting

As a long time Julie Nutting fan, I loved when she teamed up with Prima Marketing.The stamps and other Prima products were and are such a terrific pairing!!  Well, guess what??? They have done it again with these precious baby stamps!!

The stamps come with a full wardrobe to have both girl and boy babies.  In addition, there are absolutely adorable accessories.  

I created a gift bag and tag set with the new stamps.  I loved that I could specialize my bag to fit a girl, in this case, or a boy.


The stroller stamps are perfect to make a border on my bag and if you look closely, you will also see a little teddy bear.  There are so many cute additions!


Be sure to stop by the Prima Blog to see what some of the other designers have created with the NEW Julie Nutting releases!  There is also a giveaway on the Prima blog!  You don't want to miss any of it!

Photobucket

Monday, September 29, 2014

Ustream Class with Flying Unicorn


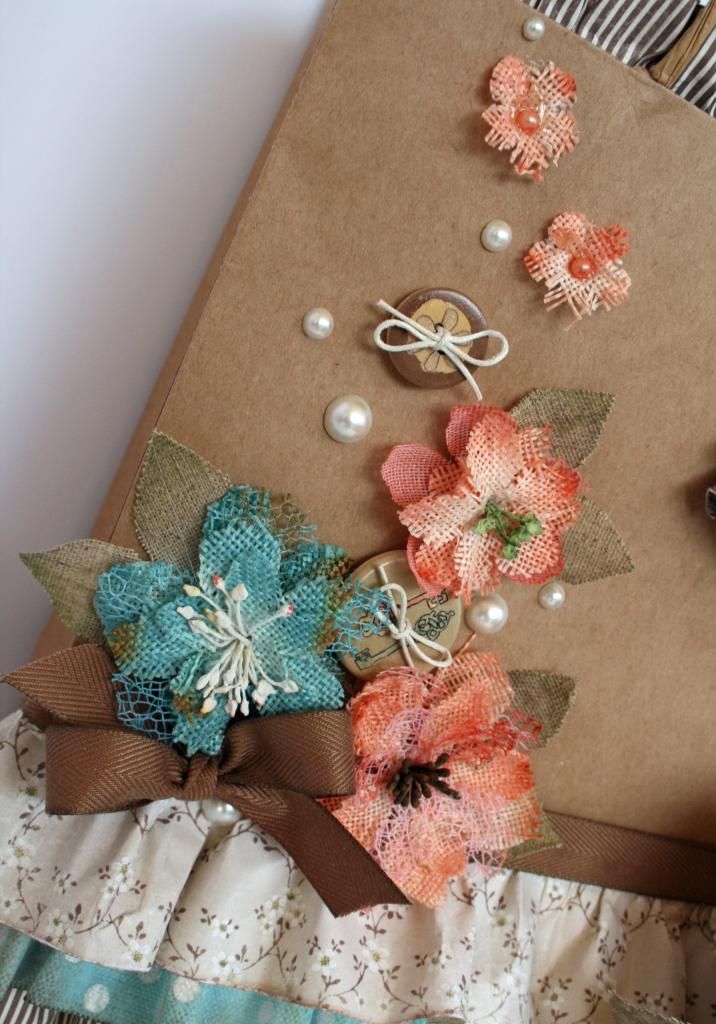
Hi y'all!  This is the project that I did for Flying Unicorn University on Ustream! 

 If you want to know how to make paper ruffles for your projects, this is the place to go!

If you have already watched, you know that we ran short on time, so I promised to share the card dimensions here on my blog.  Well, I thought I did, but it didn't post!  So, a bit late... scroll down to the bottom to see all the details!

If you missed the class, you can watch it right here!  


A close up to show off the beautiful Petaloo Flowers!

  
And a close up of the tag!


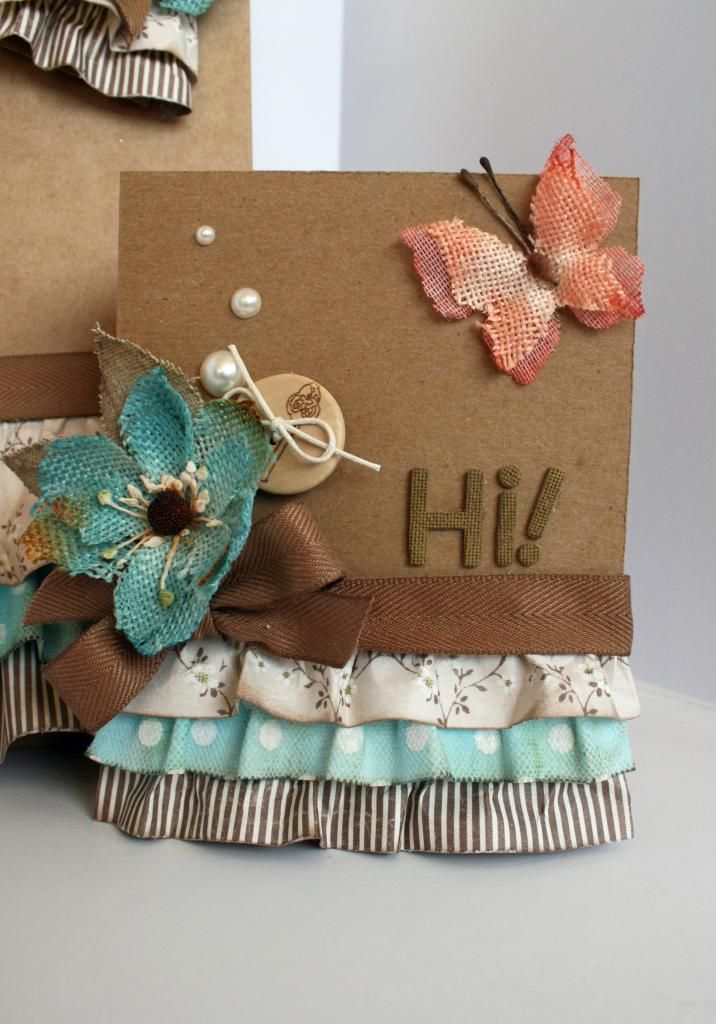
Alright, here is a close up of the card.  
The finished card is 4 1/4 by 5 1/2".  

Each of the ruffles are 1 inch wide.  I made them using the flat method shown in the class because the card is a bit longer than the tag and they lay nicer and straighter using that method.  The strips behind the ruffles are still 1/2 wide. 


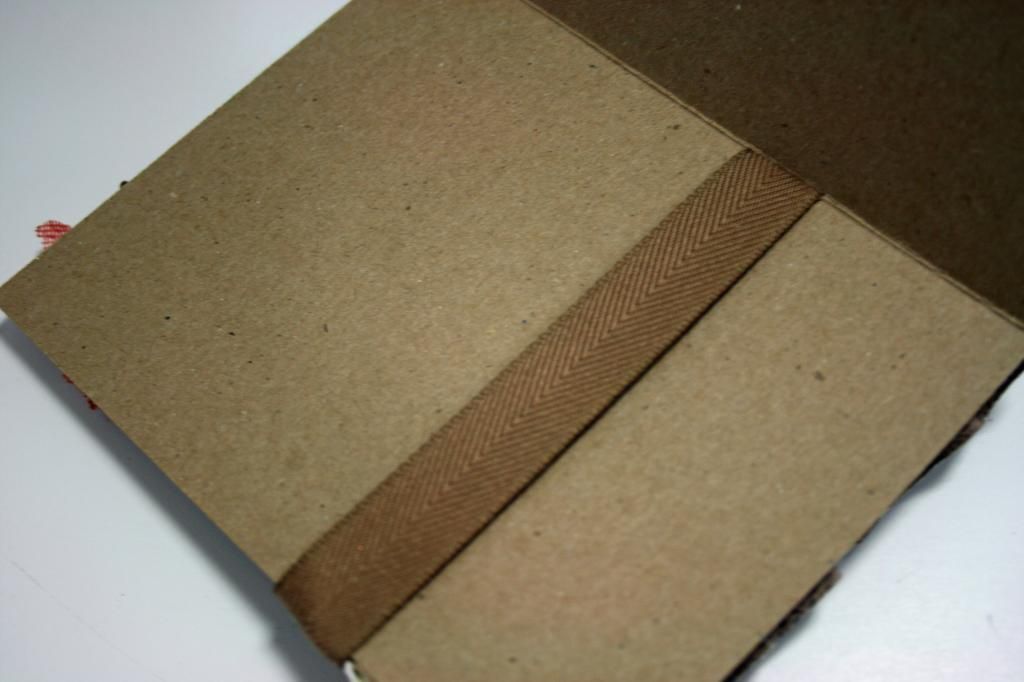
To keep the inside neat when attaching your bow, just simply cut a little slit along the fold to thread your ribbon through.  Tie your bow and your ready to attach your embellishments and add a sentiment!


Thanks so much to everyone that watched!!  I hope the rest of you will drop by to see me and the other designers on Wednesday Nights at 8 Central!

Photobucket

Tuesday, March 4, 2014

Quick and Easy Banner Tips-3 Birds Studio

Hi everyone!  If you made it to my blog from the 3 Birds Designs Blog, you already know that I'm sharing a quick and super easy banner tip today.  If you are starting here, be sure to go by the 3 Birds Designs Blog to take a peek at my layout that incorporates banners, too.  While you are there,  be sure to take a look around!  There are so many great ideas that the other members of the design team have shared!

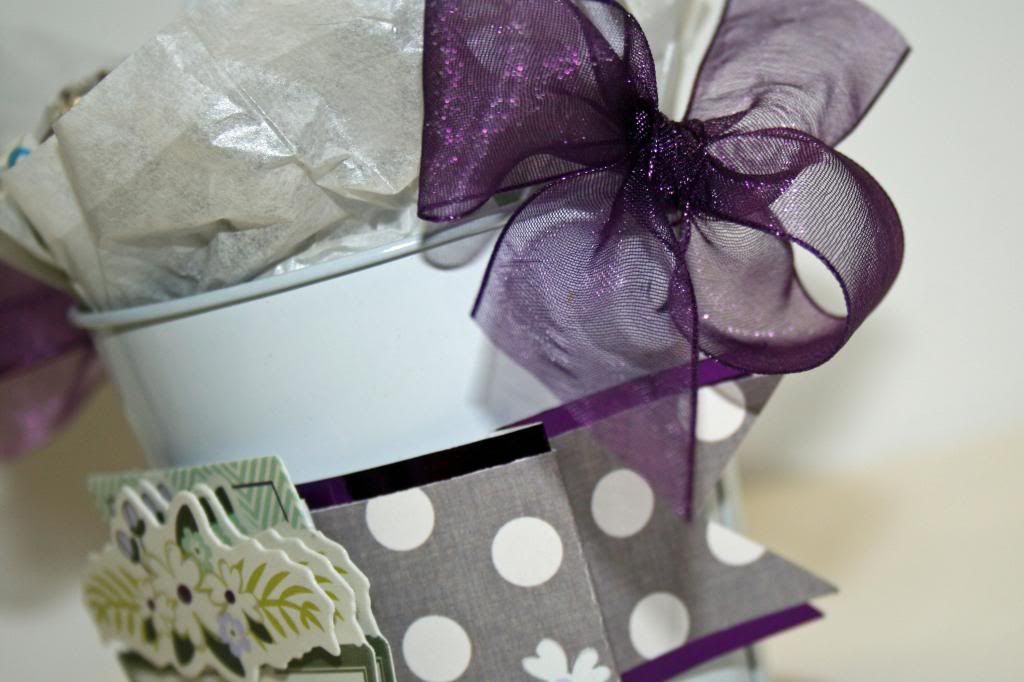
I made this little bucket giftie for and example of a layered banner.  I love the look of banners, but I used to seldom do them?  Why?  Because I never got the ends even and it bugged me!  I am the first to admit that I can get a little picky about things and with banners, just eyeballing it and hoping for the best wasn't doing it for me.  Then... I had an idea!


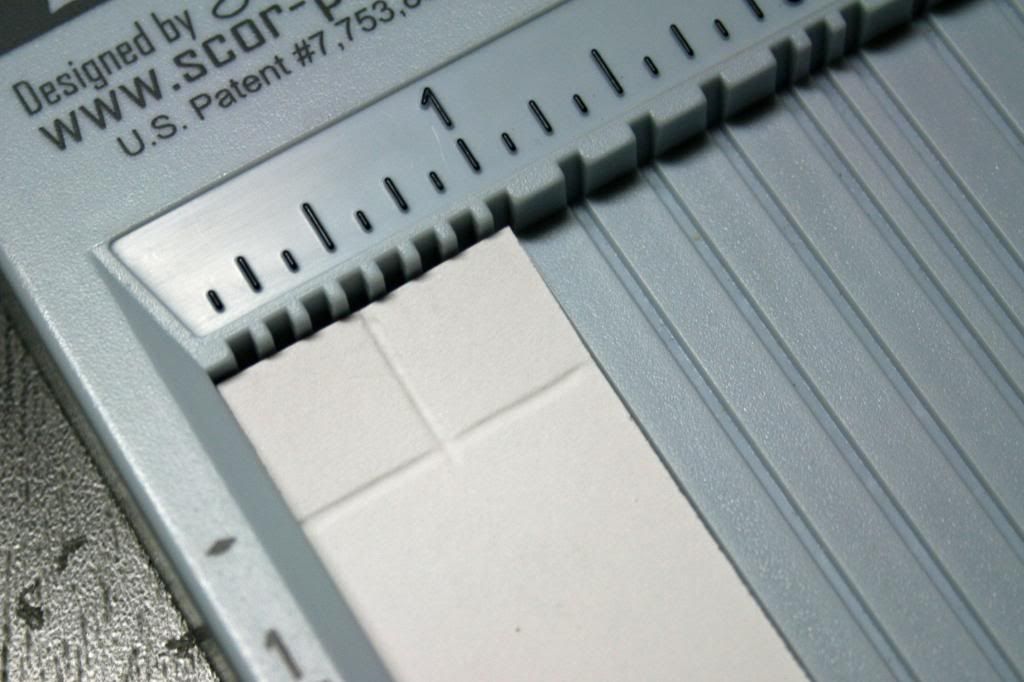
I had my Scor-pal on the table one day when I wanted to make a banner, and I decided to play around.  I came up with this and now I like making banners and I really like that I don't have pencil marks on my paper, just in case I decide to use the other side!

For this example, I first cut a strip of paper 1x6".  The concept will work with any size, however.  Also, you want to make your scoring really lightly, so that you don't have score marks when you complete the banner.  For the picture to show, I had to do it a bit heavier.

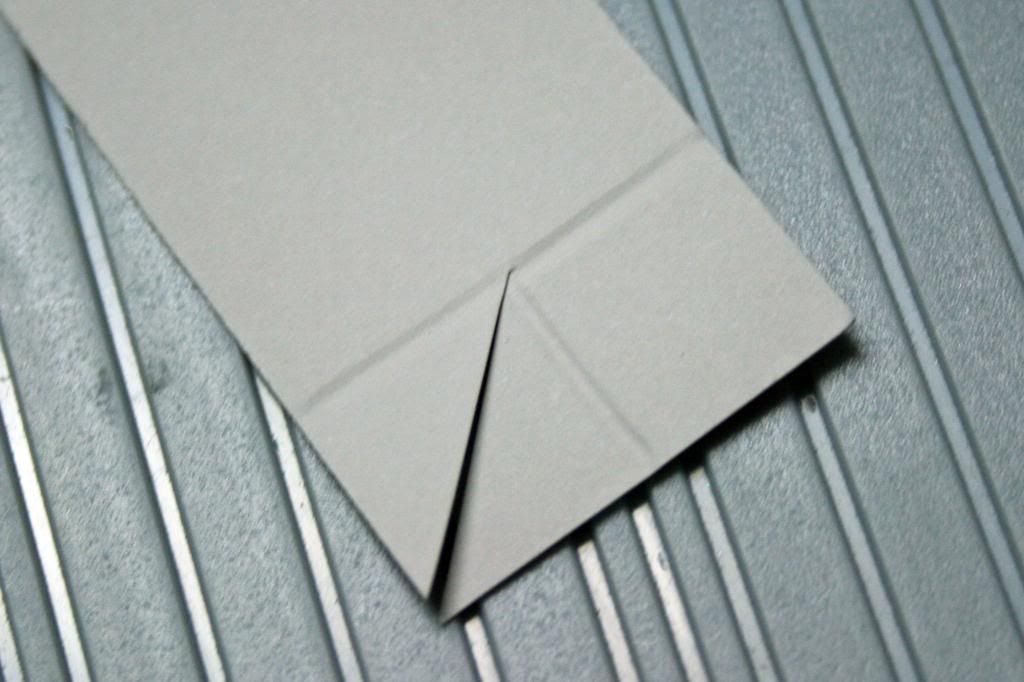
Step 1: Score lightly where you want the inside angle of the banner to end.  Because this one is small, I used 1/2".


Step 2:  Turn the paper and score in the middle of the paper.  Again, this example is 1" wide, so the score mark is 1/2".  End this score mark where the first one is.


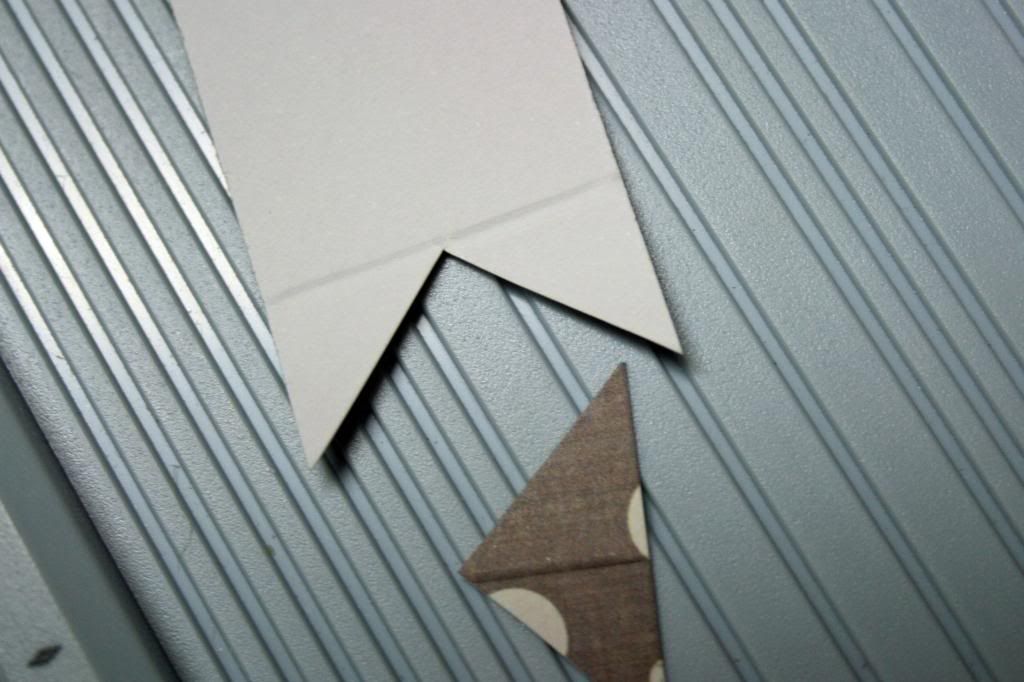
Step 3:  Cut from the corner of the paper to the place where the score marks meet, as shown.


Step 4:  Repeat on the other side.


Step 5:  Score where you want the banner to fold.  This is a matter of preference.

Step 6:  Fold.


Perfect banners every time!!


Now, you might have figured this out before, but for me, this was a eureka moment!  If you have a better idea and I would love to hear about it.  I'm always up to learn something new!  

I also have some BIG NEWS today!!!  
The new Graceful Season Collection from 3 Birds Studio is now available for purchase on HSN!!!
Be sure to check it out on the 3 Birds Designs Blog for all the details and I would love it if you took a look at my layout!

Photobucket

Friday, February 21, 2014


This is a gift bag that I put together using canvas paper, trim, fabric, some jute and, of course, gorgeous Leaky Shed Studio Chipboard!  Decorating using my Leaky Shed Chipboard gave it the special touches that it needed!


I love the Flower Leaf Corner from Leaky Shed Studio, but I wanted to use it to frame the flower cluster, instead of the traditional way. 
As you can see from the picture, this is a really pretty chipboard piece with leaves and flourishes.  I just cut it up to arrange it in a different way.  I used chalk ink to color it brown.


I tucked the Leaky Shed Studio Barn Swallow with Crown above the flower cluster.  Instead of coloring it with ink, I covered it with paper.  I chose a subtle print to keep the monochromatic look that I was going for.


Photobucket


Thursday, February 20, 2014

3 Birds Quilled Cardmaking - Shadowbox

I'm really excited to be up on the 3 Birds Studio blog today! If you haven't been to the 3 Birds Studio blog, be sure to take a look at a card and pillow boxes that I made.  This kit is so fun and the instructions for quilling are super helpful!  I've never quilled before so, for me, having everything included in the kit, including the tool was invaluable.

 I was so excited about the Quilled Cardmaking Kit from 3 Birds, that I couldn't resist making more than one card!

Just For You
For this card, I experimented with stemmed flowers.  Now, I know the pros probably do this differently, but I had this idea, so I had to try it!


There are two things that you can see from this angle.

The first is you can see is how I built the stems for the flower and attached it to the flower.  I folded one strip of the green in half and glued it for added stability.  I then glued the curls and leaves to the stem.  Lastly, I attached it to the quilled flower.  This technique allowed me to add glue to the more substantial pieces to make it easier to attach to the card.

Tip:  Use tweezers and a tiny bit of glue to attach the stem to the bottom.

The second thing that you can see for building this card is the foam tape that I used.  Because this is a shadow box card, using foam tape allowed me to over lap the edges and give it added dimension.

 To finish off the look of the card, I added some red strips for an additional frame.  I used my Xyron sticker maker to add adhesive to the strips of red paper.


And.. a bonus!  I LOVE gift bags, so I wanted to go ahead and have a little gift bag to go with the card.  I used a piece of paper from the 3 Birds paper pad to make this little gift bag.  

Gift Bag

This was super simple.  I just made an extra flower and leaves and attached them over two strips of the quilling paper.  I also used the Xyron to make attaching these strips easy.   


Don't forget to stop by the 3 Birds Studio blog to look at my other quilling ideas!

Thanks so much for stopping by!