Friday, December 28, 2012

Have you seen the new Powder Mountain Collection from Bo Bunny?
 
This collection is really beautiful!  It has so many beautiful options, too.  In addition to the beautiful blues, it has warm browns and cool greys.  I chose to go with the mix of blues and browns for my layout today. 
 
Want a chance to win it?  Go by the Bo Bunny Blog to see how!!
We are teamed up for a blog hop with Scrap That, a kit club!
 
Snow Fun!
 
 
This is my husband and I a few years ago in Whistler Canada.  Living in Central Texas doesn't give us the opportunity to play in the snow, so this was a real treat!
 
 
Don't be afraid to stitch on chipboard!  It's just as easy as stitching through your paper.  Just use a piercing tool to make your holes and you are good to go!  I accented each of the stitching points with some of the Bo Bunny Jewels.
 
 
Add layers and overlapping with foam dots.  Don't forget to finish off your page with a bit of ribbon, too!  :)
 
Don't forget!  You can win some of this collection! 
 Get the details at the Bo Bunny Blog!
 
 
Photobucket

Wednesday, December 5, 2012

Clustering with the Little Yellow Bicycle Chipboard and Clear-cuts couldn't be easier!  It's a fun way to add lots more detail to your pages without your pages becoming too busy.  Today, we are featuring these two products and sharing some ideas at the Little Yellow Bicycle Blog.
 
Winter
 
 
Try layering and overlapping differently shaped elements together.  I love the circles and frames!  Also, I used a clear-cut snowflake over a paper snowflake to add that extra sparkle!  Gotta love the glittery goodness on the clear-cuts!
 
 
Think about layering similar images from different products.  Here, I layered the ice cycles from both packages.  I wanted the chipbard one to take center stage, so I added the blue twine to it and used the light gray twine for the clear-cuts.
 
 
I'm a big fan of layered titles!  For this one, I just layered the clear-cut word right on top of the chipboard word.  Super simple and a bit more detail!
 
 
Be sure to stop by the Little Yellow Bicycle Blog for some more ideas from Biker Chick Corrie!!
 
AND...
Did you know that we have a LYB challenge going on at Two Peas in a Bucket?  Go check it out!  You can win a $50 prize package from Little Yellow Bicycle! 


Photobucket

Saturday, December 1, 2012

Paper Creations Winter Cover

It never ever gets old to see my projects in print! Making the cover is enough to have me dancing around the house!  I was super excited to see that my little ornaments were on the cover of Paper Creations for their winter edition!  Yippeeeeee!!
 
 
Be sure to pick it up!  It is loaded with great ideas and with fun giveaways!
Don't forget to check out the Paper Creations Website for even more ideas!
Photobucket

Monday, November 26, 2012

Little Yellow Bicycle and May Arts

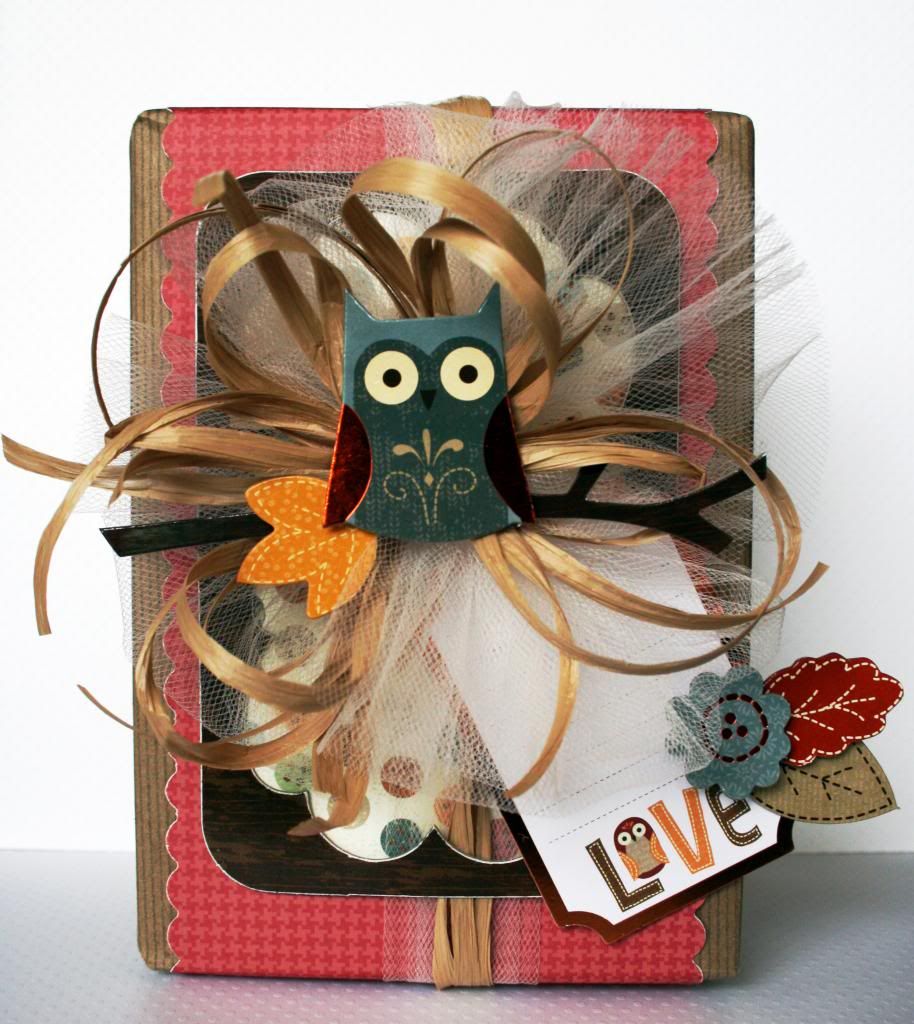
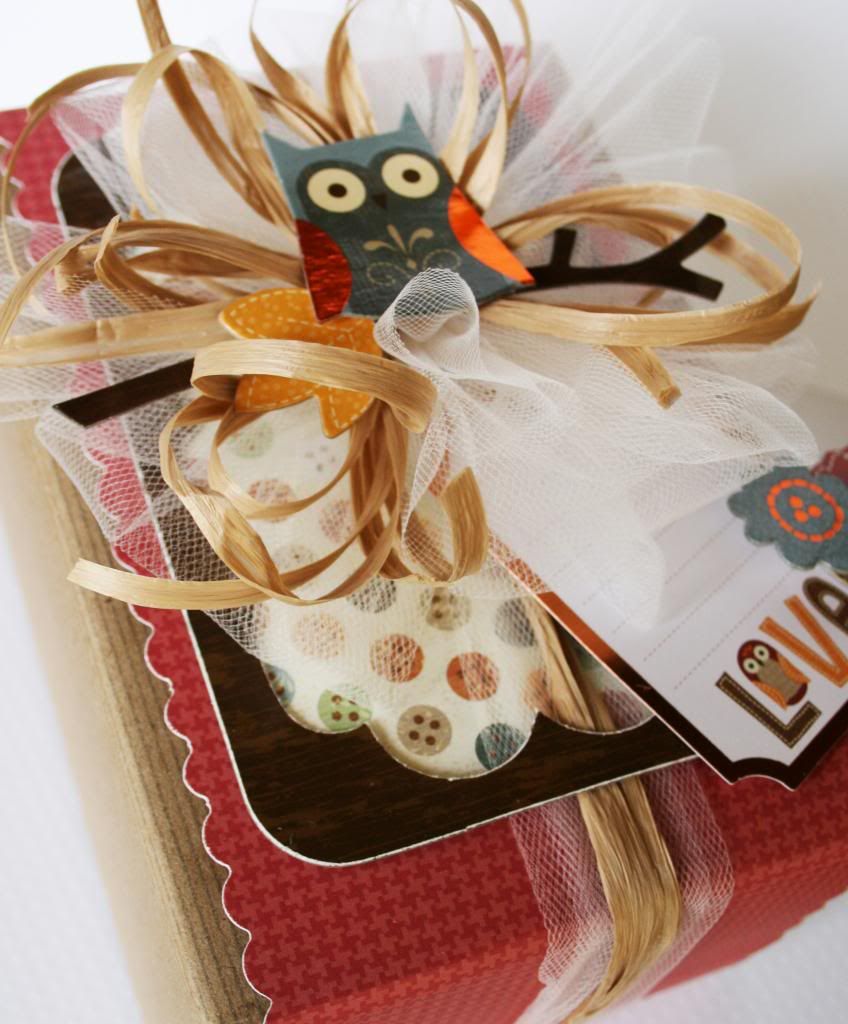
As you probably know, I freely admit that I'm a ribbon fanatic. Seldom do I make a page that doesn't include a bow or at least a strip of ribbon. Teaming with May Arts is perfect for me! Between the ribbon and all the beautiful trims that May Arts makes, I couldn't be happier!
 
For you, this team up means that you have chances all week long to win!!  Check out the Little Yellow Bicycle and the May Arts blogs for the details! 
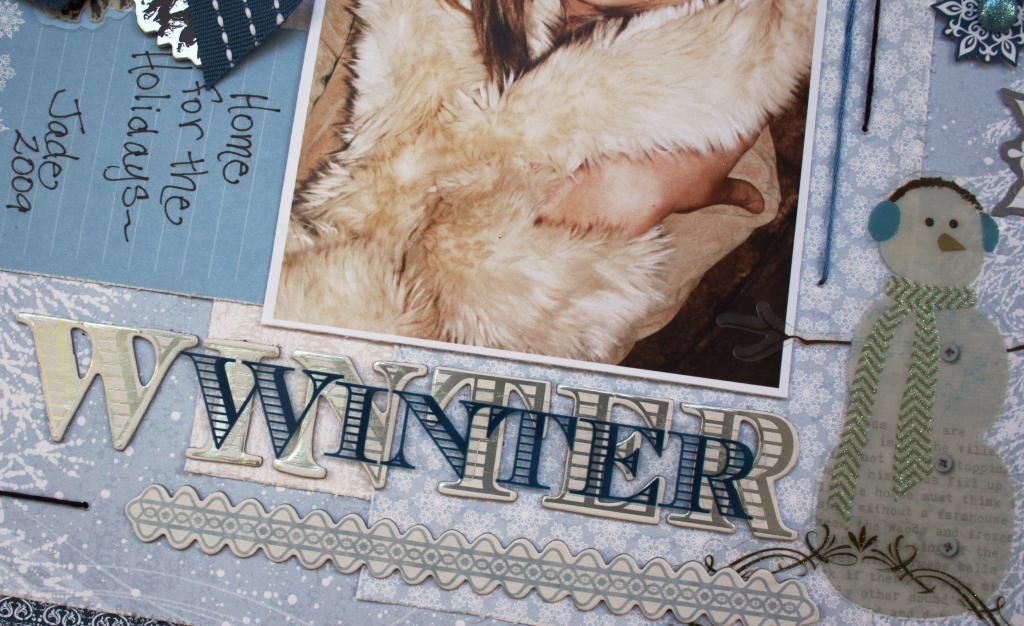
 
Wonderful
 

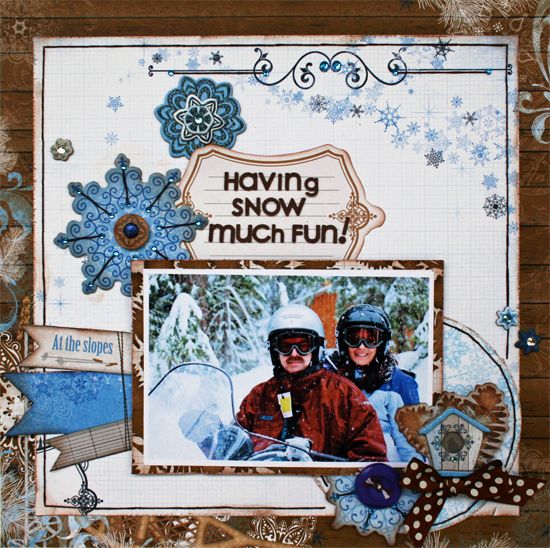
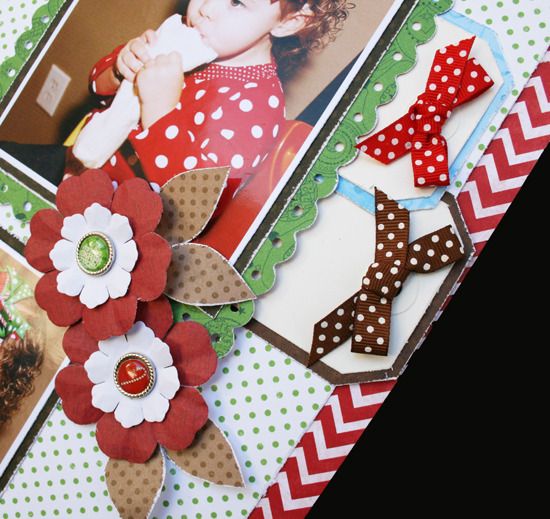
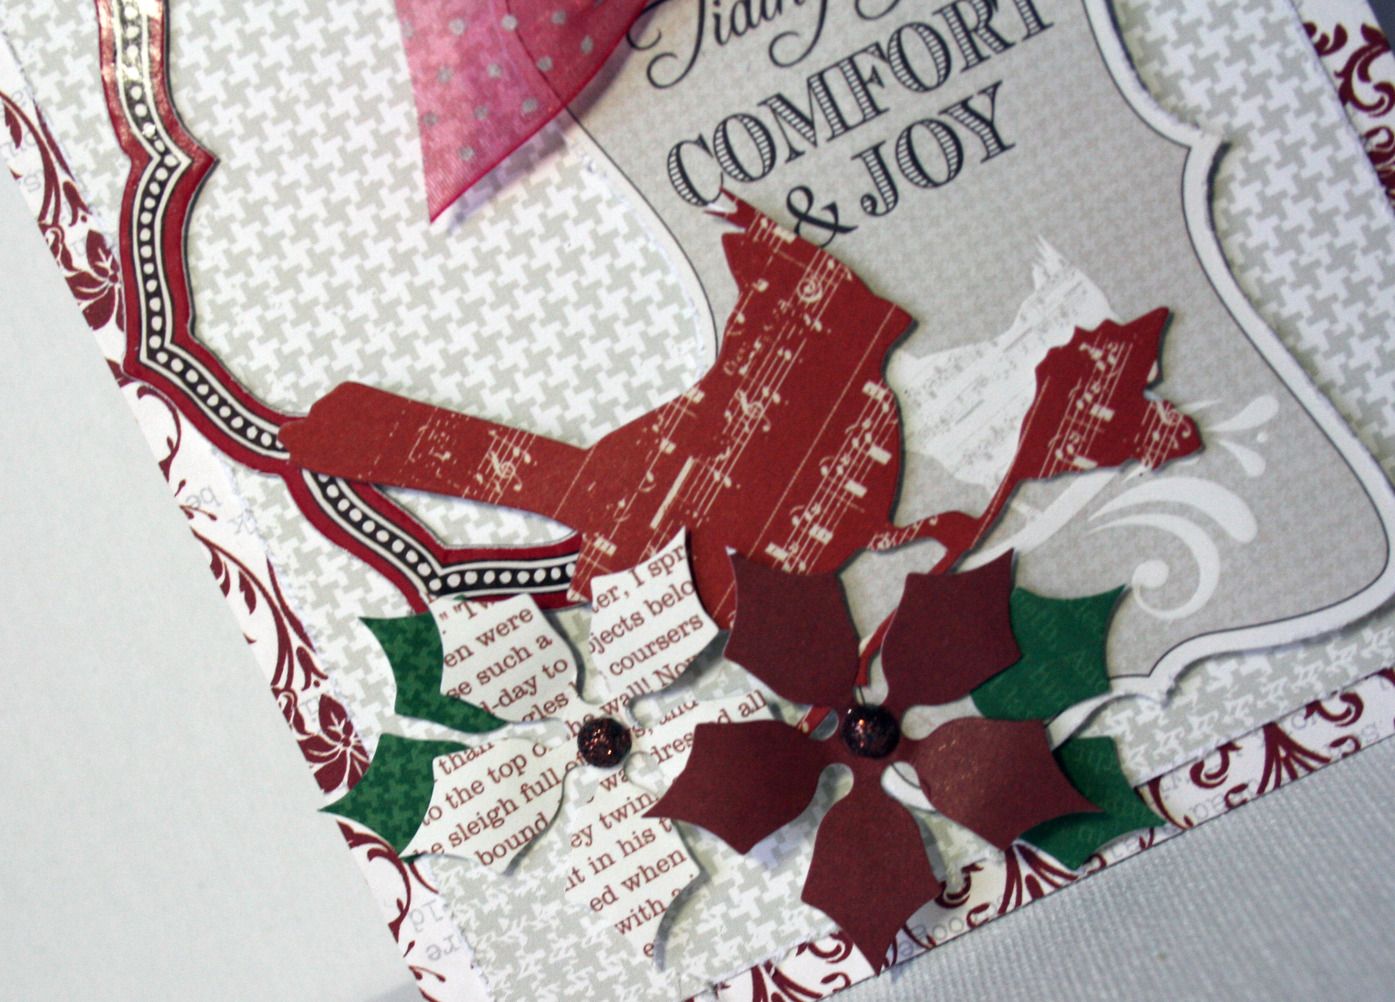
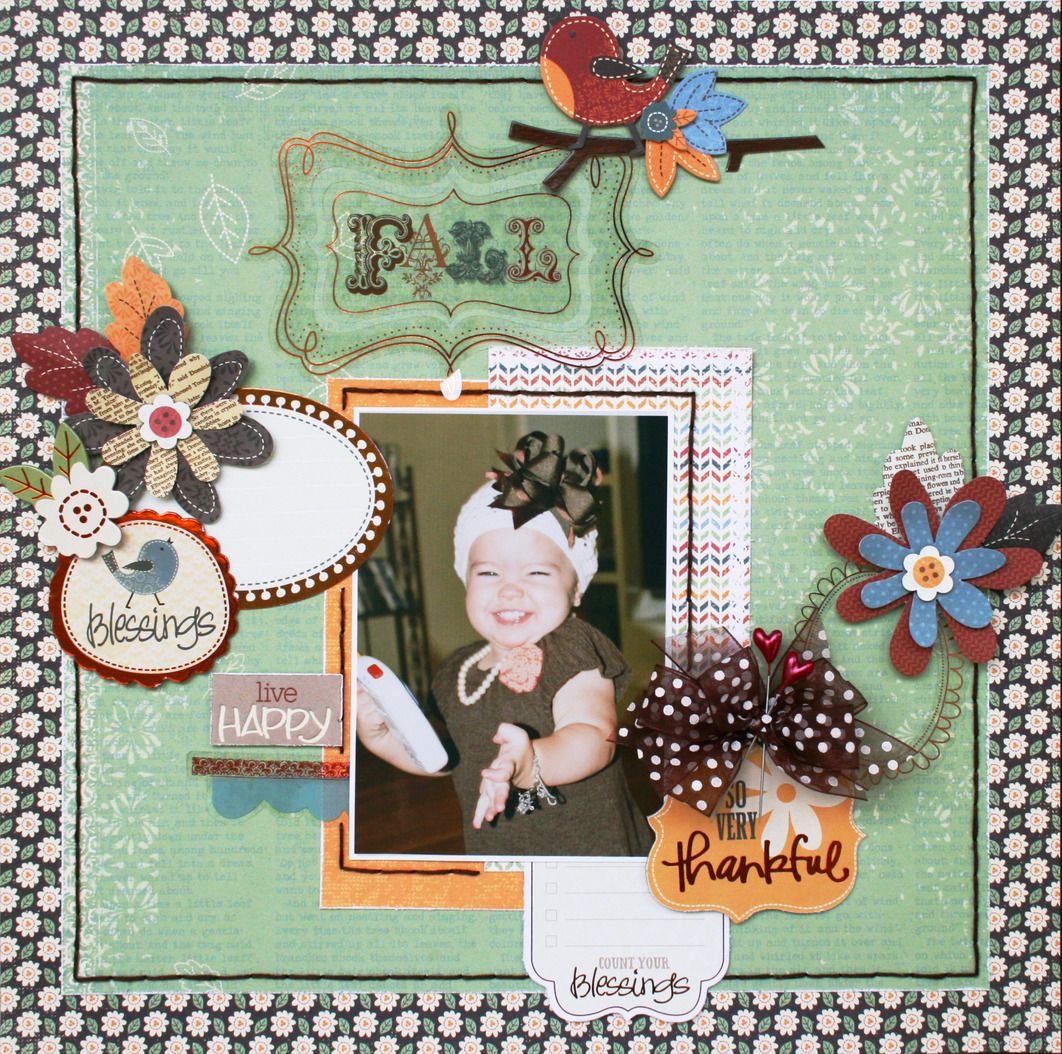
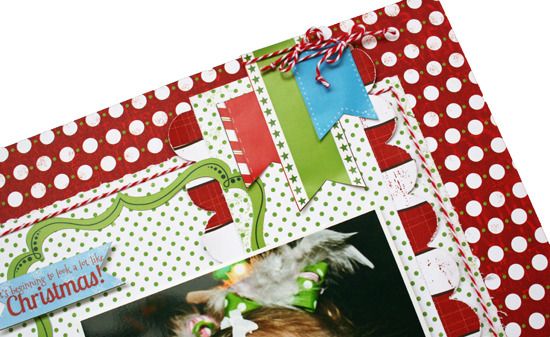
This is a sweet picture of a friend's daughter that was taken at Christmas time. Her little black and white outfit goes beautifully with both the
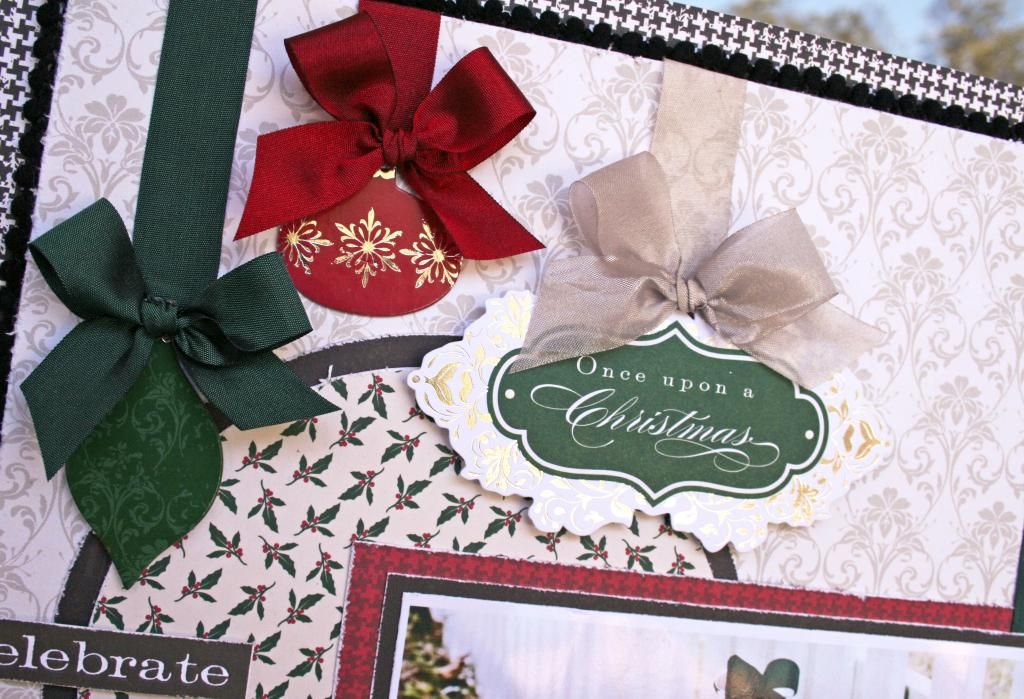
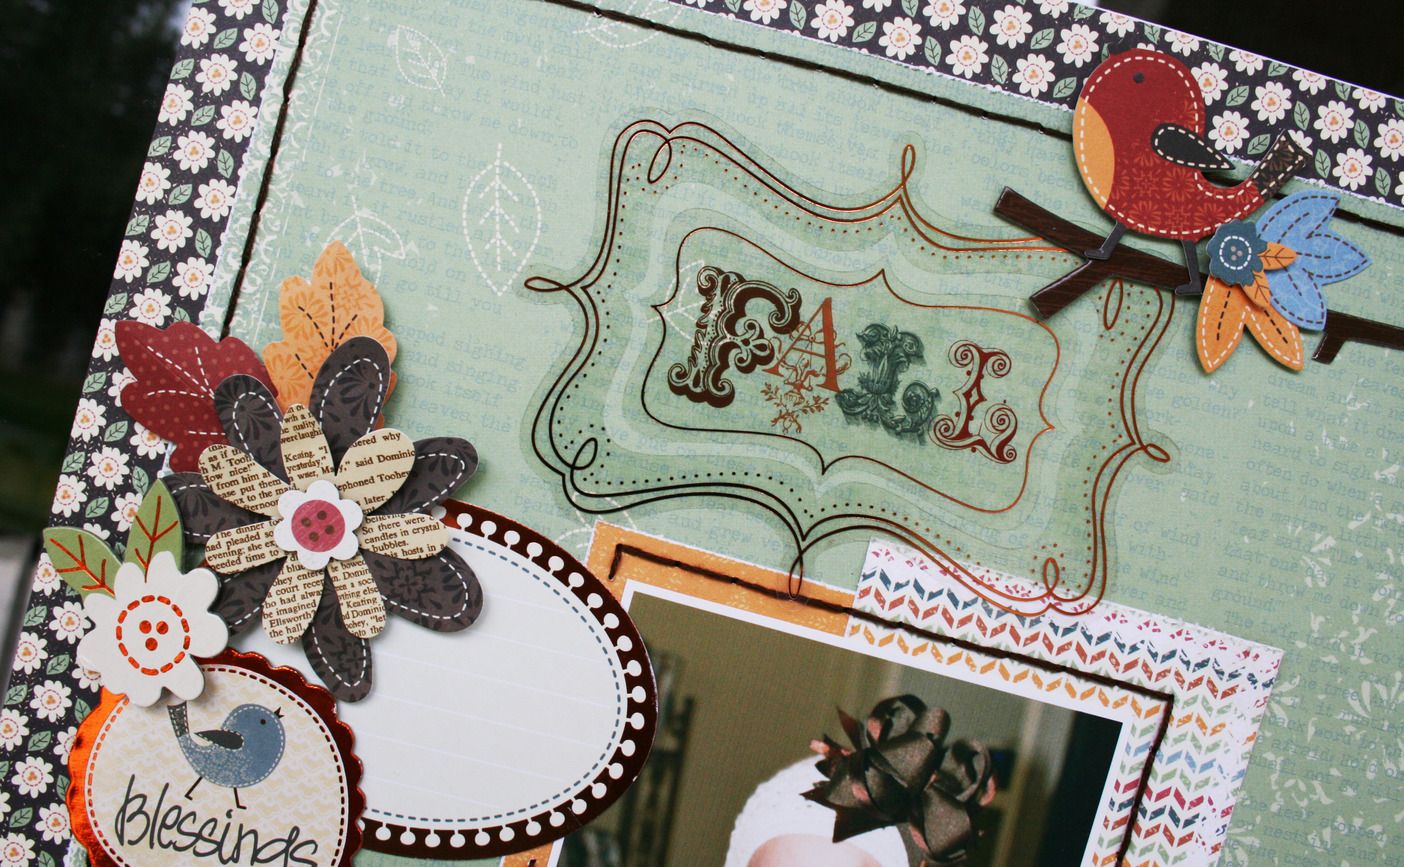
houndstooth paper and the black accents. I used some of the tiny pom-pom trim from May Arts to border the inside square shape to further accent and ground the layout with more black. Using a strong adhesive tape to hold it in place worked well without causing the paper to potentially buckle by using wet glue. If you take a closer look, you can see that I placed it so that you can see mostly the pom-poms.
 

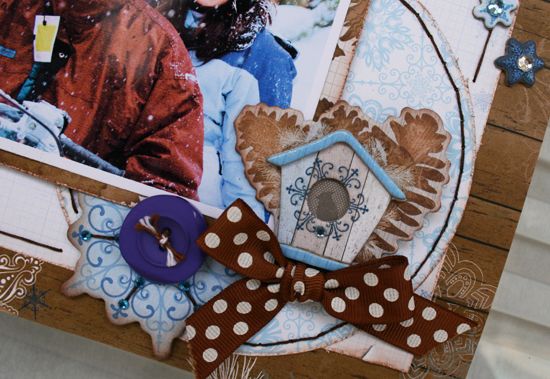
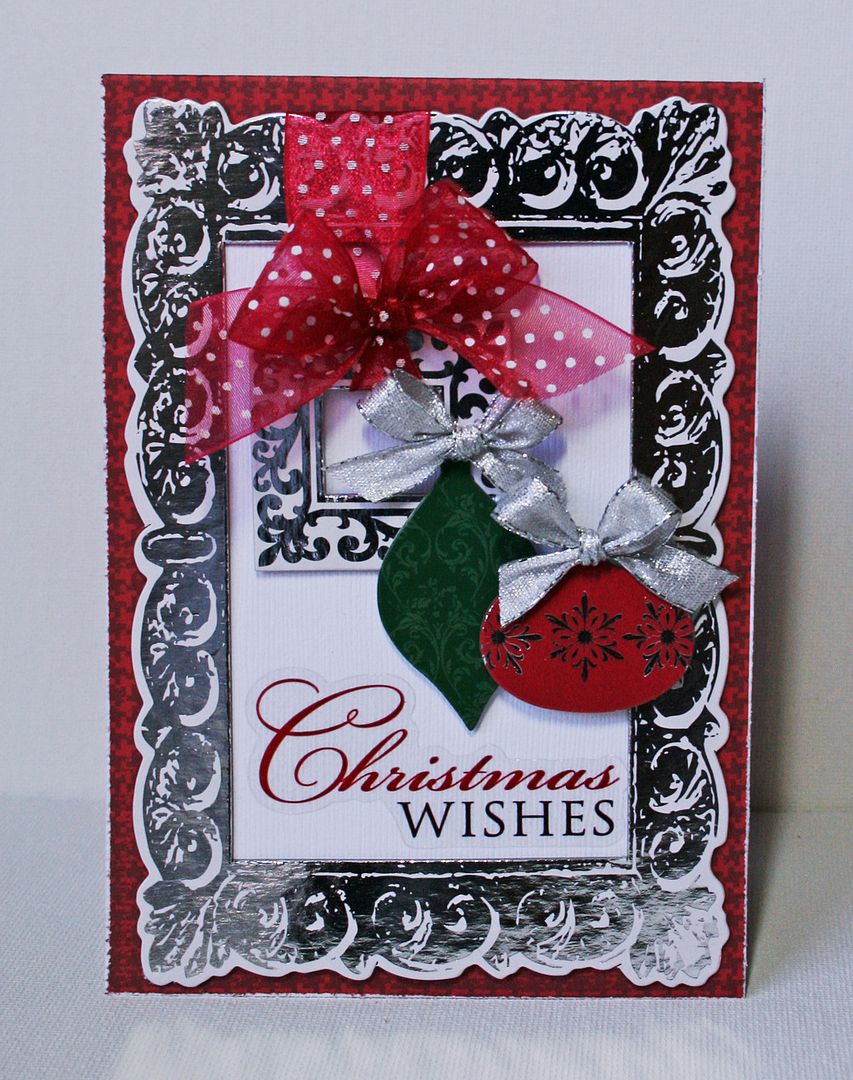
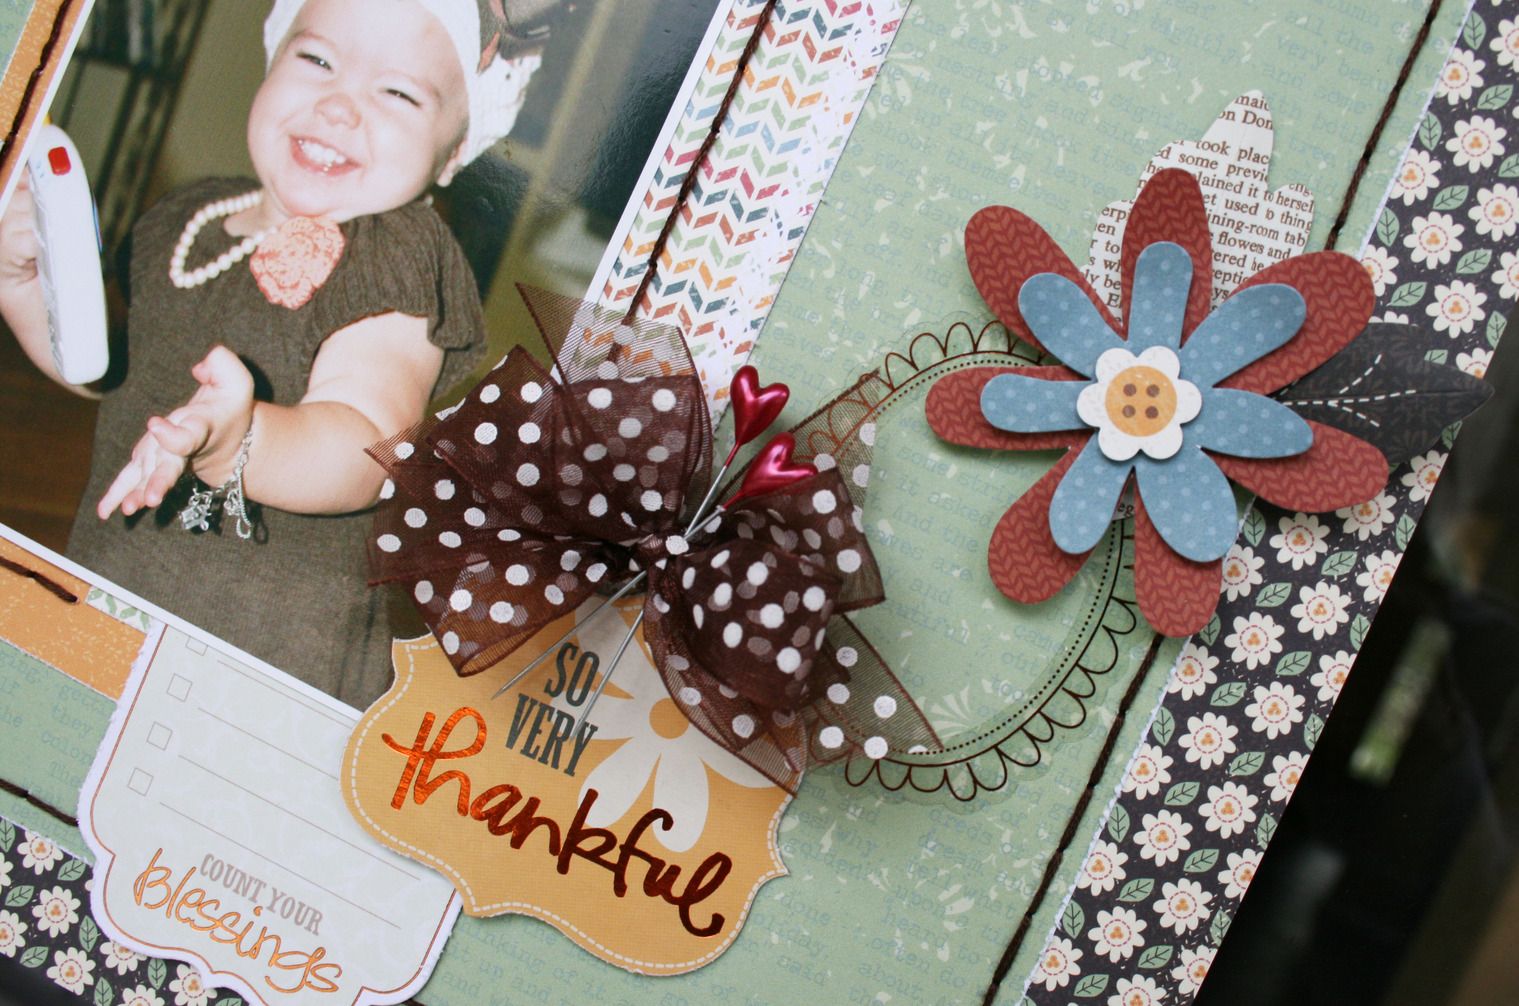
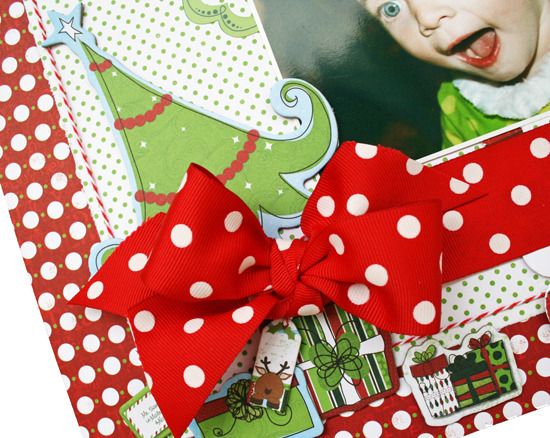
A few medium sized bows can make a big impact on your page. If you take a closer look at the ribbon that I used for the bows, you will see that the green and red ribbons have a touch of black woven in add a touch of sheen and the high quality and you can see that these ribbons couldn't go any more beautifully with the elegance of the Once Upon a Christmas papers and embellishments.
 

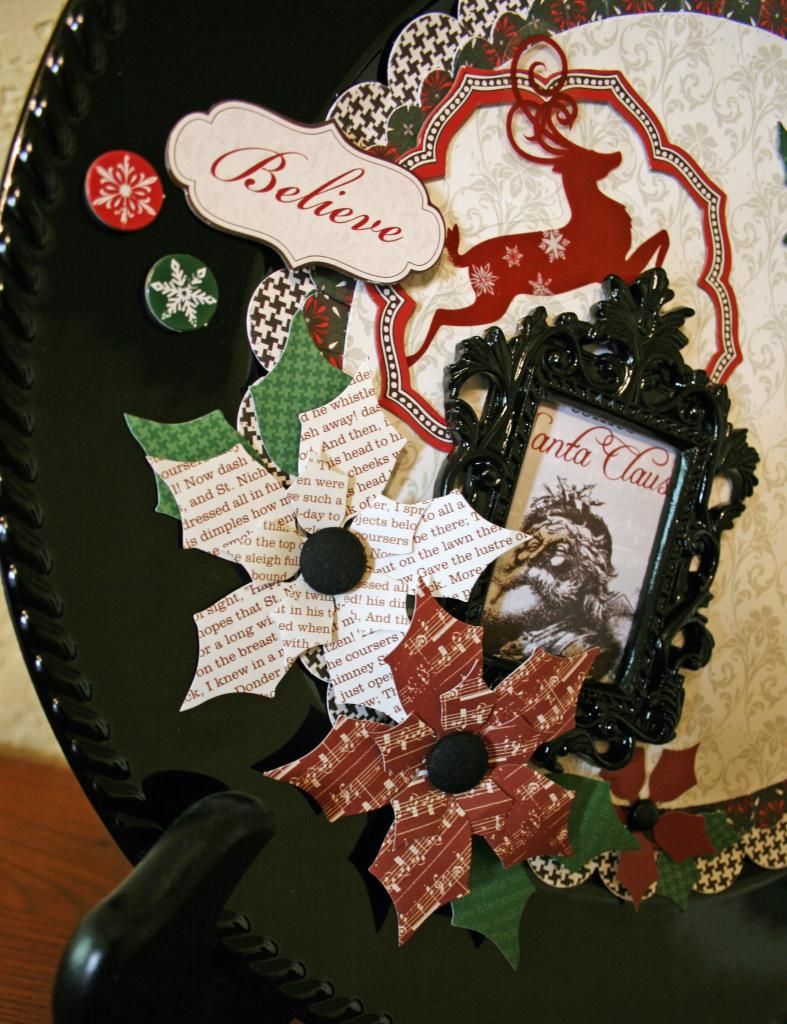
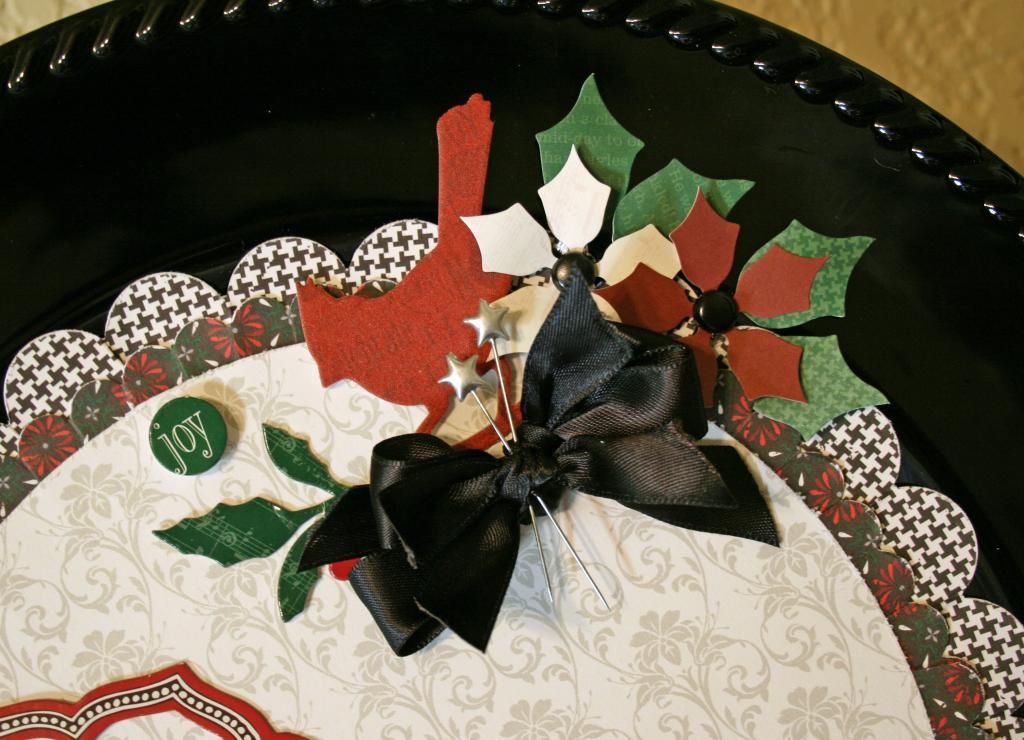
For balance, I put more bows at the bottom of the page. On this side, I chose to continue the look of hanging the ornaments. Using such a large amount of ribbon led to the decision to keep the rest of the layout design relatively simple. It also means that this layout can be completed quickly and easily!
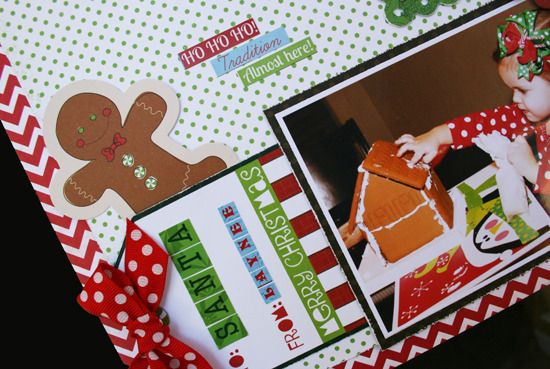
The sentiment was added using the DejaViews clear stickers. Don't forget these stickers when designing! There are so many different ones and so easy to use. I really like how so many of them use different sizes and fonts for sentiments and titles. Not to mention, they stay stuck!
 
To have a chance to win go to the LYB blog!! 
 There are chances all week to win!  Be sure to check out all the Biker Chicks post and leave comments!  Also, keep your eyes open for a blog hop on Friday for even more chances!
 
Photobucket

Wednesday, November 21, 2012

Quickie Gifties with Little Yellow Bicycle

It's just a couple of days away from when we all start thinking about gifts!
With all the celebrations that revolve around the Christmas season, you are sure to end up needing some little gifts with the personal touch!
 
At Little Yellow Bicycle the Biker Chicks are sharing ideas for gifts that feature our brand new Once Upon a Christmas Collection. 
 
Decorating a charger is a quick, easy and inexpensive.  I picked this one up at Hobby Lobby for $2. 
 
 
The great thing about chargers is that they come in so many different colors lately.  I found this glossy black one and thought it would go perfectly with the black houndstooth and elegant damask papers that is included in the Once Upon a Christmas collection.
 
 
The paper crafting kit includes the beautiful poinsettias.  I added large fabric covered brads to the centers of the large ones to pull in a bit more of the black.  That beautiful little frame was picked up for $1.50 at Michaels.  I pulled off the backing and framed a tag from the collection for the picture.  After that, all you have to do is glue it down!
 
 
For the sccallops around the edges, I used punches.  After I punched the edges, I trimmed them to 1 inch strips.  To make it easily go around the circle, just give it a pinch below each scallop.  It makes it easier if you use a scoring tool to score a line at each place the scallops meet.
 
Be sure to stop by the Little Yellow Bicycle Blog for more gift ideas!


Photobucket

Monday, November 12, 2012

Designing with Tags at Bo Bunny

Tags are all the rage!  I have been seeing them everywhere! They are such a great way to do a simple  project in a limited amount of time.  With tags, everything from simple to elaborate goes!
 
At Bo Bunny, we are focusing on tags today.  I thought it would be fun to incorporate some into a layout. 
 
Merry
 
 
I made two simple little tags to peek out from behind the photo.  I used them as part of the design instead of making them actually useful for journaling.  Adding a little pocket would let them do double duty.
 
 
In this photo, you can see that I cut out a tag from one of the papers.  I used some of the little Bo Bunny stickers to add a couple of details.
 
 
Be sure to check out the Bo Bunny Blog for more ideas from the design team! 


Photobucket

Thursday, November 8, 2012

Bo Bunny November Challenge!

As you might know by now, Bo Bunny does monthly challenges! You have until the end of the month to take the challenge for a chance to win some Bo Bunny goodies!!
 
Be sure to check it out here.
 
This is the layout that I did for the challenge.  The challenge is pretty simple but since I usually do one picture layouts, it was a bit of thinking for me.  :)
 
The challenge is to use 2 or more photos and 2 or more embellishment clusters.
 
 
When clustering, I like to use a combination of heights.  The leaves are fussy cut from one of the papers, so they are flat.  I did at a bit of a bend to them so they would have a touch of dimension.
 
 
For this cluster, I did pretty much the same thing as the top one.  Adding the metal trinkets adds a difference in textures to the clusters. Also, Bo Bunny has added even more texture to the trinket with the addition of the epoxy finish.
 
 
Don't forget to check out the challenge!  There is also a November Card Challenge going on right now.  You don't want to miss it!


Photobucket

Wednesday, November 7, 2012

Little Yellow Bicycle - Once Upon a Christmas

It's time to play with the brand new Once Upon a Christmas Collection at Little Yellow Bicycle!
Want in a bit of new good news? If you can't get your Little Yellow Bicycle fix at your local scrapbooking store, you can now buy it directly from Little Yellow Bicycle directly!
 
Today the Biker Chicks are showing how we used the collection to make cards!
I love the elegance of this collection and the foil accents make it even more beautiful!
 
 
Using pop dots and layering the chipboard, makes for easy clustering on the card.  Also, be sure to take a look at the clear sentiment stickers that are included in this collection!  They are just perfect for cards, as well as titles!
 
 
The sentiment on this one is added with the tags that are included in the collection!  There are so many great sentiments and shapes in this package!  Gotta love that!
 
 
I used more pop dots for the layering and clustering on this card.  The cardinal is actually a sticker that I raised up a bit with foam. 
 
 
Be sure to drop by the Little Yellow Bicycle Blog to see more great ideas for cards!  Don't forget to do some looking around!  There are lots of great ideas for the Once Upon a Christmas collection and many more to come throughout the month.
 
 
Photobucket

Friday, November 2, 2012

Acorn Hollow- Little Yellow Bicycle

It's my last project with Acorn Hollow for the Little Yellow Bicycle Blog.  I have to say that I'm a little bit sad to put this collection away!  It's such a fun and easy collection to work with!!  Be assured that I will be hanging on to every last scrap of it to use later!  :)
 
5 Things I'm Thankful For
 
 
I just HAD to pull those little journal sheets out of the 5 Things envelopes so that I could see them better!  The shapes are just adorable and with the flat edges on one side, I thought that the would make a terrific banner!  It also leaves plenty of room for adding journaling.
 
 
Because I wanted to use the journaling card as part of my design, I simply added the names and dates to this one. 
 
 
The Paper Crafting Kit makes embellishment clustering so easy!!  Don't forget the precious little pieces from the Clear Cuts for layering, too!
 
 
Be sure to check out the Little Yellow Bicycle Blog for more great ideas for Fall, Halloween and Thanksgiving!  The team has been super busy creating!
 

Photobucket

Friday, October 26, 2012

Little Yellow Bicycle and Xyron Blog Hop

We are so excited to share our projects created with Little Yellow Bicycle’s Acorn Hollow Collection and Xyron Adhesive.
...
 
If you haven't tried Xyron adhesives, you are missing out!  They are not only easy to use, they are terrific for putting your paper and embellishments in place... and KEEPING them there!
 
Here is a layout that I made with both Little Yellow Bicycle Acorn Hollow Collection and Xyron adhesives.
 
This fall collection is absolutely adorable!  It is perfect for all of your fall projects!  Both the Biker Chicks and the Xyron team have been working with it all week!  Be sure, after the hop, to take a peek at all the other ideas on each of the LYB Blog and Xyron Blog!
 
 
The Xyron Create a Sticker Machine is terrific for adding adhesive to the LYB Clear Cut Shapes.  You can see by this close-up how great a job it does both adhering the Clear Cuts to the page and staying clear behind them! 
I used the 2 /12 inch Create a Sticker Machine for this one, but there are different sizes to fit your needs.  I am addicted to the Xyron X (1 1/2") for adhering letters and small bits and pieces.  It is also the BEST way to add strips of ribbon to your pages!
 
 
Don't forget the Xyron Glue Sticks!  They are a great way to adhere the paper flowers or chipboard to your pages, too!
 
 
Now, on to the BLOG HOP!!
 
You know you want a chance to win some great products from both of these terrific manufacturers!!
 
Leave a comment here and on each blog you hop to and you have a chance to win the entire
 BRAND NEW Once Upon a Christmas collection
from Little Yellow Bicycle. Leave a comment on our Facebook page and you add another chance to win. Then head on over to the Xyron Design Team blog to check out their fabulous creations and enter their giveaway for our Acorn Hollow Collection! Be sure to "like" them on their Facebook Page for an extra chance to win!
 
If you've made it this far, you are almost home! 
Your next stop is the Xyron Design Team Blog!
 
 
If you started here, hop over to the Little Yellow Bicycle Blog to get started on hop!
 
Good Luck!!
 
 
Photobucket

Wednesday, October 17, 2012

Gift Packaging with Little Yellow Bicycle

Ever need some quick packaging and don't want to settle for ho-hum?  Don't have exactly what you want either?  Can't stand the thought of running down to the Hallmark Store? 
 
No worries!  We are paper crafters, after all!  Raid your stash! 
 
I wrapped this gift box with some simple craft wrapping papers and Little Yellow Bicycle's Acorn Hollow collection.
 
  Don't forget your punches! Try layering a punched strip of paper for a decorating base. A chipboard frame with a co-ordinated paper inside is just the ticket to something interesting.
 
 
Finish it off with loopy bows in raffia and tulle.  Adding a few more chipboard shapes is a fun touch for the center.
 
 
Finally, don't forget a tag!  The Little Yellow Bicycle journal cards make adorable little tags!  They are perfect for so much more than just journaling!
 
Tip:  The raffia is actually a raffia looking ribbon.  I like it much better than actual raffia.  It comes on a roll, so you never have those weird kinks that yousometimes find with raffia.  You can find it in your local craft stores.  Look in the section with the curling ribbons.
 
Be sure to check out the Little Yellow Bicycle Blog for more ideas from the Biker Chicks!
 
Photobucket

Friday, October 12, 2012

Limited Supplies at Bo Bunny!

Using limited supplies doesn't mean unfinished pages or sparse pages.  You can do a lot of embellishing with just a couple of embellishments and a few sheets of paper.  At Bo Bunny, we were given this recipe to make a layout. 
 
Use:
3 sheets of patterned papers
1 sheet of cardstock
1 sticker package
1 package of embellishments
 
Here is my page:
Is this not the cutest Christmas picture ever?
 
 
You can see the stickers I used here better.  If you are really watching your dimes, try to buy things that you can use again and again.  I pulled the twine out of my stash.  Twine packages go a long way!
I also used the combo sticker sheet for my page.  Although I used several stickers, I have a LOT left over for future projects.
 
 
For the embellishments, I chose the 12x12 chipboard package.  This is another embellishment that goes a long way and that I can use again and again!
 
 
Now... recipes are made to be tweaked to your individual taste, right?  As you know, I almost always use ribbon on my projects.  So, I used a piece of ribbon instead of cardstock for my page.
 
Be sure to check out the Bo Bunny Blog for lots of ideas for stretching your supplies!


Photobucket