Showing posts with label Card. Show all posts

Wednesday, July 20, 2016

New Prima Sweet Peppermint and Confetti Dies

Wow!  That was my first impression of the new Prima Confetti Dies!  Wow again when I saw the beautiful flowers and holly leaves from the Sweet Peppermint Collection!  This is a non traditional color pallet that I love!  So soft and beautiful!

I created a simple shaker card using all the elements together. 


The shaker started with one of the cards that you can cut out of the Sweet Peppermint Paper.   I then used foam to make a simple rectangle shaker and filled it with Confetti that I cut out of my leftover scraps of paper.  Super simple and perfectly matched!

And... talk about gorgeous flowers!  These are stunning!  I'm such a huge fan of fabric flowers!!


As always, I invite your to check out the Prima Blog for more examples of all the new and beautiful Prima releases! 

Photobucket


Sunday, May 29, 2016

Prima Marketing with Chameleon Pens!

How fun is it to get to team up with another manufacturer of fun and fabulous products?  A few of us were asked to team up with Chameleon Pens and come up with some ideas!

The Prima Girls were asked to use Julie Nutting Products, Garden Fable Collection and of course the Chameleon Pens.  I came up with this card using Julie Nuttings Beautiful wings!

I colored the wings with the pens.   I held the pen in the mixing chamber for about 15 seconds, then started on the outside and worked my way to the center to color these.  This allowed me to have the lightest of color around the outside and the more vibrant color on the inside of the wings.


I added some glitter to the edges of the Julie Nutting Wings and layered them.  There is a bit of foam tucked in behind the layers to give these dimension.

I love how smooth these Chameleon Pens colored the wings.  They are beautiful without needing to blend or add any other product.  Just move slowly and you will get a beautifully blended look, even on larger surfaces.


Of course, I had to add a sweet angel and lots of Prima Garden Fable Paper and Flowers!

Supply List:
Chameleon Pens-MultipleTones Set
Julie Nutting Stamp Wings 910303
Prima Boxed Flowers Leaves 586676
Paper Doilies 584696
Stencil Woven 584559
Art Basics Light Paste 961404
Garden Fable 12x12 Paper Birdhouse 847234
Garden Fable Tag Me 579500
Garden Fable Journaling Note Cards 578954
Garden Fable Everbloom 580766
Garden Fable Spring 580810
Garden Fable Perrinial 580780
Garden Fable Evergreen 580827
Resin Angels 573546


Be sure to take a look at the Prima Blog and the Chameleon Pens Blog for many wonderful ideas!!  Both teams did a fabulous job with Prima and Chameleon Pens!

Photobucket

Wednesday, April 13, 2016

Card with Prima Boxed Flowers

Hi everyone!  I made this card for Prima's Blog using some of the Gorgeous Prima Boxed Flowers.  There are so many choices with the boxed flowers and each one is just as beautiful as the others!  They are also such a great value!

For this card, I used some of the white flowers.  These are so beautiful and I love how easy they are to alter to fit any project.  
 

For this card, I used the Watercolor Confections to color both the card and the flowers.  With all the products that Prima makes, there are so many ways to add color to the white Boxed Flowers.


AND... don't forget about all the terrific Prima embellishments!  I used Resist Tags, Wood Icons, a Prima Stencil and even some Prima wire to embellish!  

As always, don't forget to check out the Prima Blog for even more ideas!!  There are always so many beautiful projects to inspire!
 
Photobucket

Monday, October 19, 2015

Creating in Faith - Prima Marketing

Today is a big day!  Prima is releasing the brand new Creating in Faith collection by Jamie Dougherty!  This collection is so wonderful!  There are many beautiful rub-ons, stamps and bloom girls included in this collection.  It is so perfect for bible journaling, but so much more, too.  I loved playing with it!

I created these cards using some of the phrase stamps.  They came together so easily and I love the inspirational message that the collection allowed me to add to them.


A handful of watercolor pencils along with the Creating in Faith stamps for the background made the base.  I then added a few embellishments along with the beautiful Nikko flowers and I had cards that I'm going to be happy to send.


I can't wait for y'all to get a chance to play with these!!  I know that you are going to find them as inspiring and easy to create with as I did!!!

Be sure to go check out the Prima Blog to see what the other girls made with them and see the entire collection!!!  You will love it ALL!

Photobucket

Thursday, March 20, 2014

3 Birds Studio and Pinterest Inspiration

Hi y'all!   At 3 Birds Design Studio, it's Pinterest Week!  We are all doing projects that were inspired by things that we found on Pinterest.  Be sure to take a peek at the 3 Birds Blog when you are finished here to take a look at my layout that was inspired by this same photo.  

Here is the image that I chose to use to inspire me.
Cupcakes are so popular right now and they are not the cupcake that we all grew up eating.  They are simply beautiful these days!


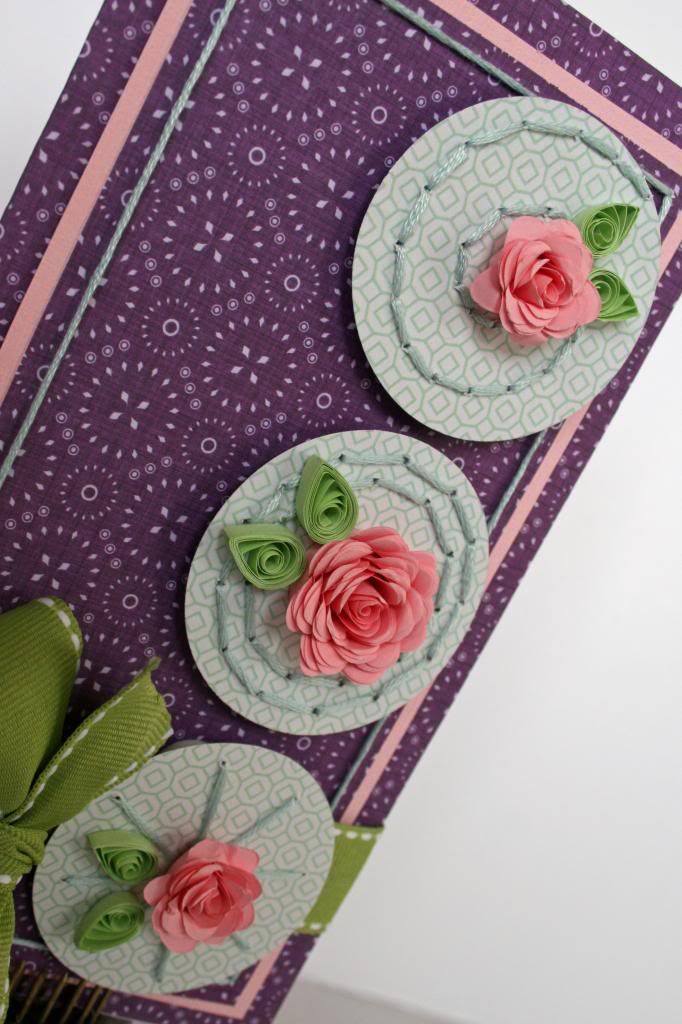
I mimicked the top of the cupcakes, but in shape with using circles and by using stitching in place of the icing.

Here is the card that I made.  

You can see that I added dimension by using foam under the circles after I finished stitching.  Of course the roses and leaves were made using the 3 Birds Quilled Card Kit. 


I wanted to share some tips today that I used to place the stitching on the circles.
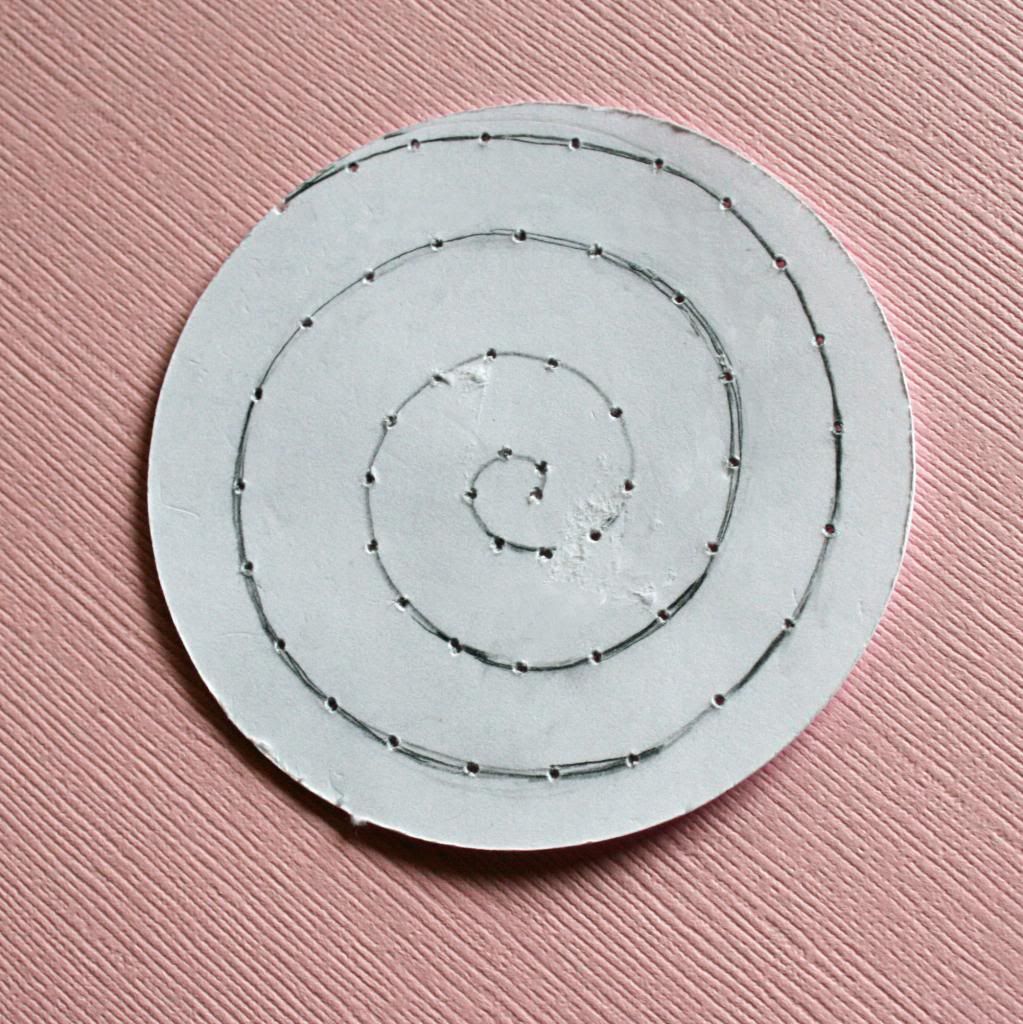
For the top circle, I simply cut a circle from white cardstock that is the same size as the circle in patterned paper.  Draw you design on the paper and pre-punch the holes for your stitches.  This is a simple tip, but it makes things like swirls a breeze because it's as simple as erasing, if you don't like your design.  All that's left is to place it on top of your patterned circle and punch the holes through both layers.


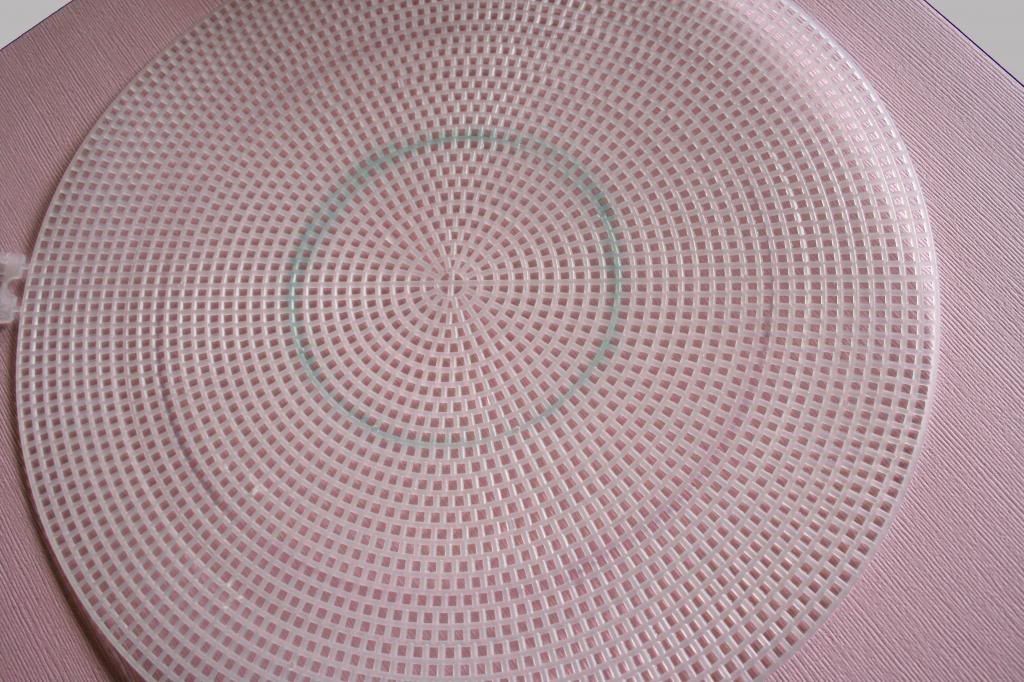
For the next circle on the card I wanted a couple of simple circles.  I'm not really great at the eyeball thing for circles, so here is my solution.  I picked up a plastic canvas at Hobby Lobby and I use it to make my circles.  So easy!  All you have to do is punch through the holes to your desired stitch length along the circle.  (I used a marker to show you what I mean.)  Unless you want tiny stitches, be sure to skip a few holes as you go.


Finally, for the last circle, since I wanted the design to be uniform, I just used another cardstock circle an folded it, as shown, to make my pattern.  This would probably be easier to do with printer paper for a larger circle with more lines, but cardstock was perfect for one this size.


Hope that you got some ideas today that might make stitching a bit easier!  If you have some more, please let me know!  I'm always looking for ideas to simplify the process!

Also, don't forget to check out the 3 Birds Design Studio Blog for more great projects that were inspired by Pinterest!


Photobucket

Thursday, February 20, 2014

3 Birds Quilled Cardmaking - Shadowbox

I'm really excited to be up on the 3 Birds Studio blog today! If you haven't been to the 3 Birds Studio blog, be sure to take a look at a card and pillow boxes that I made.  This kit is so fun and the instructions for quilling are super helpful!  I've never quilled before so, for me, having everything included in the kit, including the tool was invaluable.

 I was so excited about the Quilled Cardmaking Kit from 3 Birds, that I couldn't resist making more than one card!

Just For You
For this card, I experimented with stemmed flowers.  Now, I know the pros probably do this differently, but I had this idea, so I had to try it!


There are two things that you can see from this angle.

The first is you can see is how I built the stems for the flower and attached it to the flower.  I folded one strip of the green in half and glued it for added stability.  I then glued the curls and leaves to the stem.  Lastly, I attached it to the quilled flower.  This technique allowed me to add glue to the more substantial pieces to make it easier to attach to the card.

Tip:  Use tweezers and a tiny bit of glue to attach the stem to the bottom.

The second thing that you can see for building this card is the foam tape that I used.  Because this is a shadow box card, using foam tape allowed me to over lap the edges and give it added dimension.

 To finish off the look of the card, I added some red strips for an additional frame.  I used my Xyron sticker maker to add adhesive to the strips of red paper.


And.. a bonus!  I LOVE gift bags, so I wanted to go ahead and have a little gift bag to go with the card.  I used a piece of paper from the 3 Birds paper pad to make this little gift bag.  

Gift Bag

This was super simple.  I just made an extra flower and leaves and attached them over two strips of the quilling paper.  I also used the Xyron to make attaching these strips easy.   


Don't forget to stop by the 3 Birds Studio blog to look at my other quilling ideas!

Thanks so much for stopping by!

Friday, December 6, 2013

Card and Ornament-Leaky Shed Studio

 Hope that you all had a great Thanksgiving!  Our family had a wonderful holiday and are now gearing up for Christmas.  

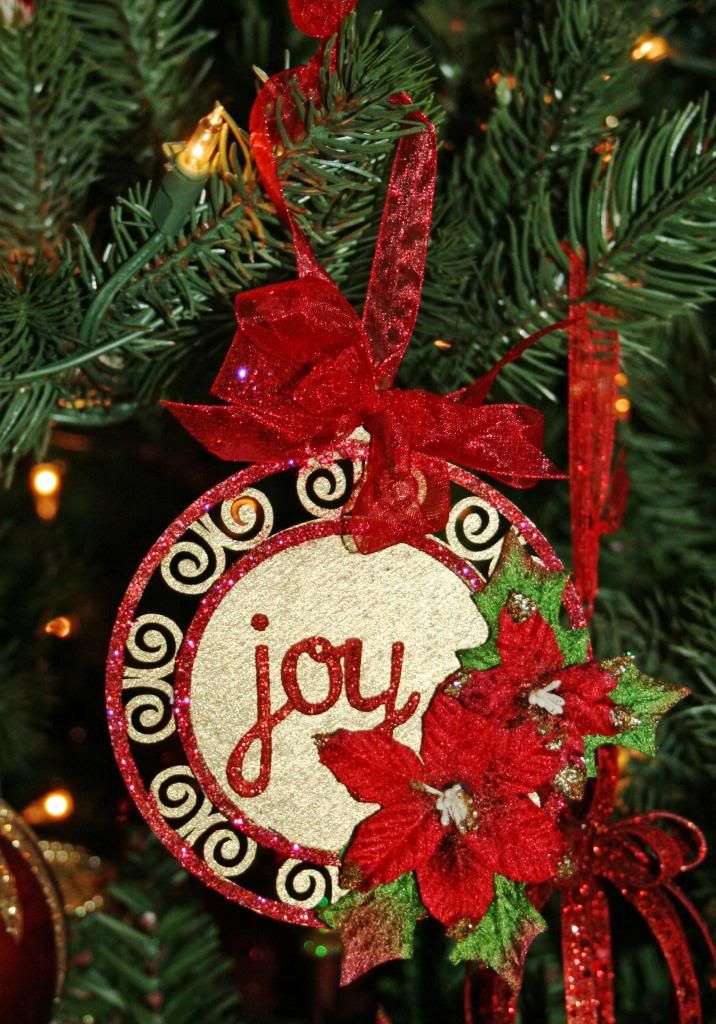
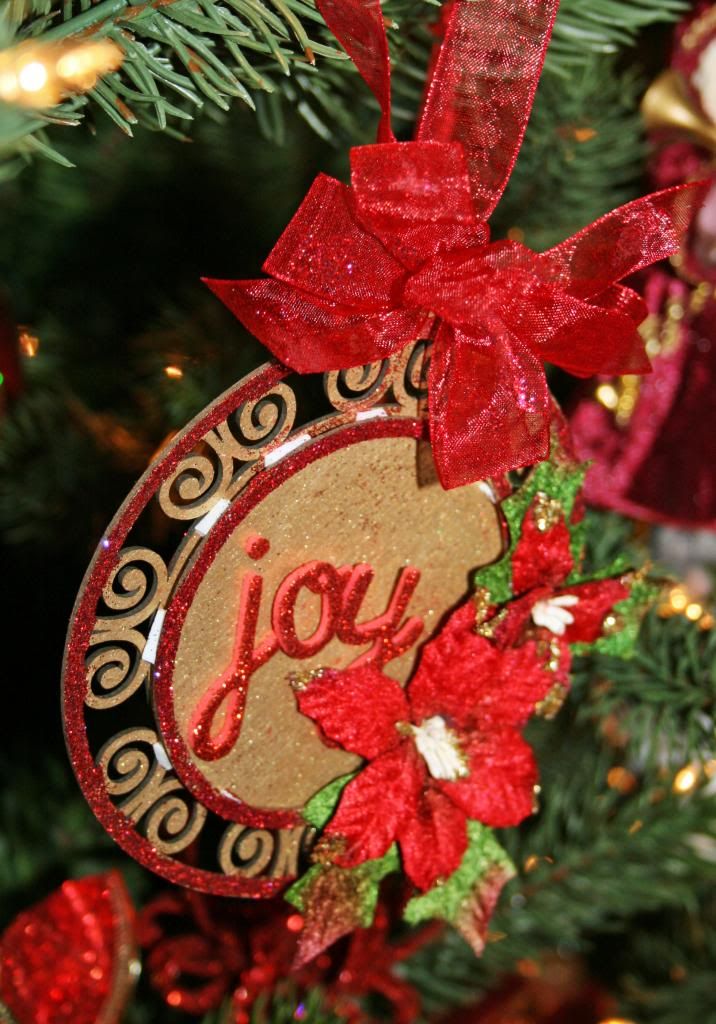
For today's post, I used the Leaky Shed Studio Christmas Ornaments.  This is a terrific group of ornaments that is so pretty already, so designing with them was super quick and easy!  

This ornament was super easy.  I started by giving it a couple of sprays of Heidi Swapp Gold Color Shine.
I then added glitter to the edge and to the separate circle piece in the middle.


I used tiny strips of foam tape to attach the inner circle.  For the picture, I made sure it really showed up to show, but hanging on my tree, you don't see it at all unless you are looking for it.  :)

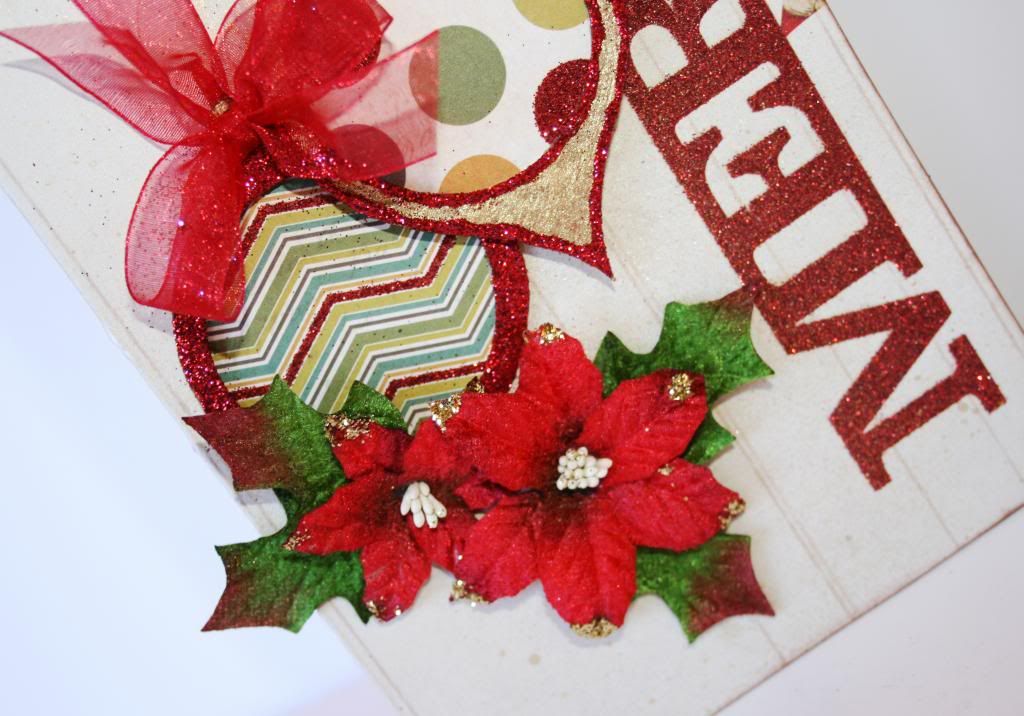
The flowers and letters are already glittered, so it took nothing more than gluing them to the project. 

Tie a bow and a hanger to the top and your are good to go!

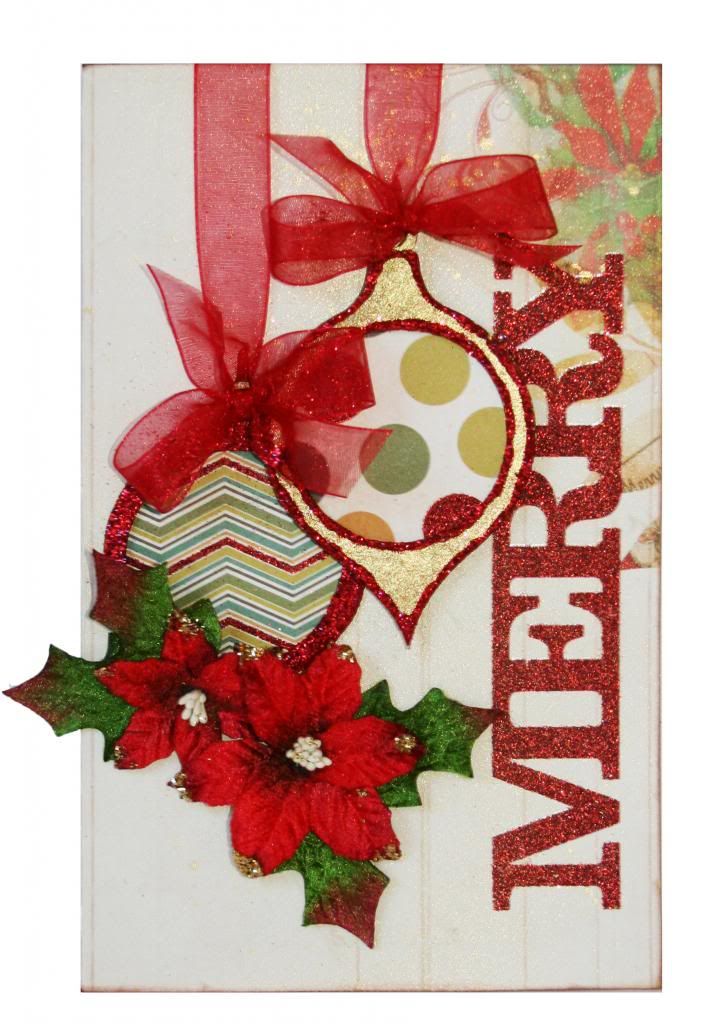
I also made a card with two more of the ornaments. 
Now, since it's really obvious, I'm owning the fact that getting a picture of this card really did me in!  However, I think you can still see the details.:)

  
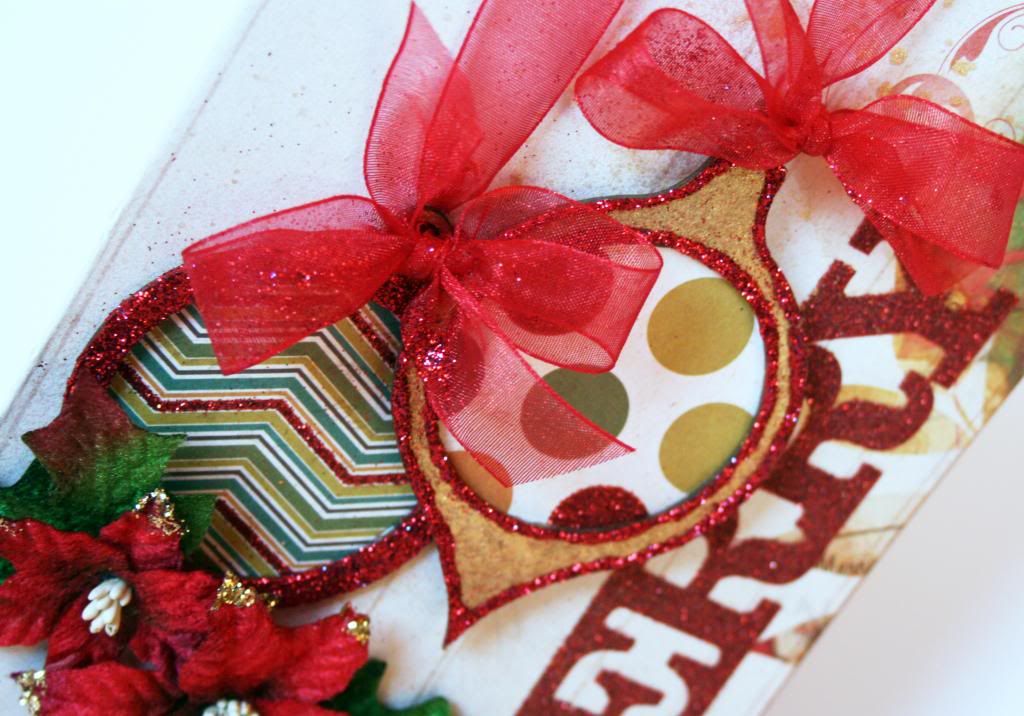
I repeated the basic idea from the ornament for the tree on these.  A couple of sprays of mist and glitter accents. 

For the centers, I used a 2" punch to make circles of paper.  This My Mind's Eye paper is already glittered, so all you have to do is glue it to the back.

Tip:  If you haven't ever tried it, let me recommend the Art Glitter Glue.  It lays down a fine line, dries quickly and is so much easier to use than school glue. 


Again, use foam to layer the chipboard, glue down the flowers and tie bows for this quick and easy card.

One more confession, since I'm owning my mess today... Notice the glitter on the bows.  Weeelllll...I had glue on my fingers and got it on one of the ribbons.  Of course, that meant I got glitter on it, too.  Guess what?  I liked it a lot, so I added it to the other ribbons, too!  Mistakes aren't always a problem!

Thanks so much for stopping by today!  

Don't forget to check out Leaky Shed Studio on Facebook, too!


Photobucket

Monday, April 1, 2013

New Design Team at Little Yellow Bicycle/Blog Hop

Happy Happy Happy Day!
I'm super excited to have been invited back for another year with Little Yellow Bicycle!!

 
It's so fun to work with such fantastic products, a terrific group of designers and great support from the manufacturer!  As you know, Little Yellow Bicycle makes beautiful, quality products.  It is always a joy to get a box full of Little Yellow Bicycle Products! 
There are a lot of new things happening at Little Yellow Bicycle, too. We have a brand new blog! 
Be sure to check it out! 
  As a special welcome to the new Bikers, we are having a blog hop!
Each of the new Bikers has made a card as a welcome to the team and to introduce you to each of us.

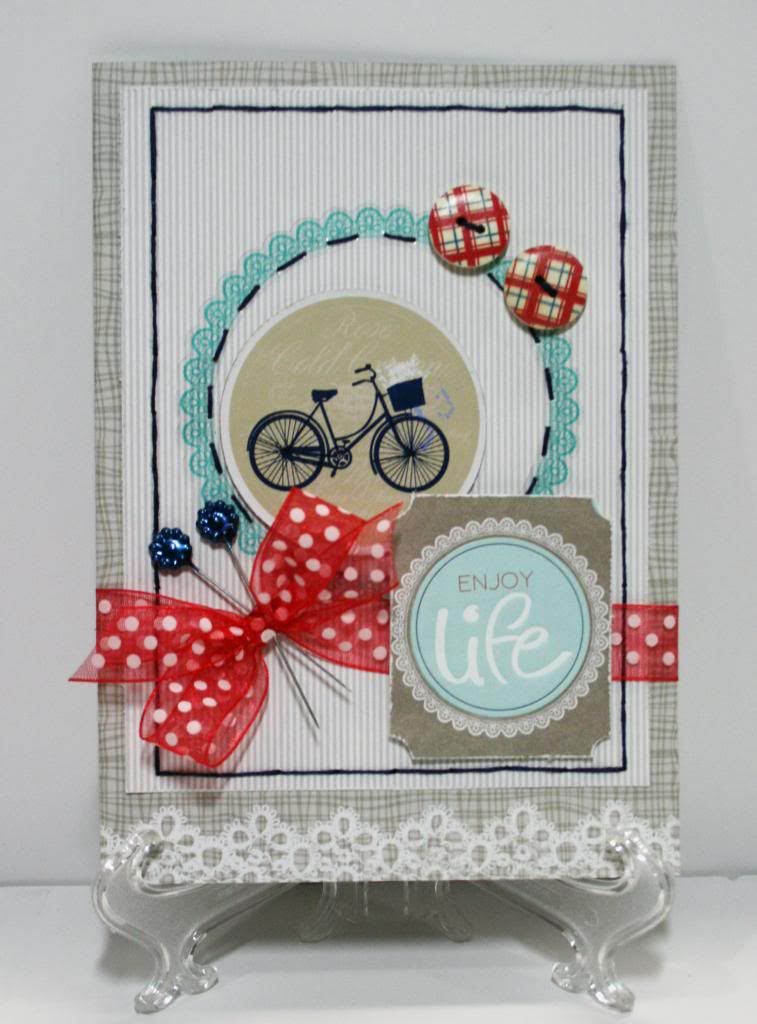
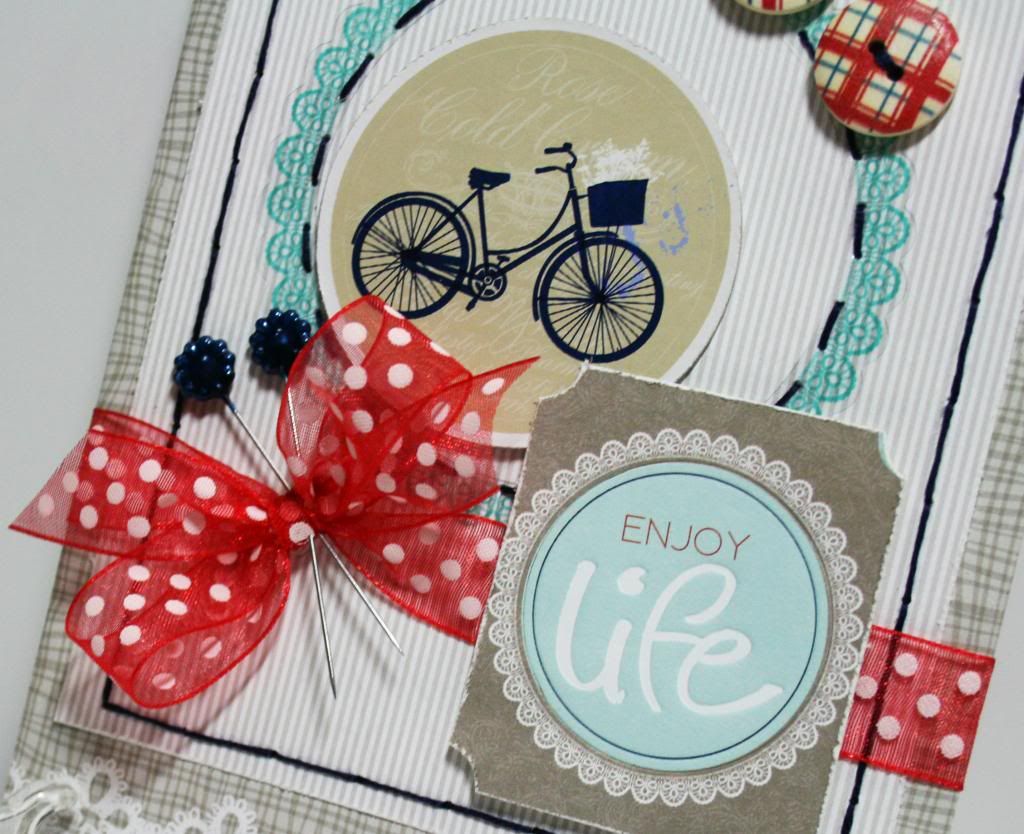
Enjoy Life Card

I mostly used the Just Because Collection. 


The Bicycle chipboard piece is from the Saturdays Collection.  I couldn't resist adding a bicycle to my card today! 


Take a closer look at the buttons.  They are from the new Naturals collection!  LOVE all the pieces that the Naturals collection includes! 
Be sure to stop at each of the new Biker's Blogs to have a chance to WIN some of the latest release, Fern and Forest Girl and Fern and Forest Boy!  They are ADORABLE collections and I know that you will love them!
   
If you are already on your way in the blog hop, your next stop is the amazing Vicki Boutin!

If you started here, hop back to the Little Yellow Bicycle Blog to get started!
Just in case you are confused, here is the order of the entire hop:
 ME!
Vicki Boutin
Liz Qualman

Also, another new thing...Did you know that you can get the products you love directly from Little Yellow Bicycle now? If you are having trouble finding them from your local or online retailer, be sure to check with LYB!
Thanks for sharing my excitement to be on the LYB team again!   


Photobucket

Tuesday, March 27, 2012

Tuesday Card Challenge at Bo Bunny!

It's time for another Card Challenge at Bo Bunny!

This one was really a bit of a challenge for me for some reason!  Ever have those days where no matter what you are doing, you can't come up with something you like?  I was having one!  :) 
 Thankfully, in the end, it came together.  Whew! 

So what is the challenge? 
Make a shaped card and add handmade flowers.

Right up my alley, right?  Just goes to show that even sitting right in your comfort zone, sometimes we all have one of those days!

Congrats on Your New Home

This is the new Bo Bunny Alora Collection.  I think it is just darling!  I can't get enough of it!


I decided to go with a round card to meet the shaped card part of the challenge.  I don't think I have ever made a round card, but I like that it is a bit different from my normal card. 


I used eyelets to hold the card together at the top.  I didn't tie the bow tightly, which allows it to swivel to write.  A simple white cardstock circle, cut a bit smaller than the top circle, gives this one a place to write your message.


I used Cuttlebug Daisy Kit dies to make the flowers.  This is a really easy to use kit.  I really like that the way you put it together adds ready made dimension.  Super easy and such a cute flower!


One more tip before you go... be sure to make sure that all of your glue is only on the top part of the card so that your card will open! 

And...
Don't forget to drop by the Bo Bunny Blog for the details on the challenge and for inspiration from the DT!


Photobucket

Thursday, March 15, 2012

Playing with Paradise

Have you seen the new Little Yellow Bicycle Paradise Collection yet? If not, you need to take a peek!  If so, you know how adorable it is!  
I needed some cards and bags for some upcoming events and I decided to use this fun collection to make them.  I really love this color combo.  I'm such a fan of blue, green and brown together.  Adding some touches of hot pink made it even more of a must have!
I made the cards using the Little Yellow Bicycle Medley Album Kit.  These kits are designed to make albums, but I think that they make wonderful cards, too. 

Here is a close-up of just the card. 
I used the flower kit to add a ruffle around the chipboard sentiment.  Making a ruffle with the flower kit is such an easy thing to do.  Just give the paper strip a pinch at each of the scoring lines and work it around a circle.  It already has a really cute scalloped edge for the outside of the ruffle.


I used foam dots to layer the flowers and the chipboard bird for extra dimension.  Be sure to make sure that your flowers are only attached to the flap so that your card will be easy to open. 


Finally, you can see why I really love the Medley Album Kit for cards. 
You can use the lined pieces to tuck a personal message inside the card.  Super cute and oh so easy to write your message neatly on! 

And another!


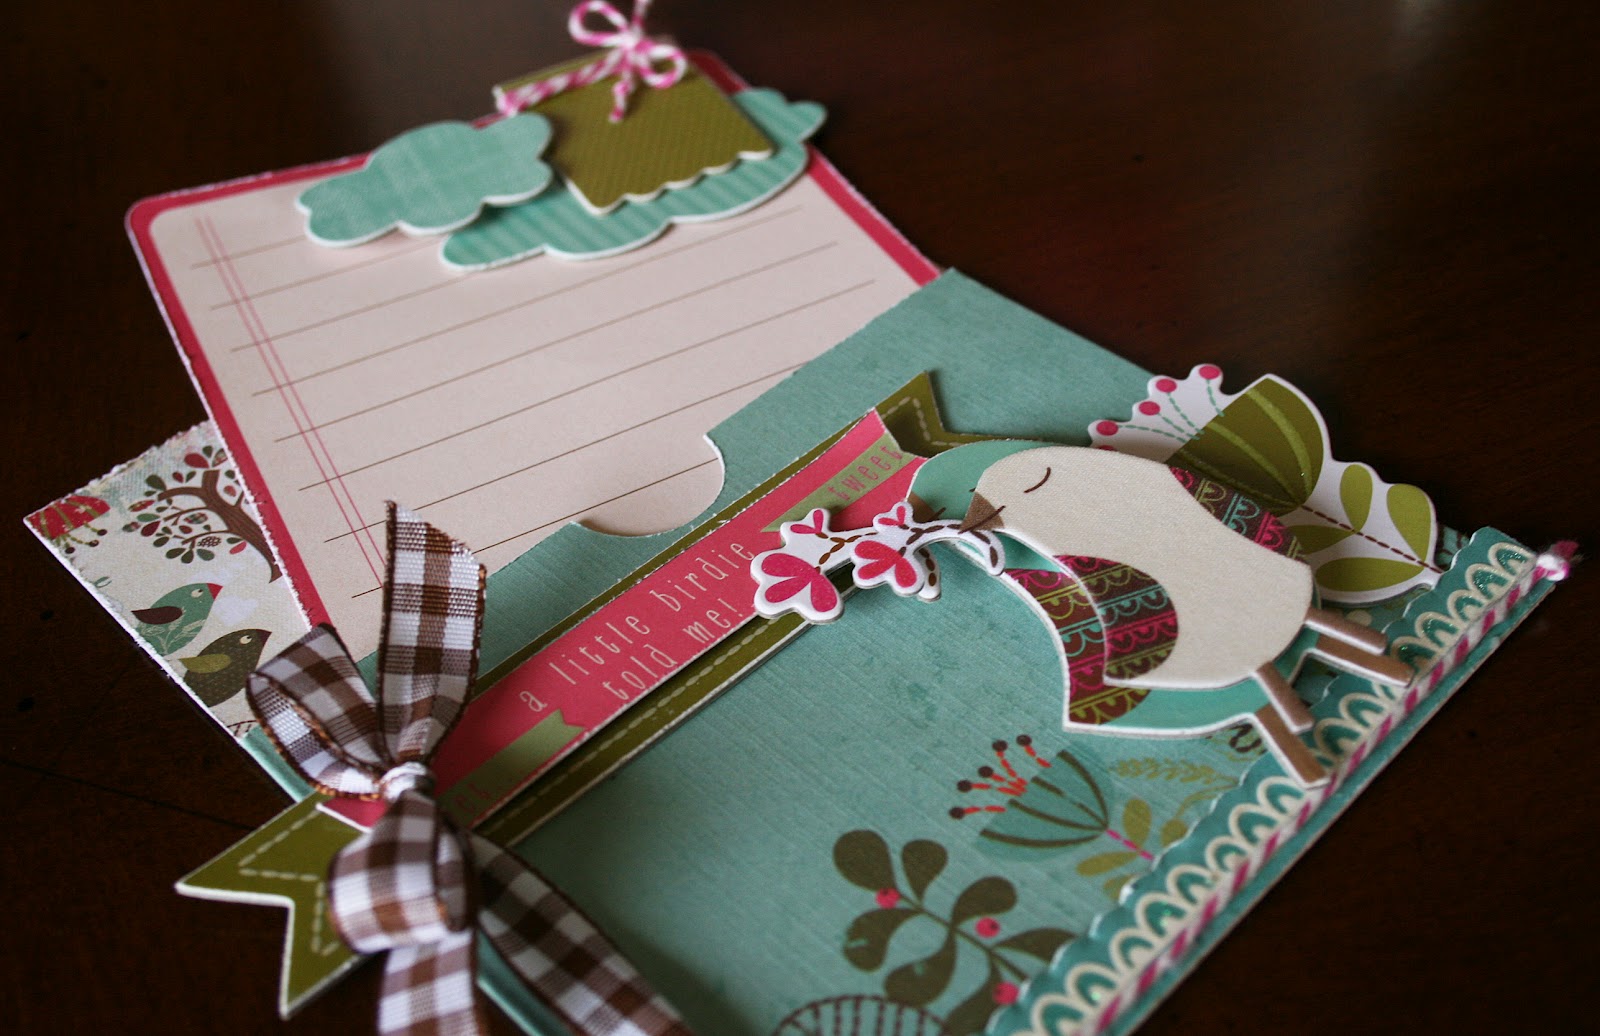
For this card, I chose the little folder that would allow the journaling section to show. 


Again, I used foam dots for dimension.  I love layering similar elements, too.  The little birds on the bottom are an example of this layering.  The bottom one is chipboard and the top one is from the fabric favorites.


And here it is with the card pulled out.  You can make it super easy to pullout by making sure to layer chipboard and let the banner piece overlap the top a bit.

I would love to hear what you think.  Do you use products outside of their intended use?  Let me know and I'll drop by to take a peek at yours.   

Photobucket

Tuesday, August 16, 2011

Sketch Support

It's Add-on Week at Sketch Support

This month, Allison has provided us with the cutest little birthday hat sketch.  This one is so adorable and it's perfect to use up some of your littlest scraps.  

It's perfect for cards, but it also makes a fun embellishment to add to your pages, tags or anything else you might come up with! 

Happy Birthday Card
In addition to making the colorful party hat, I used the pattern to make some white hats to add a bit of interest to my white space.

The fringed top of the hat was made by punching three different circles, cutting 3 tiny triangles out of each of them and adding a brad.

  
And... If you know me, you know that in addition to the paper strips, I HAD to add some ribbons! The little ruffle along the bottom was made by cutting some ribbon strips, glueing them in half and tucking them under the bottom of the party hat.


Be sure to stop by Sketch Support for more ideas and to download the sketch for your personal use!  There are LOTS of ideas for the sketch and since it's only Tuesday, there are LOTS more to come!

Thanks for dropping by!