Showing posts with label tutorial. Show all posts

Thursday, September 29, 2016

Live with Prima Class Part 2

As promised, this week there is a video tutorial on how to make this project with the Dress Form that was created in last week's video.

In the video, you can see all the steps on how to create this.  There are lots of beautiful Prima products that I included, along with lots of Prima Mediums, included Sculpture Medium.


You can  watch the video right here.  


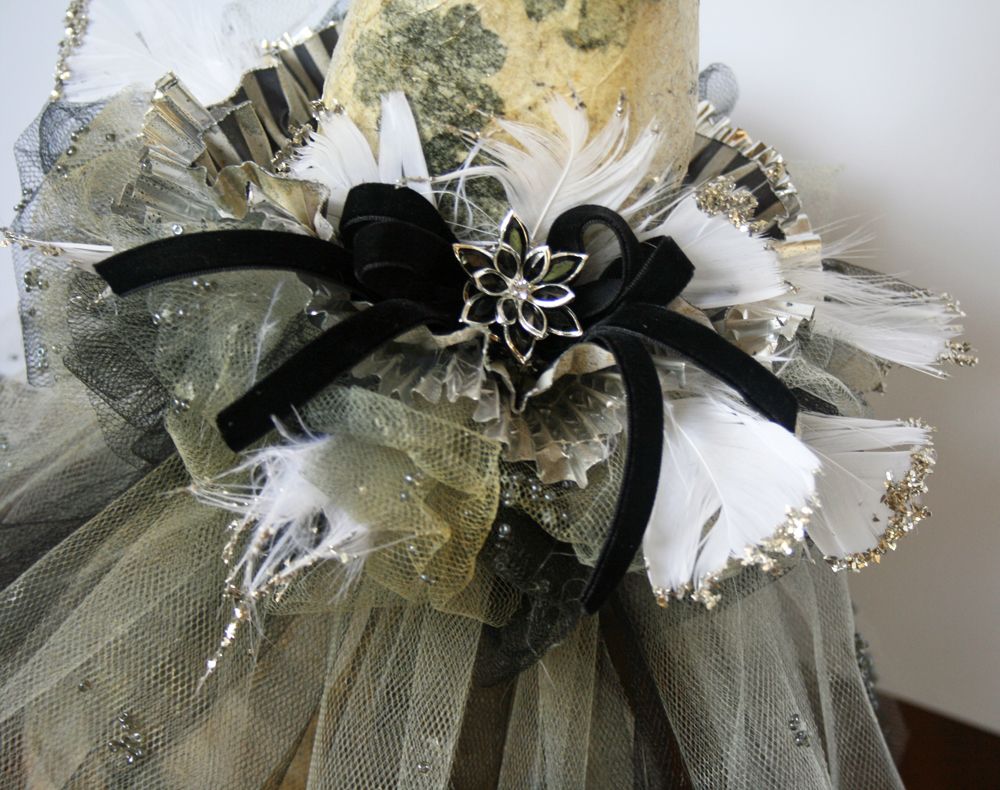
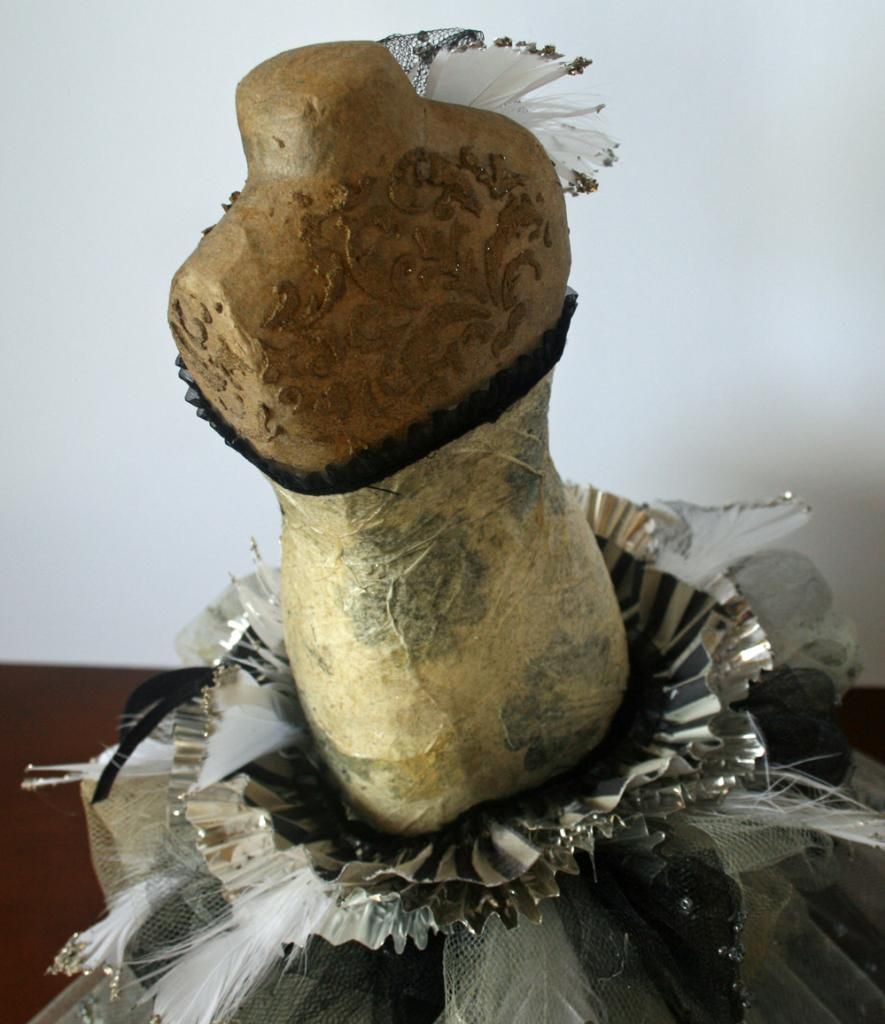
I also wanted to include the close-ups here on my blog so you can see the details.


Be sure to check out Live with Prima on Facebook to keep up with all the latest videos and live shows from the Live with Prima team!

Photobucket

Thursday, September 22, 2016

Live with Prima Video Class-Dress Form

Hi everyone!  I'm excited to share my first Video Class for Live with Prima today!  These classes are in a quicker format but still cover all the instructions needed to create the projects.  Of course, if you have any questions, you can contact me and I'll help!

Here is today's project.  I'll be using it in a project next week, so drop back by next Thursday! Also, you can watch the video right here, too! 


I wanted to also include some close-ups here today so that you can see the details well.


Photobucket

Friday, March 18, 2016

Whimsical Bunny Centerpiece for Live with Prima

I had so much fun creating this whimsical centerpiece for Easter.  This is a super fun and easy thing to make.  I'm looking forward to using it on my Easter table.

Tonight on Live with Prima, I did a full class that you can watch right here on my blog!  I've also included a template of the pattern that I used for the ears and nose.  


These sweet little bunnies started out as a 2x4.   The class also includes instructions on how to make the ruffled border that surrounds them.


Print the template 8 1/2 x 11.


I hope that you enjoy the class!  If you make your very own bunnies, I would love for you to share them with me or to post them to Live with Prima on Facebook.
 Photobucket

Friday, February 19, 2016

Live with Prima Class

Although I've shown this project before on my blog, I wanted to share a link to the class on exactly how I made it!  This is a fun and easy project that anyone can do and do quickly!


Here is the video.


And here is a close-up of the project so you can see the details.

Photobucket 
 

Wednesday, February 17, 2016

New Prima Julie Nutting Release with Step by Step Tutorial

Hi everyone!  As you all know by now, I'm a huge Julie Nutting fan!  With the CHA Winter Release, Julie and Prima came up with all new stamps!  The theme is beach, so it's time to get some in your stash for summer projects!


I created a wall hanging for the Prima Booth at CHA.  This started with three 5x7 burlap canvases.  I also used some of the new French Riveria collection along with lots of other Prima products! You can see a step by step Snapguide tutorial below.


Be sure to check out the Prima Blog, too!  There are so many beautiful Julie Nutting projects there!

Check out How to Create a Beach Canvas With Julie Nutting Stamps by Prima Marketing on Snapguide.


 Photobucket

Thursday, January 7, 2016

Frosty Bird House for Live with Prima

I'm always so excited to teach on Live with Prima!  For my class tonight, I'm going to show you how to make this Frosty Wintery Birdhouse.  It is fun to make!  I'm also going to show you how I used the brand new CHA release of the Prima IOD Moulds and Paper clay.
  

You can see this little bird is all snug and warm in his Frosty Home.  He even has lighting provided by the terrific and fun to use, Lumies!


Hope you will be able to join me tonight!!

If you missed the live show, here is the video!


Tuesday, August 18, 2015

Watercolor Wonder with Prima!

Hi everyone!  I wanted to share a watercolor canvas that I created for Prima!  This is super fun and easy to create!  I did a step by step tutorial so you can make it, too!


I had a lot of fun using a few simple ideas and a lot of great products!  Great products always make creating fun!  Prima's Watercolor Pencils are fantastic!  I can't say enough good about them!!


Just a handful of Prima Watercolor pencils, a touch of Prima Color Bloom and your favorite flowers and embellishments come together easily.  

You can see the step by step tutorial right here!

Check out How to Create Watercolor Wonder by Robbie by Prima Marketing on Snapguide.

Be sure to drop by the Prima Blog to see what Rikka has done, too!  There are 2 tutorials for you today!!

Photobucket

Friday, July 10, 2015

July KOM for Flying Unicorn-Video Tutorial

Hi everyone! Today, I am sharing a layout that I created with the July KOM plus a few extras.

I have also created a video of the entire process.  

The instructions include fussy cutting, lots of dimension and tips.  Of course, I've included a load of flowers, too!

Hope you will watch! You can watch the video straight from my blog.  Just scroll down!  :)


 Supplies:
July KOM
Lemoncraft House of Roses Paper
Lemoncraft House of Roses Labels
Lemoncraft Buttons
Prima Debutante Collection Say it in Crystals
Prima Debutante Collection Tags
 Prima Debutante Collection Wood Icons

Other:
Prima Debutante Collection Flowers
Prima Debutante Collection Brads
Prima Color Bloom in Cotton Candy
Seam Binding

Thanks for dropping by!

Wednesday, June 10, 2015

Mini Album for Flying Unicorn - Free Class

Hi everyone!  As promised on my show, I'm posting my mini album with all the inside pages and measurements.  If you missed the show, no problem!  You can watch the playback at Flying Unicorn.


This was a lot of fun and I want to thank everyone for watching!  

For a short re-cap, I came up with this idea as a way to use the canvases that we love to make in a different way.  I love to make them so much, but it gets hard to find a place to display them.  With a mini, they can be put almost anywhere!  They also make great gifts!

I used Prima's Butterfly Collection for the album.  You can find it in the Flying Unicorn Store along with everything else that I used that is in stock for 10% off this week!


The album was created using 2 5x7 canvases.  It is important to buy the flat canvases.


This is the spine.  Notice those gorgeous glass beads!  I am loving adding them to everything lately!

The spine is 1.5x7 inches.


For the back, I used paint instead of gel and texture sand.  It will lay nicely while still including the colors that are used on the front and spine. 

Now for the inside!


The inside is based on a 4x6" format.  I wanted most of it to sit inside the album with only a few select bits and pieces overlapping.

Everything in the album was first cut from chipboard and then paper was added.  The chipboard will keep your pages stiff to help them hold up to the handling that a mini album gets.


One of the papers included in the Butterfly Collection had all these little squares on it.  I chose to use them as added decoration for my album.  Those pieces are approximately 2x6".


As mentioned before, the inside pages are based on a 4x6 format, so the rectangular pages are 4x6"


For this page, I used a large tag and covered it with the Prima paper.  I purposely set it higher in the album so that it would be visible on the outside of the album.


Here the fairy is fussy cut, layered onto clear transparency and then attached to the tag.  Again, it's about standing up to handling without  bending.  Using a transparency sheet make it work.


This sweet butterfly girl was done the same way as the previous one.  She is also on a 4x6 background.


The shaped pieces were cut using a Spellbinders Grand Nestabilities Die.  I cut this one off to make it shorter, but left it long enough to overlap the album a bit, too.


Don't forget all that gorgeous chipboard!!  You want to make sure to use it in your album!  I've also left room for photos or journaling.


It's perfectly ok to repeat some pages in your albums.  I repeated a previous page here.


For this page, I used the same die and cut off the edge to make it sit nicely in my album.  In this case, I oriented the page vertically.  Again, it overlaps a bit to show on the outside.


Finally, I finished with a journal card that was cut from one of the papers.  It's a great way to finish an album and leave a message to your albums.  


If you would like to watch the show and see how the album comes together, here is the link!

Don't forget to check out the Flying Unicorn Store to get your supplies!


Photobucket

Sunday, March 22, 2015

Paper Straw Easter Bucket with Video Tutorial

Easter is right around the corner!  It has snuck up on me this year, but I couldn't let it slip by without doing a little Easter Project.  Just for fun, I also decided to do a little video of how to make this! If you frequent my blog and galleries, you might remember that I made a bright version of this a while back.  I had some questions about how I did it so the video will walk you through each step.

It's easy!

You might recognize that this is made with paper straws.  They are all the rage and I can't seem to pass up all the pretty colors that I see in the stores.  I hope that I'm not the only one with a whole drawer full of these!  :)


I started with a little bucket that I picked up for $1 at Target.  I used straws and flowers that matched to decorate it.  I love roses and these were awesome since they were already so perfectly coordinated.


Another thing that I seem to buy a LOT of is doilies!  I just love them!  They are such a sweet touch to so many projects and here I used them to give the look of ruffles.


This project was so fun, fast and easy!  I hope you enjoy the video and give it a try yourself!

Photobucket

Monday, October 20, 2014

Dress Form Class with Flying Unicorn

Hi y'all!  As promised, here are some close-ups of my class project.  I'm a little late posting them, so I would like to apologize to anyone who has been waiting!  We've been so crazy busy and had to go out of town.  But... here they are!  :)

If you didn't get a chance to see the show live, here it is!  I would love to hear what you think and to see anything you create based on my classes!


Here is the full length photo of the dress form.


This is the top of the form.  I shared every step in the class, so you can see all the techniques there.


The top of the skirt.  


Finally, this is the back of the dress form. 


A huge thank you to everyone who has been tuning in!  I truly appreciate it!!  

I'll be teaching live again on December 10!  Hope you will join me!

Photobucket