Showing posts with label Little Yellow Bicycle. Show all posts

Thursday, August 8, 2013

Little Yellow Bicycle Vintage Summer

Summer Lovin' with Little Yellow Bicycle
Who doesn't love Summer?  It's my favorite time of the year!   So when we were doing summer lovin' projects at LYB, I was excited!  If you remember my birthday post, you will see the versatility of this collection.  It can be used so many ways!

Summer Love

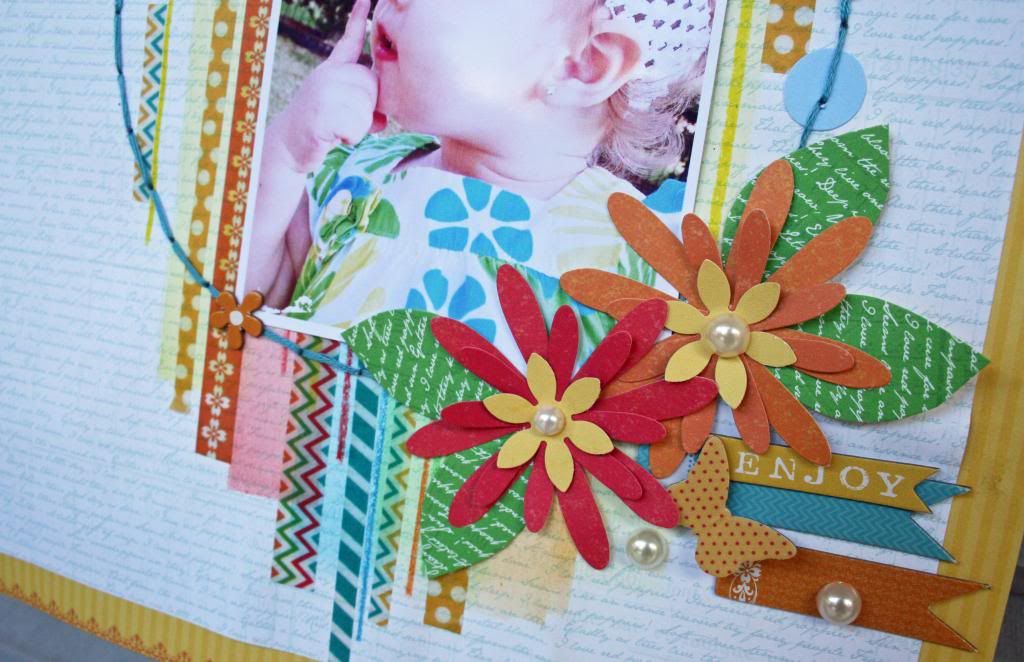
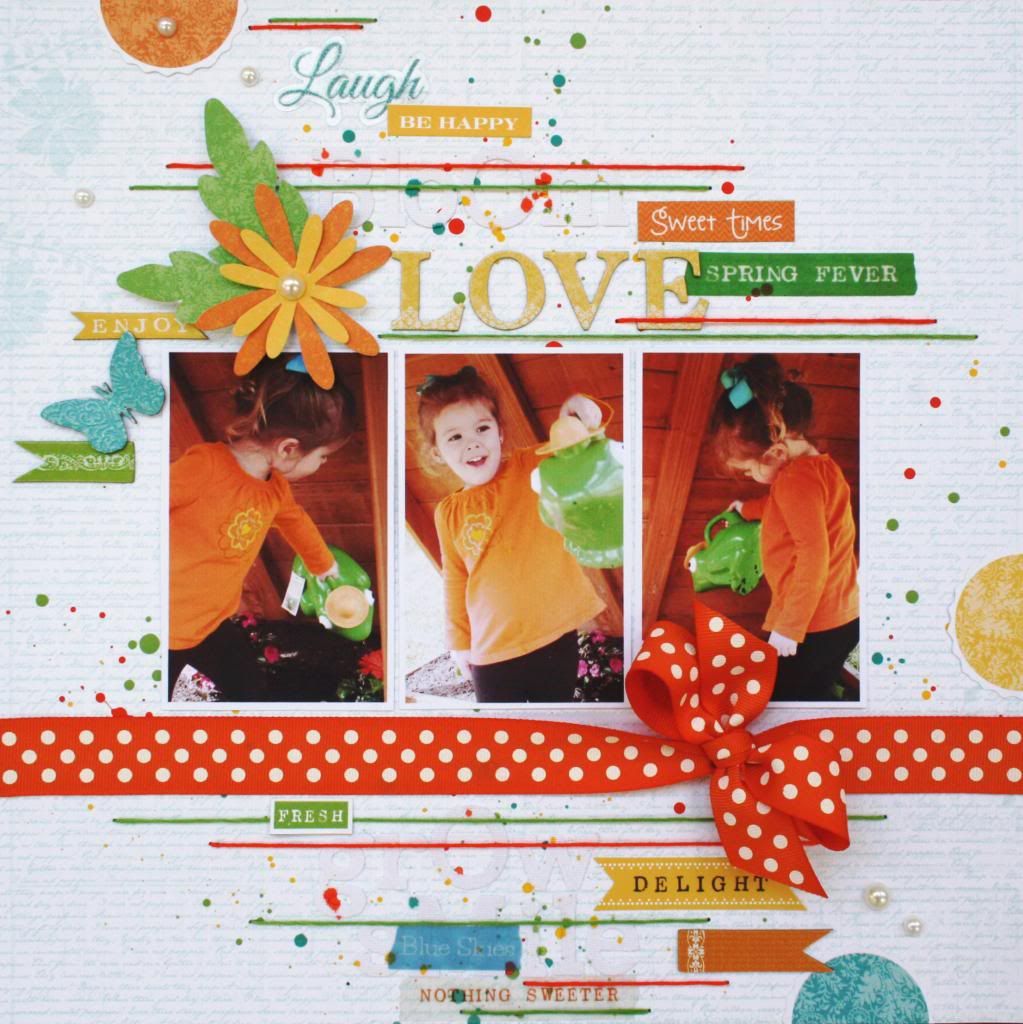
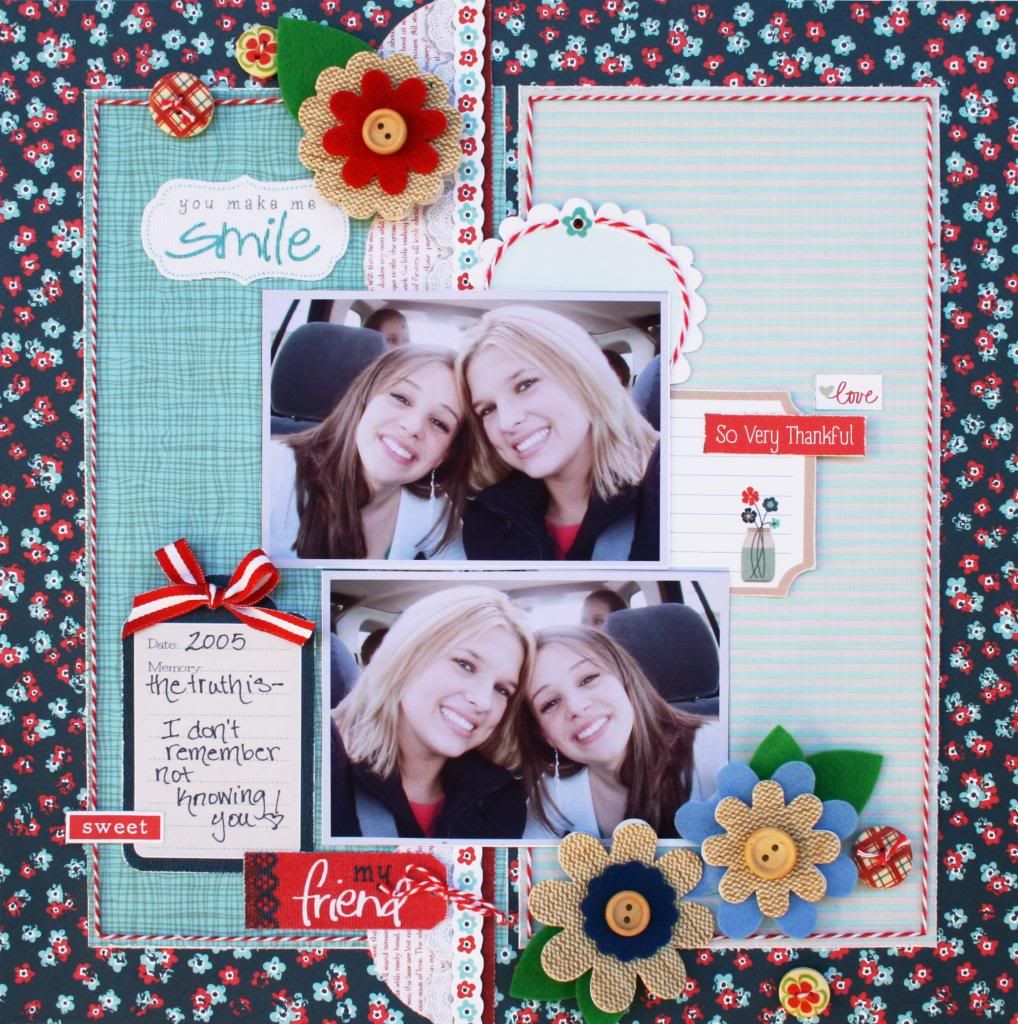
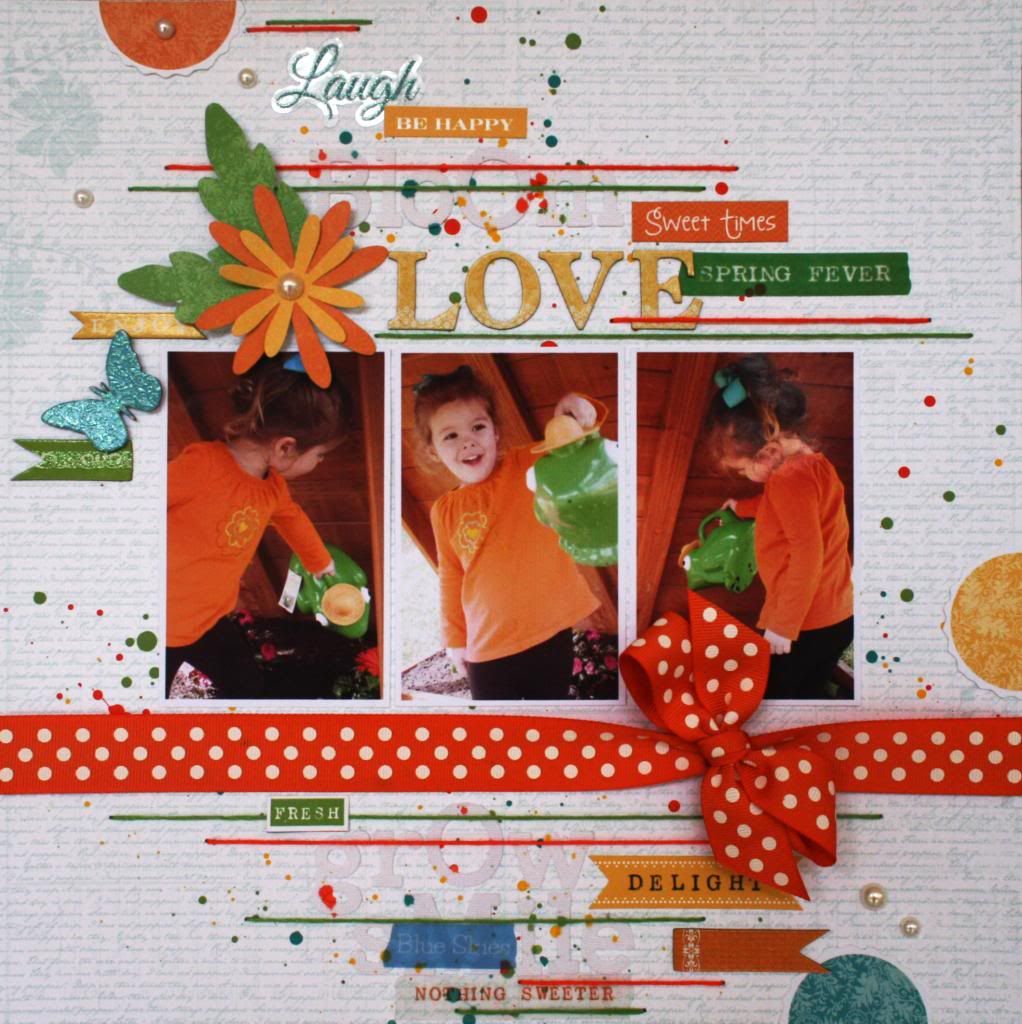
I love this photo of a friend's little girl.  She is so adorable and with the water, watermelon and those tiny hands, it's a 'make me smile' photo for sure!


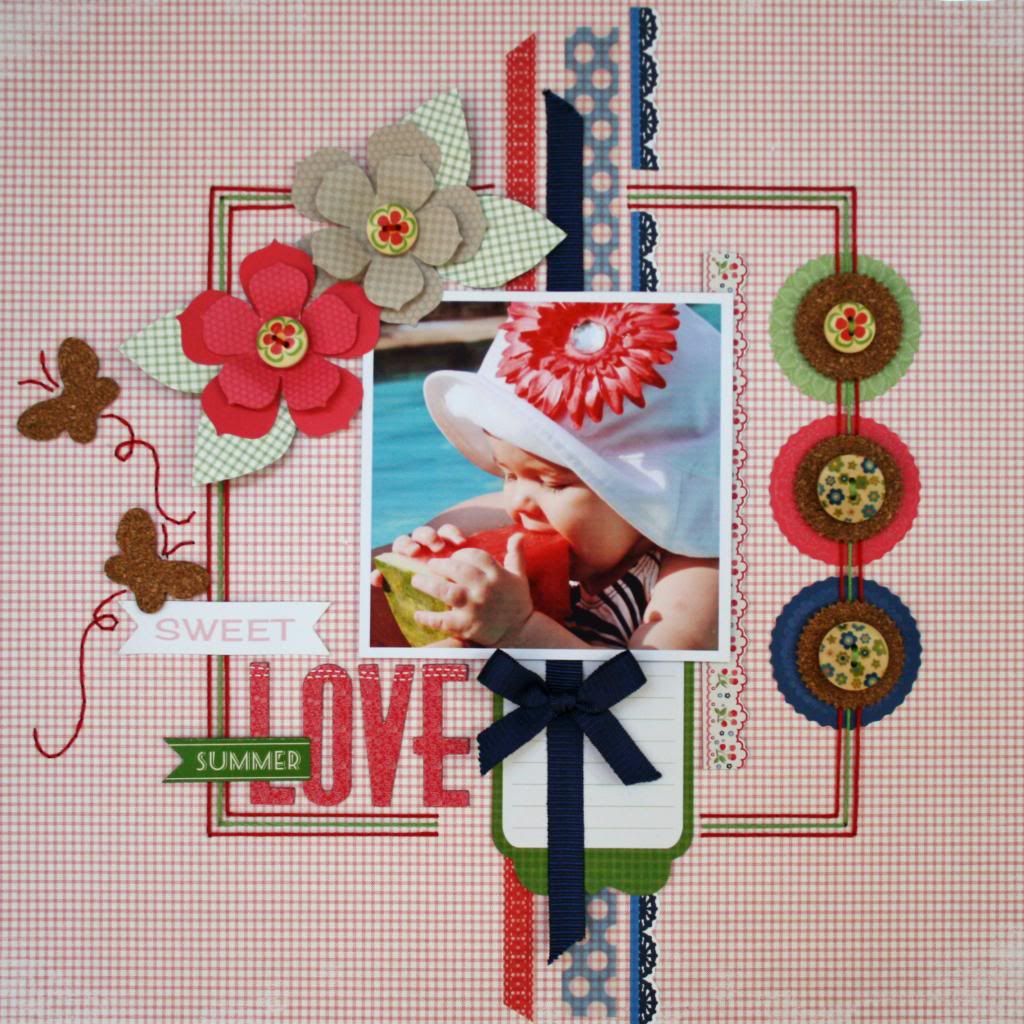
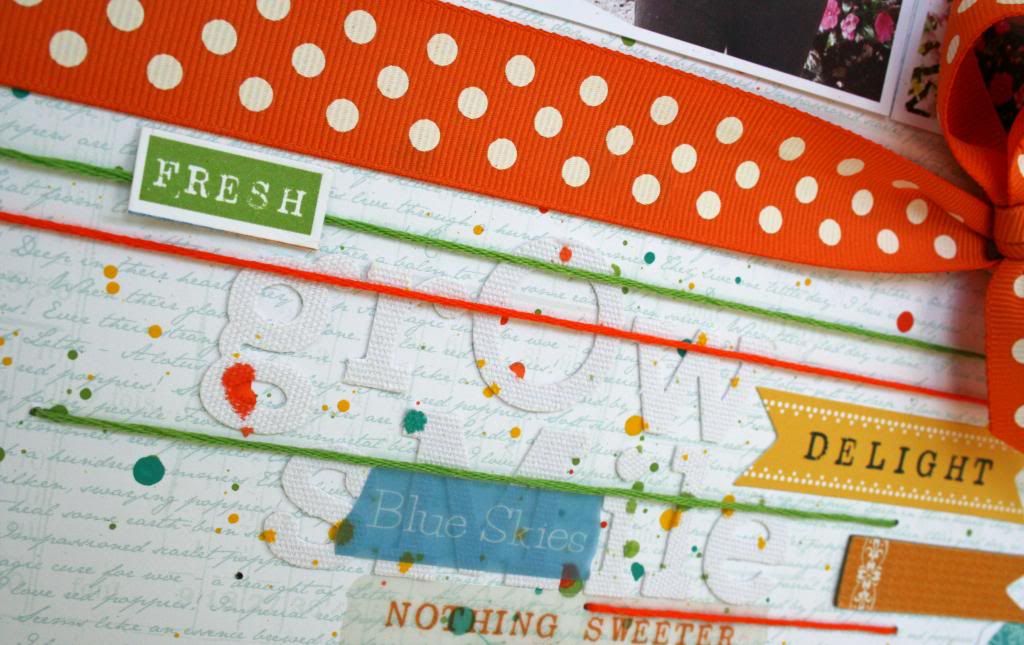
I did some stitching on this page, but don't be discouraged!  I used the technique that I like to use when I'm not wanting to spend a long time!  If you look closely, you will see that, again, I've made LONG stitches!

Tip:  Thinking about making a square or a few squares?  Take a peek in your stash and chose papers that already have a print that is easy to place the stitching holes.  This checked paper made the 3 squares super quick and easy!


The butterfly trails were stitched with regular stitches.  Unfortunately, I haven't found a quicker way to do those!

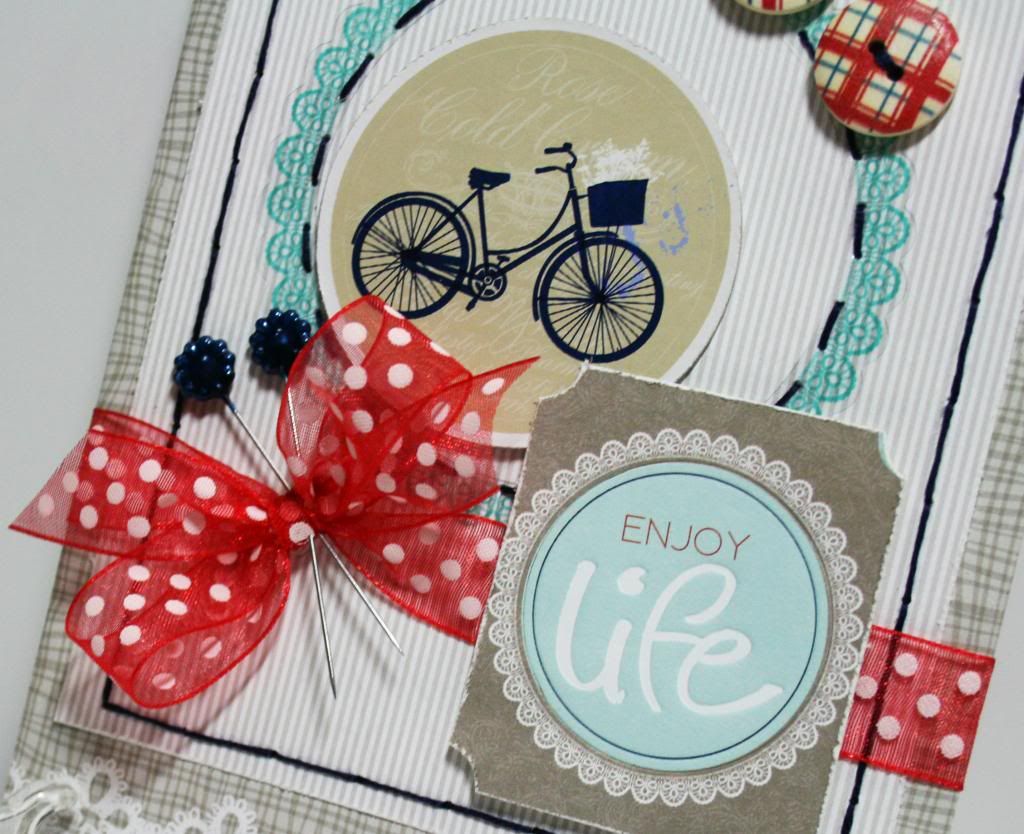
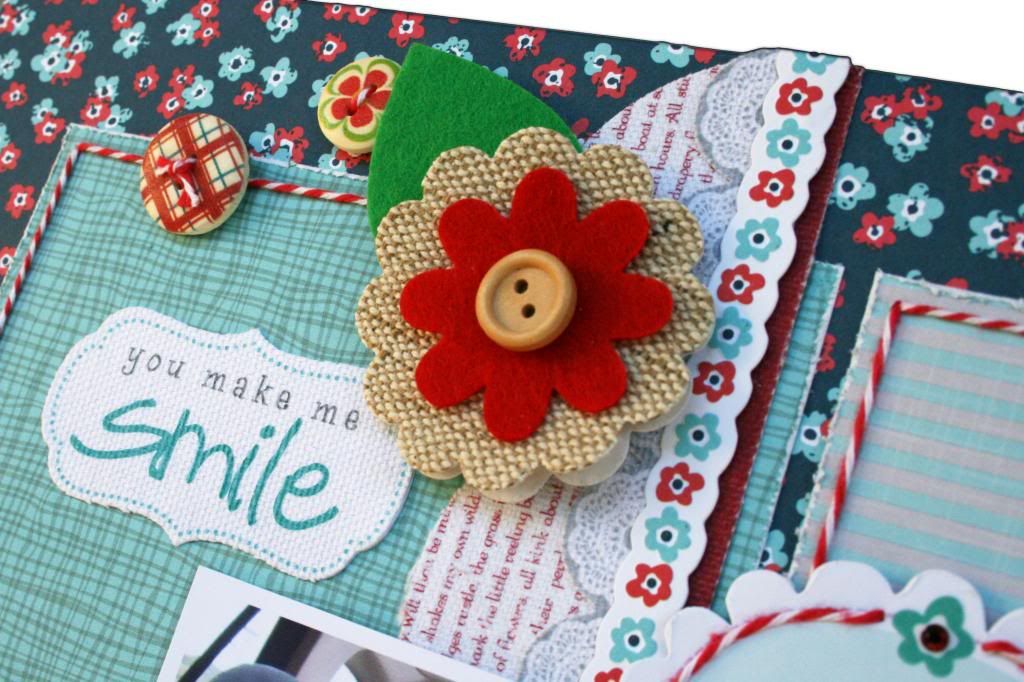
Also, for the centers of the paper flowers from the flower kit, I used some buttons from the Naturals Collection.  I also used some of those buttons on the layered circles shown below.


The cork is another Naturals Element.  LOVE the cork!  It makes me happy!  :)

Tip:  Instead of stitching through the button holes, I just positioned them to look like I did them at the same time.  I love the Beacons Fabri-tac to hold heavier elements.  It's like hot glue that isn't hot!  It also dries really quickly for those of use with patience issues!

Be sure to check out the LYB blog to see some great summer projects!


Photobucket

Friday, August 2, 2013

Little Yellow Bicycle Vintage Summer

Hooray for Birthdays!

I love the red, white and blue in Vintage Summer from Little Yellow Bicycle!  My son's birthday is on July 3rd, so we almost always had red, white and blue themed parties when he was growing up.   This collection fits perfectly with all of those photos. 

Make a Wish

If you notice the date on this page, you will see that I'm a little bit behind in scrapbooking my photos.  ;)  In my defense, I didn't start scrapbooking until he was a sophomore in high school! 

I am so crazy about the ticking pattern in this collection.  I sew, too and have always been drawn to ticking in fabric, so I had to use it for this page. 


Because this paper remeinded me of fabric, I decided to give it a bit of pieced look and do a LOT of stitching!  It took a while, but I like the result, so I am happy with it.


This ribbon is 1 1/2" wide, so instead of a bow, I chose to just do a simple knot so it wouldn't be too large.  It also made sense to use a knot for a boy page.

Tip:  Look through your stash for extra embellishments.  The red stars have been in my stash for years!  Even though they are old, the made a fun little accent. 


The title is a mix of the denim letters from the Naturals Collection and clear word stickers. 
Tip: Next time you are limited on space, give a thought to using small and large stickers.  It makes a longer title fit when you might not have planned well!  lol  (Can you tell that I didn't?)

Be sure to take a peek at the Little Yellow Bicycle Blog to see what the team is up too!  The blog is loaded with lots of great ideas using the Vintage Summer Collection!

Photobucket

Tuesday, July 30, 2013

Little Yellow Bicyle and Faber-Castell

Recently, Little Yellow Bicycle teamed up with Faber-Castell!  I am a HUGE fan of their PITT artist's pens and big brush pens.  I have also heard great things about the Gelatos and got to try them, too.  (That is another post!)  For this project, I chose to use the Art Grip Aquarelle pencils.  LOVE THEM!
Simply Spring 
This is the Little Yellow Bicycle Poppy Collection.  Such a sweet collection with beautiful colors that a great for any spring project!
These pencils are terrific! I've tried several others and the Faber-Castell Pencils are better than any of the ones I've tried to date!
To build my background, I used the pencils and a sponge brush. I simply scribbled with the pencil on scrap paper, dipped a 1 inch sponge brush in water and picked up the water colors. I did use a ruler to run my sponge brush along to keep my lines straight.
Next I added some pencil lines directly over the sponged section. Keep it random! Then I finished it off with some of the vellum tape pieces.


In the top section, I skipped the sponging and just used some pencil lines.
This was so easy and so FAST!


Be sure to check out both the Little Yellow Bicycle Blog and the Faber-Castell Blog for more ideas! 

Photobucket

Thursday, June 27, 2013

Little Yellow Bicycle-May Arts-Xyron


A match made in heaven!  Being a self-confessed ribbon addict, I can't express how much I love this swap!  Terrific adhesives that are terrific for attaching, not only paper and embellishments, but ribbon too, make it pretty much PERFECT!

I came up with this layout using Little Yellow Bicycle's Poppy Collection. 
It's such a cute collection and just perfect for spring and summer pictures!

Sunshine

The little gardening elements are so cute and went so well with this adorable picture of Laynee in the garden picking tomatoes.


Using Xyron's Create a Sticker products is the best way I've found for attaching ribbon.  I love that even May Art's scalloped and wider ribbons can be put through the machines and work perfectly!  I used the X (1 1/2") and the Create a Sticker 2 1/2" machines for this layout.


Take a peek at the bow!  I love these double sided ribbons from May Arts!  I purposely tied the bow to feature both sides.  Did I say that I LOVE these ribbons? 


I used the Xyron Mega Runner to attach other things on my page.  It is a STRONG adhesive and it works so well when you need to attach pieces that are a bit heavier.  I used it to attach the burlap circles which are heavier than paper.

Now...
For the BEST PART!

All 3 of these fabulous manufacturers are giving away prizes this week!

Trust me, you want a chance to win!  All 3 of them, Little Yellow Bicycle, May Arts and Xyron make quality products that you want in your stash!

Check out each of the blogs to learn how you can have a chance to have some sent to you!
You will also see so many great projects from all of the design teams!


Photobucket

Tuesday, May 28, 2013

Little Yellow Bicycle - Alphabet Soup

We are playing with all the different alphabets at Little Yellow Bicycle
There are so many ways to add alphabets and words to tell your story. 
 
Although, I had the hardest time getting a photo of this in the full size project, the close-ups show the detail that is obvious IRL.  So frustrating sometimes!  :)
 
LOVE
 
I used a combination of Chipboard, Clear-cuts, Favorite Pieces and even Canvas Naturals on this page. Because I really played up the words, I only used on sheet of paper for the background.


So, here you can see a bit of the white on white that I achieved by adding  canvas letters to sections of the page.   I used floss to overlap the words in some places for more interest and color.
 
 
To get the splattered look, I used acrylic paint that I watered down for a thinner consistency.  I just flicked the wood part of my paint brush to get it to splatter.  The canvas letters were already in place when I splattered.  I added the fresh verse and chipboard letters after it was dry.
 
 
Be sure to take a look at the Little Yellow Bicycle blog for more great ideas! 
Photobucket

Thursday, April 18, 2013

Little Yellow Bicycle - Fern and Forest

We are All In a Flutter at Little Yellow Bicycle!
The Fern and Forest Girl collection has lots of embellishments with wings.  Sharon Kropp came up with some adorable little fairies for the collection.  I based the fairy on my canvas on hers.
 
Wish
This is a 9x12 Canvas. 
All the colored accents and doodles were done with my Faber-Castell Pens.  Pitt Big Brush Pens for the color accents and a Pitt Artist Pen (bold) for the outlining.
 
 
The fairy was pieced using paper from the Fern and Forest collection.  I also used the paper crafting kit to add details.  Her scalloped collar is from a flower that I cut up and tucked under the paper for her head.  The blue ruffle on her dress is a scored and scalloped paper that I tucked under her dress.
 
 
After building the base and the fairy, I added glitter accents in her hair, on the leaves, flowers and scattered around the canvas.  The hair was done with paint and just sprinkled while wet.  The polka-dots are Tim Holts Distress paint, also sprinkled while wet.  Finally, the detailing on the leaves and paper flowers was done with a Souffle Pen.  The ink from the pens dry fairly slowly, so you can add glitter while they are still wet.  (It is quicker drying than paint or glue, so you need to work quickly.)
 
Chipboard accents were added for touches of dimension and layers.  The title piece 'wish' is also from the chipboard package.
 
 
I used lots of Clear Cuts, too.  Some of them (starts and bursts) were added with Modpodge and are flat, and some (leaves and butterfly) are attached with glue and are dimensional. 
 
If you have any questions, be sure to ask! 
 
Don't forget to drop by the Little Yellow Bicycle Blog to see Jen's Flutter Page! 
 
Photobucket

Thursday, April 11, 2013

New Fern and Forest Girl *Little Yellow Bicycle*

Have you seen the brand new releases from Little Yellow Bicycle
They are so DANG CUTE!
There is a girl collection and a boy collection in Fern and Forest.  Today, I've played with the girl collection.  It is simply adorable!!
 
Beautiful
These Tea Party pictures sit just perfectly on the Fern and Forest.  I really love that I could take some traditionally colored girly photos and add other colors because of the papers having such a great mix of hues.
 
 
The paper crafting kit provides so many pretty pieces for layering.  I used the flowers and leaves included in the package to embellish.  Because I wanted to add more white to them, I loosely traced them with a white Souffle Pen.
 
 
A touch of ribbon and ric rac, along with some Clear Cuts and Stickers from the collection, completes the look!
 
Be sure to check out the NEW Little Yellow Bicycle Blog! 
The design team is creating with this collection all month and have come up with lots of fabulous ideas!
Photobucket

Monday, April 1, 2013

New Design Team at Little Yellow Bicycle/Blog Hop

Happy Happy Happy Day!
I'm super excited to have been invited back for another year with Little Yellow Bicycle!!

 
It's so fun to work with such fantastic products, a terrific group of designers and great support from the manufacturer!  As you know, Little Yellow Bicycle makes beautiful, quality products.  It is always a joy to get a box full of Little Yellow Bicycle Products! 
There are a lot of new things happening at Little Yellow Bicycle, too. We have a brand new blog! 
Be sure to check it out! 
  As a special welcome to the new Bikers, we are having a blog hop!
Each of the new Bikers has made a card as a welcome to the team and to introduce you to each of us.

Enjoy Life Card

I mostly used the Just Because Collection. 


The Bicycle chipboard piece is from the Saturdays Collection.  I couldn't resist adding a bicycle to my card today! 


Take a closer look at the buttons.  They are from the new Naturals collection!  LOVE all the pieces that the Naturals collection includes! 
Be sure to stop at each of the new Biker's Blogs to have a chance to WIN some of the latest release, Fern and Forest Girl and Fern and Forest Boy!  They are ADORABLE collections and I know that you will love them!
   
If you are already on your way in the blog hop, your next stop is the amazing Vicki Boutin!

If you started here, hop back to the Little Yellow Bicycle Blog to get started!
Just in case you are confused, here is the order of the entire hop:
 ME!
Vicki Boutin
Liz Qualman

Also, another new thing...Did you know that you can get the products you love directly from Little Yellow Bicycle now? If you are having trouble finding them from your local or online retailer, be sure to check with LYB!
Thanks for sharing my excitement to be on the LYB team again!   


Photobucket

Tuesday, March 12, 2013

Little Yellow Bicycle and Ranger Ink

You know it's got to be good when Little Yellow Bicycle teams up with Tim Holtz and Ranger Ink!
 
Combining the new Little Yellow Bicycle Naturals, new Little Yellow Bicycle Stamps with Ranger Inks is a perfect combination.  Both companies make quality products that make it fun and easy to create!   What's better yet?  You can find the new Naturals at your local Michaels and Hobby Lobby in addition to your other favorite scrapbook stores.  It couldn't be easier to get your hands on them!
 
Here is my project for this swap.  I had a blast experimenting with the inks and stains! 
 
Altered Frame


Be sure to check out the Little Yellow Bicycle Blog for close-ups and instructions.
 
Guess what?  We are giving some away!While you are there, read all about how you can win some of the new Naturals for yourself!
 
Also, Little Yellow Bicycle is now on Twitter and Instagram!  There is a lot going on so be sure to follow us to hear all the news first!


Photobucket

Wednesday, February 20, 2013

Little Yellow Bicycle - Just Because

All the bright and beautiful elements in the Little Yellow Bicycle Just Because Collection make me want to use them all the time! Add in some of the new Naturals and it's a match made in heaven!

This photo of my daughter and her friend was a natural fit with this collection. There are so many elements that reference friendship. Because these girls have been friends since they were 4 years old, it seems to them that they have known each other always.
 
You Make Me Smile
 
 
 I LOVE LOVE LOVE the Naturals buttons and flowers!!! With the buttons in the centers of the flowers, I couldn't resist adding some of the other wood buttons.
 

Tip: Try mixing Naturals borders with other borders for different textures. I layered the Naturals Canvas Border with one of the Just Because Canvas Borders and finished it off with a sticker border.
 
 
Be sure to check out the Little Yellow Bicycle Blog for more inspiration from the Biker Chicks!
 
 
Photobucket

Tuesday, February 12, 2013

Valentines with Little Yellow Bicycle

It's that time of year... the little ones are getting their Valentine's Day Cards together and ready to head off to school carrying extra treats!  How about doing something a little different for the teachers or even for one of your friends to say Happy Valentine's Day?
 
Last week, one of my Facebook friends commented about how she found out about something her child needed for school the next day. When did she find out? Why, the night before, of course! This is my answer to that for Valentine's Day!
 
 
I used the red and white elements from the Just Because collection.  I couldn't resist adding a touch of blue.  Who says that Valentines can only be red, white and pink?
This one is made with a heart cookie cutter. I doubt that I spent more than 5 minutes on it. I just used the Little Yellow Bicycle Vellum tape on the outside, popped it in a bag and tied a bow at the top. To add a bit more detail, I punched a hole in a Clear Cut, added a tiny jewel and tied it to the top.

Tip: Cookie Cutters can be found in several places around each of the holidays. Try checking your local craft store, grocery store or even discount stores.
 
 
This one is another super quick one. I had these clear cups on hand. I just punched a border from paper and adhered it to the bottom of the cup. Next, I wrapped a sticker border along the very bottom border. For the tie-on, I used a couple of pieces of chipboard and another tiny jewel.

Tip: If you take a closer look, you can see that to make the border fit better along the bottom of the cut, I scored it on the bottom side and then clipped between the scallops.
 
 
This one is a bit more time consuming, but still very easy and quick. For it, I used a clear transparency sheet. It also takes very limited supplies. I punched a couple of 12 inch strips and a thin piece of paper for the edges. Working while it was flat, I added the borders to the edges. Next up, I taped it together to make the cylinder. Put your candy in another clear bag that is already inside the cylinder. Tie a bow on the open end to close. On the closed end of the bag, tie a bow and then clip the edges. Finsh off with a punched heart, a little heart sticker and another tiny jewel.

Tip: You can get 4 to six of these out of each single sheet of transparency paper. One sheet goes a long way! Also, make sure that the edge you are adding the borders too is no more than 6 inches. This will save you time by making each punched strip work for two sides.


Be sure to stop by the Little Yellow Bicycle Blog for more inspiration!


Photobucket

Wednesday, January 30, 2013

In a Jiffy with Little Yellow Bicycle

This is a little brag book that I made using the Little Yellow Bicycle Just Because collection.
The colors in this collection are right up my alley!  I am a huge fan of blue and adding in red is on my favorites list, too! 
 
I love brag books, but don't like how they can be too big to actually tuck in your purse.  This is just the right size to do that and it's so easy and quick!
 
 
I had some trading card sleeves at the house and thought that they would be such an easy way to  put together some wallet sized pictures with some great papers and flat embellishments.  Adding a few ribbons and a chipboard heart gives it a little extra fun!
 
 
I used the 6x6 paper pad to mat all the pictures.  The best part about this is that because the matting is simple, you can switch out the pictures easily for new ones as your children grow.
 
 
I also used several of the journaling cards for this and mostly flat stickers.  The journal cards make it easy to tell the story if you want to add it to the book.

 
Turning it on the side is totally fine with this project. 
 
 
Don't forget the adorable Clear-cuts in this collection!  They are also flat and perfect to tuck into the sleeves.
 
Tip:  The sleeves are pretty tough.  It makes them perfect to tuck into your purse and keep your pictures safe, but it is a bit hard to punch through them.  If you have one, the easiest way is to use a Crop-a-dile.  That thing will punch through anything!  :)
 
Be sure to checkout the Little Yellow Bicycle blog for more inspiration!  The Biker Chicks are always up to something!


Photobucket