Showing posts with label ribbon. Show all posts

Monday, June 2, 2014

Off the Page for Flying Unicorn

As you know from my previous posts, I have joined the Flying Unicorn Kit Creative Team.  This month, I received my first kit and let me tell you, it was beautiful and so easy to create with.

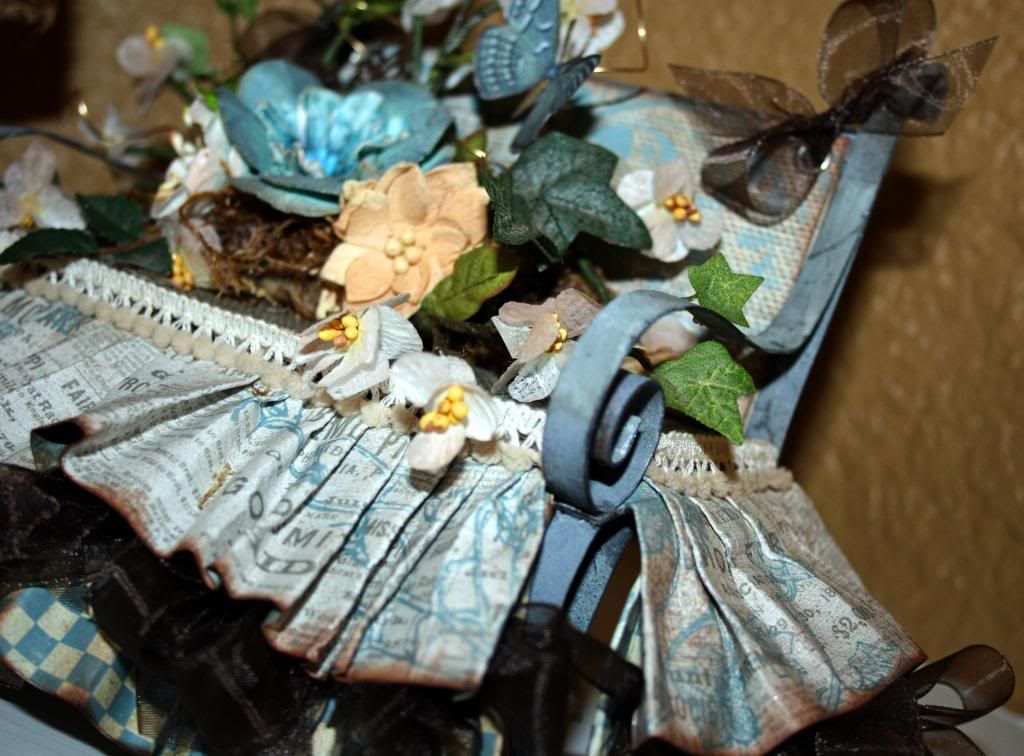
In addition to everything you need to create terrific pages, the Main Kit of the Month includes an off the page item.  This month, it was an adorable little galvanized iron bench.  Since the kit was so beautiful and I still had so much left (even after completing 3 layouts and this bench) I chose to use the kit to decorate my little bench.

The collection is Tailgate Marked from Riddersholm.  I love blue, so this kit was certainly right up my alley!


I started out thinking that I would love to add a ruffled skirt to the bench, so that came first.  
 Tip:  To make the ruffles, I sprayed the paper with a bit of sparkly mist.  Then I 'pleated' it to the length of the bench front and sides.  After it was mostly dry, I used Fabri-tac to glue it to the bench. 

Next, I made a 'cushion' and the back cover.  The cushion was done using 2 pieces of cardboard cut to size and then adding a piece of paper to cover it.  I used a bit of the Petaloo Pom Pom trim from one of the kits to put around the edges.

The back of the bench was done by putting 2 pieces of paper over a piece of chipboard, adding eyelets and attaching it to the back of the bench with ribbon.

Super simple!


Next up, I made a little floral arrangement to sit in on the bench.  I used  some flowers from the kits, some Prima Vines from my stash and actually even cut a few pieces of ivy from the back of an arrangement in my house!  lol

The butterflies were fussy cut from the paper and attached to a bit of wire that I swirled a bit.

Tip:  I used a piece of floral foam to build the arrangement on.  It makes it super easy to  attach everything and gives it dimension.  After the arrangement was built, I added a bit of moss to cover any foam that might be showing.

One last detail was missing!  I felt that it need some ribbon ruffles between the paper ruffles.  Since I had already completed it and wanted to make it as easy as possible, I simply tied a lot of bows with the sheer ribbon that I had used on the back.  After the bows were tied, I just added a bit of Fabri-tac and tucked them between the layers.

Be sure to check out Flying Unicorn to see what all the Designers have created!  There are lots of wonderful creations!

Don't forget, you can now pre-order the kits!   You can find all the details here...
Photobucket

Tuesday, May 28, 2013

Little Yellow Bicycle - Alphabet Soup

We are playing with all the different alphabets at Little Yellow Bicycle. 
There are so many ways to add alphabets and words to tell your story. 
 
Although, I had the hardest time getting a photo of this in the full size project, the close-ups show the detail that is obvious IRL.  So frustrating sometimes!  :)
 
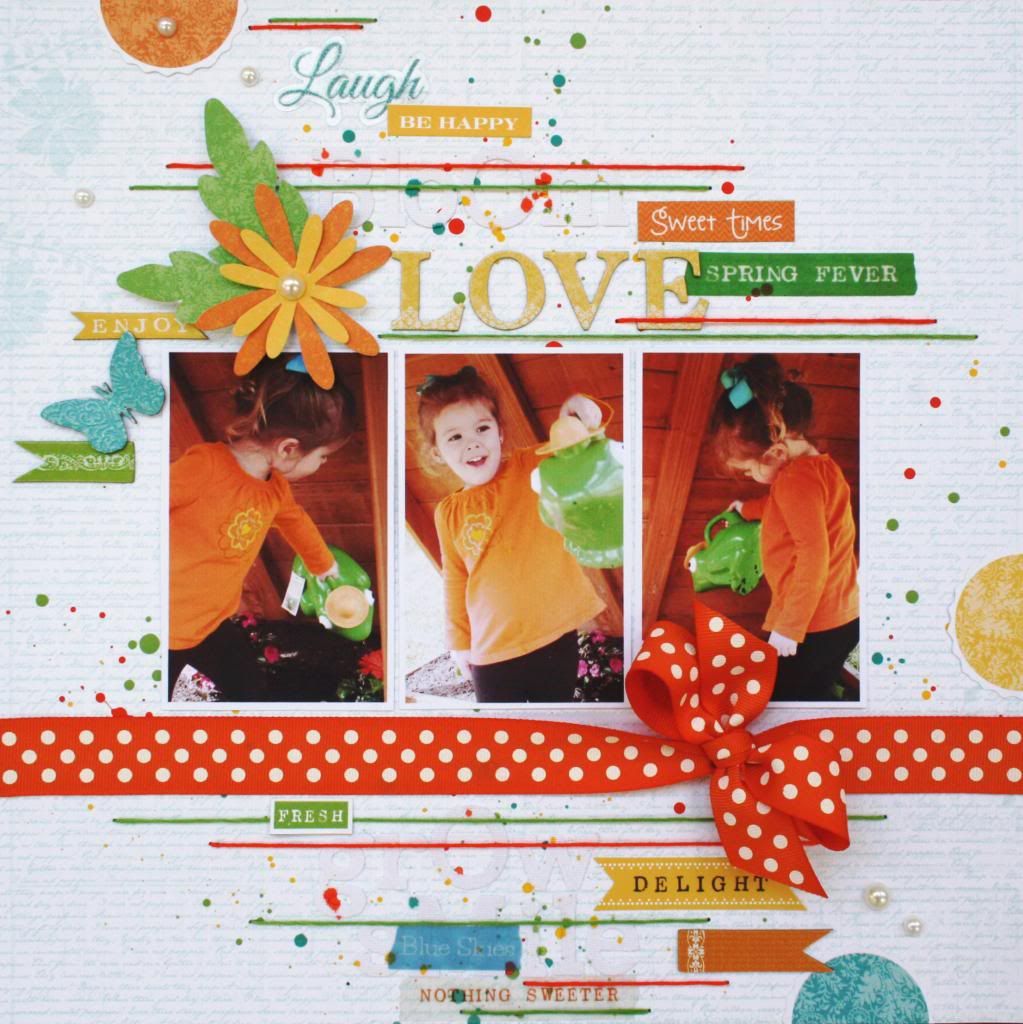
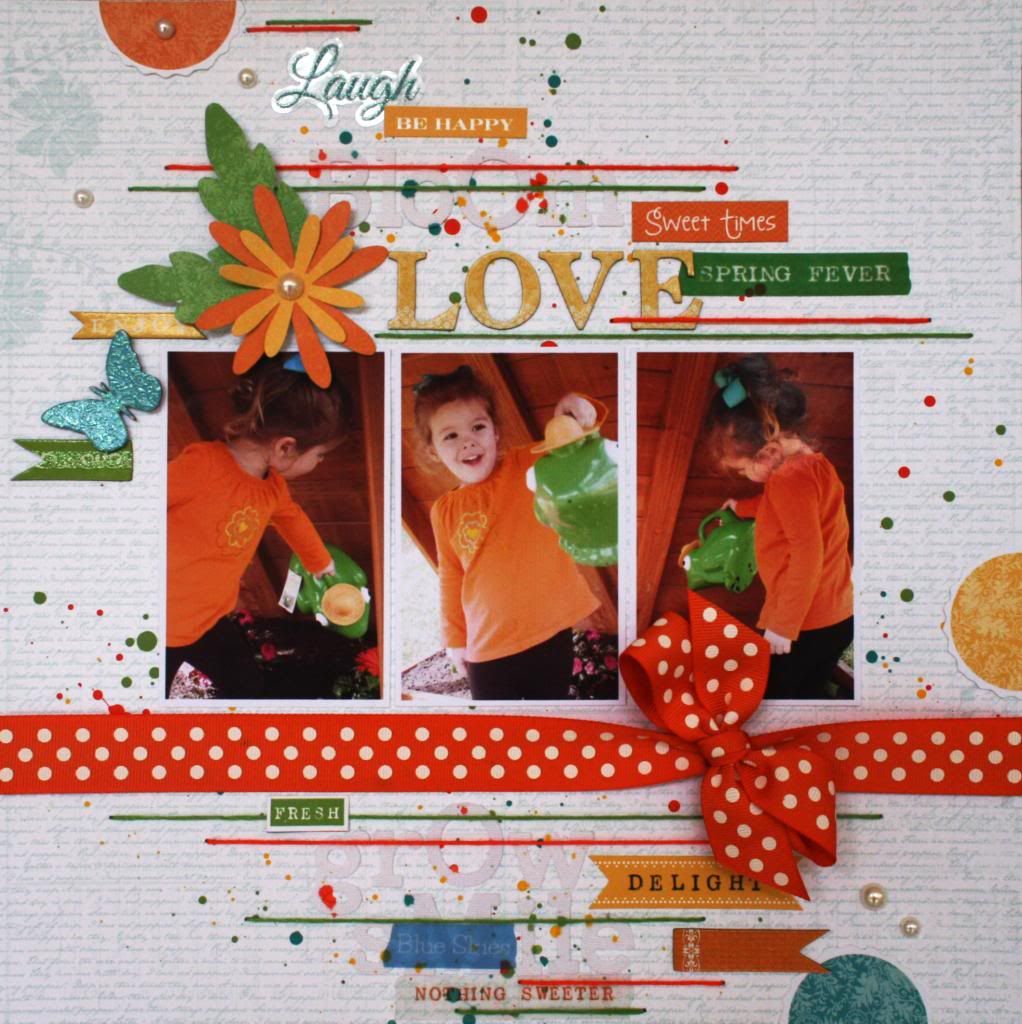
LOVE
 
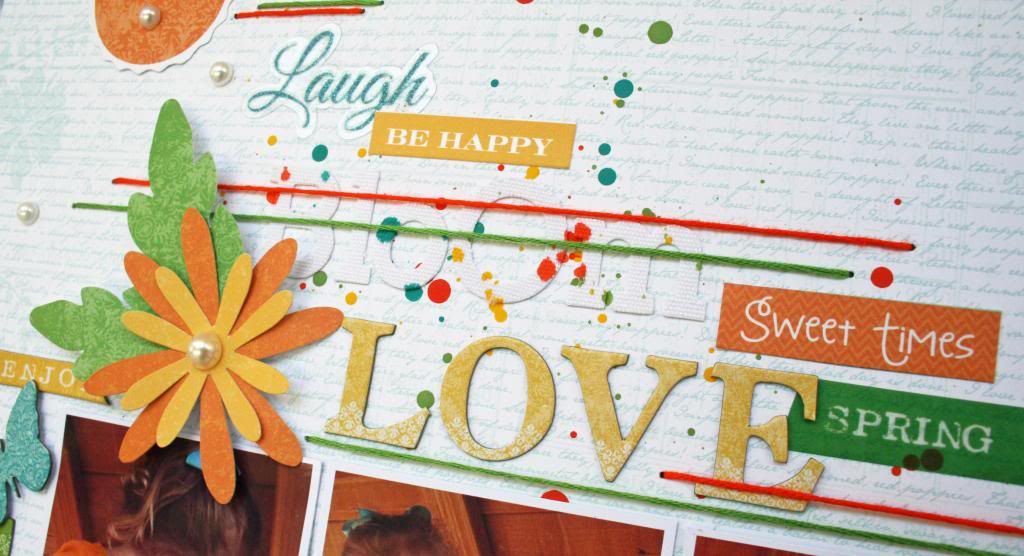
I used a combination of Chipboard, Clear-cuts, Favorite Pieces and even Canvas Naturals on this page. Because I really played up the words, I only used on sheet of paper for the background.


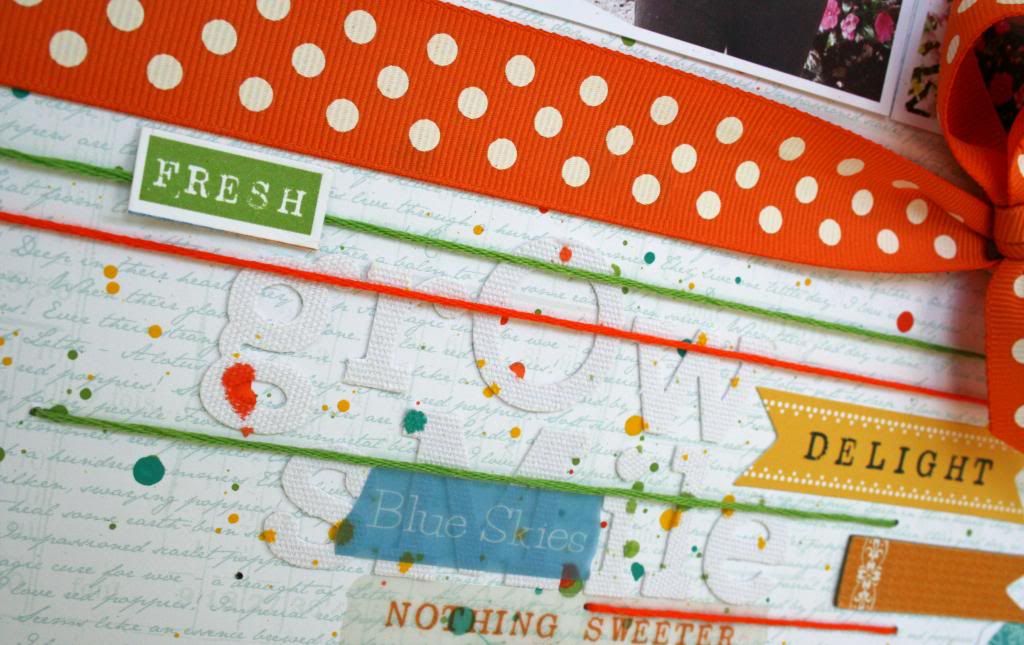
So, here you can see a bit of the white on white that I achieved by adding  canvas letters to sections of the page.   I used floss to overlap the words in some places for more interest and color.
 
 
To get the splattered look, I used acrylic paint that I watered down for a thinner consistency.  I just flicked the wood part of my paint brush to get it to splatter.  The canvas letters were already in place when I splattered.  I added the fresh verse and chipboard letters after it was dry.
 
 
Be sure to take a look at the Little Yellow Bicycle blog for more great ideas! 
Photobucket

Thursday, May 23, 2013

Bo Bunny and Xyron Swap

 
Bo Bunny has teamed up with Xyron this week for a swap.  I love when we do swaps and get the chance to work with other great products!  Xyron is one of my long-time favorites.  The X Create a Sticker is one of the first adhesives that I purchased when I started scrapbooking.
 
 
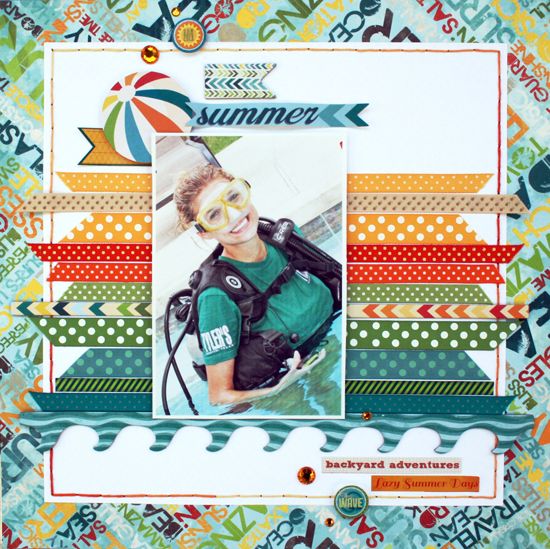
This is the layout that I came up with.  I used the brand new Key Lime Collection from Bo Bunny. 
 
Summer
 
 
Attaching ribbon is a snap when you use the Xyron X Create a Sticker  .  It is 1 1/2" wide and turns your ribbon into instant stickers.  It is also terrific or attaching die-cut letters and other small things.
 
 
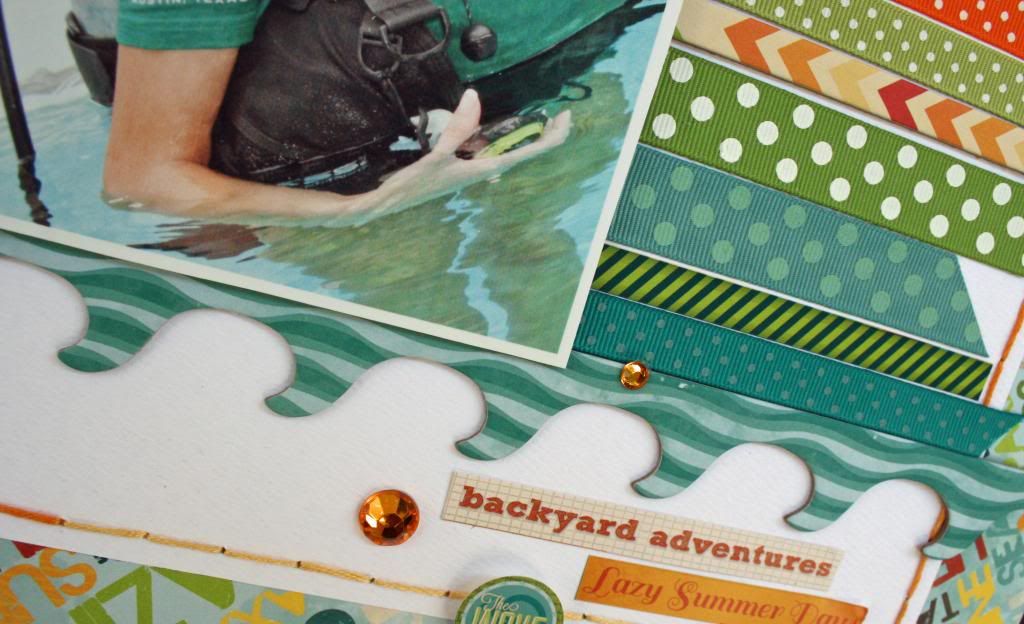
I added lots of Bo Bunny ribbons.  The double dot ribbons come in so many great colors and two different sizes.  I mixed in a couple of pieces of chipboard and a sticker border, too. 
Tip:  When you are using the X Create a Sticker to turn your ribbon into stickers, you can get more mileage from your sticker maker by pulling a couple of pieces of ribbon at the same time.  The ribbons that I used are 7/8" and 3/8" so pulling through 2 at a time is easy.
 
 
I also love the Mega Runner from Xyron!  It is so easy to use and it really sticks!!  Have to love adhesive that doesn't have your pieces floating around in  your scrapbook!
 
Now, for the fun part for you! 
Both Bo Bunny and Xyron are having Give-Aways this week!  And... I get to give away a prize, too!   And... both Juliana and Sarah are giving away a prize, too!  LOTS of ways to win this week! 
 
Now the best part of my prize...
YOU GET TO CHOOSE!
 
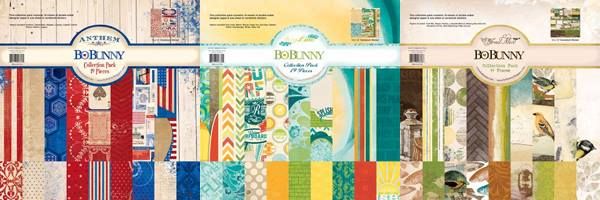
I am giving away a collection pack of your choice!
 
You can choose from Anthem, Key Lime and Trail Mix!  It's all up to you!
 
 
You have until Friday at Midnight Central Time to leave a comment here for your chance to win.
 
Also, go by Juliana's and Sarah's Blogs to see what they have created and a chance to win on their blogs! 
 
Here's your checklist:
~Visit & comment on blogs until Friday by midnight.
~Visit, like & comment at Bo Bunny and Xyron on facebook.
(There just might be something good happen there, too!)
~Wait for the drawings and see if your name shows up.
~Enjoy fun prizes.
 
Easier still....
 
Shhhh.... want an extra chance to win from my blog?  Be sure to drop by tomorrow and leave another comment.  It is your chance to enter more than once for the collection pack!
 
Don't forget that we always love to see what you are creating!  Share you pages and projects with us on the Bo Bunny Facebook Timeline!
 
Photobucket

Tuesday, February 12, 2013

Valentines with Little Yellow Bicycle

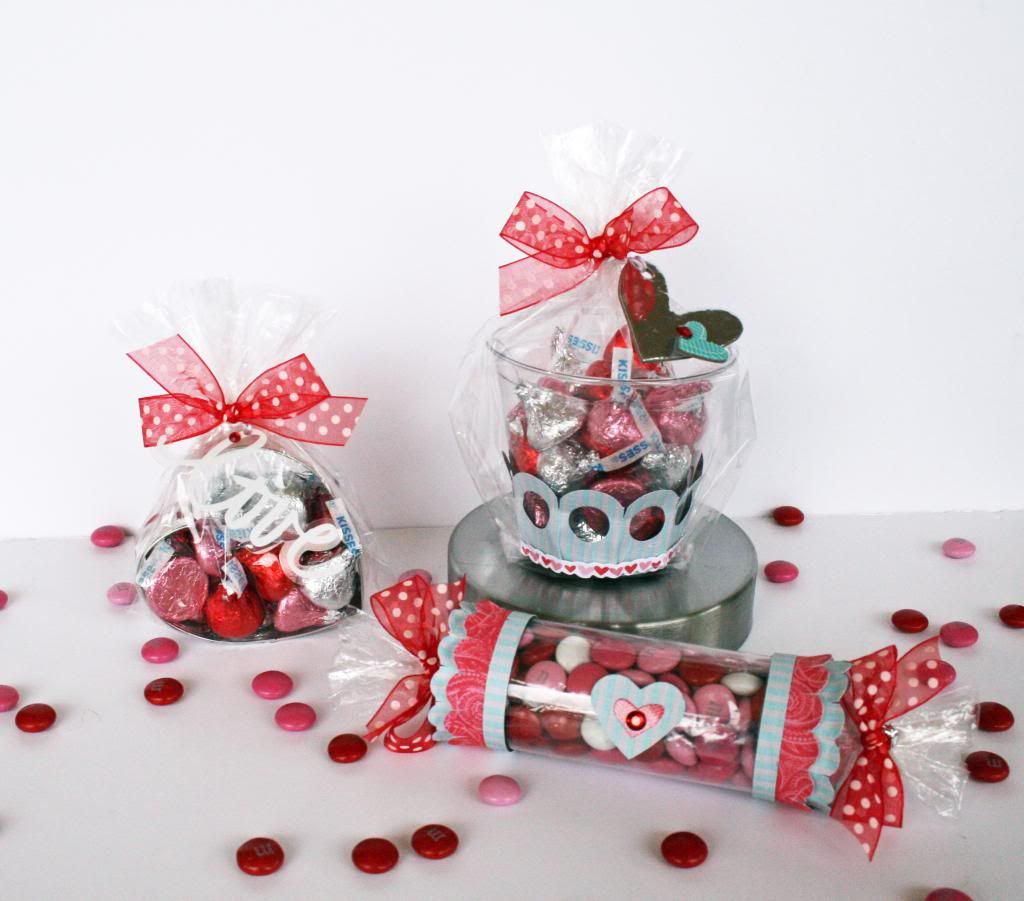
It's that time of year... the little ones are getting their Valentine's Day Cards together and ready to head off to school carrying extra treats!  How about doing something a little different for the teachers or even for one of your friends to say Happy Valentine's Day?
 
Last week, one of my Facebook friends commented about how she found out about something her child needed for school the next day. When did she find out? Why, the night before, of course! This is my answer to that for Valentine's Day!
 
 
I used the red and white elements from the Just Because collection.  I couldn't resist adding a touch of blue.  Who says that Valentines can only be red, white and pink?
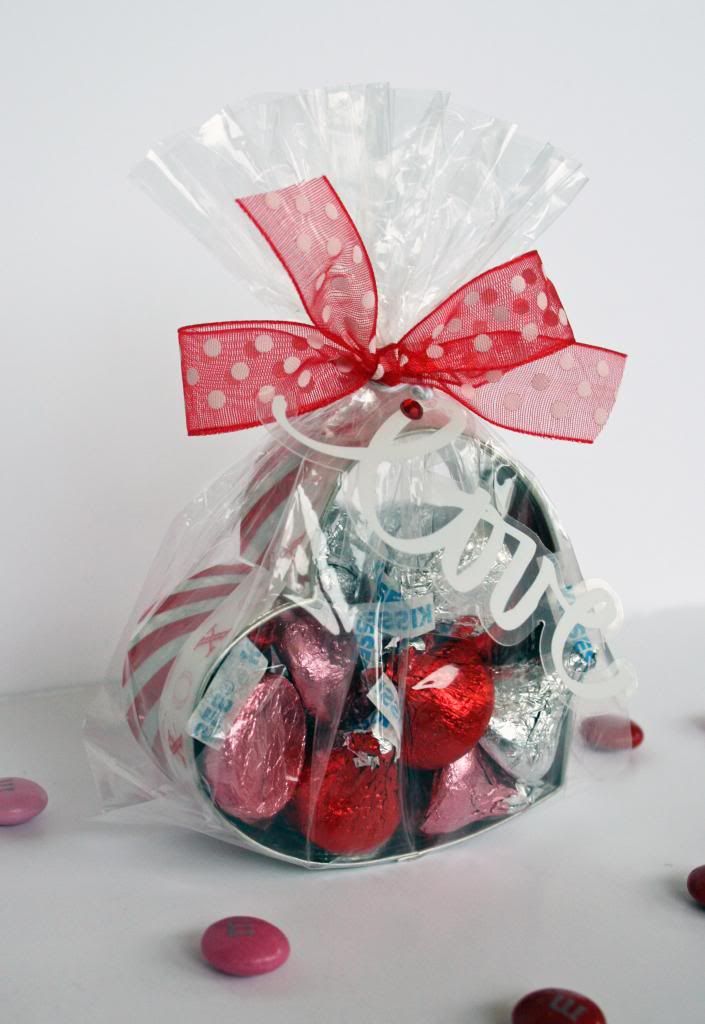
This one is made with a heart cookie cutter. I doubt that I spent more than 5 minutes on it. I just used the Little Yellow Bicycle Vellum tape on the outside, popped it in a bag and tied a bow at the top. To add a bit more detail, I punched a hole in a Clear Cut, added a tiny jewel and tied it to the top.

Tip: Cookie Cutters can be found in several places around each of the holidays. Try checking your local craft store, grocery store or even discount stores.
 
 
This one is another super quick one. I had these clear cups on hand. I just punched a border from paper and adhered it to the bottom of the cup. Next, I wrapped a sticker border along the very bottom border. For the tie-on, I used a couple of pieces of chipboard and another tiny jewel.

Tip: If you take a closer look, you can see that to make the border fit better along the bottom of the cut, I scored it on the bottom side and then clipped between the scallops.
 
 
This one is a bit more time consuming, but still very easy and quick. For it, I used a clear transparency sheet. It also takes very limited supplies. I punched a couple of 12 inch strips and a thin piece of paper for the edges. Working while it was flat, I added the borders to the edges. Next up, I taped it together to make the cylinder. Put your candy in another clear bag that is already inside the cylinder. Tie a bow on the open end to close. On the closed end of the bag, tie a bow and then clip the edges. Finsh off with a punched heart, a little heart sticker and another tiny jewel.

Tip: You can get 4 to six of these out of each single sheet of transparency paper. One sheet goes a long way! Also, make sure that the edge you are adding the borders too is no more than 6 inches. This will save you time by making each punched strip work for two sides.


Be sure to stop by the Little Yellow Bicycle Blog for more inspiration!


Photobucket

Wednesday, October 17, 2012

Gift Packaging with Little Yellow Bicycle

Ever need some quick packaging and don't want to settle for ho-hum?  Don't have exactly what you want either?  Can't stand the thought of running down to the Hallmark Store? 
 
No worries!  We are paper crafters, after all!  Raid your stash! 
 
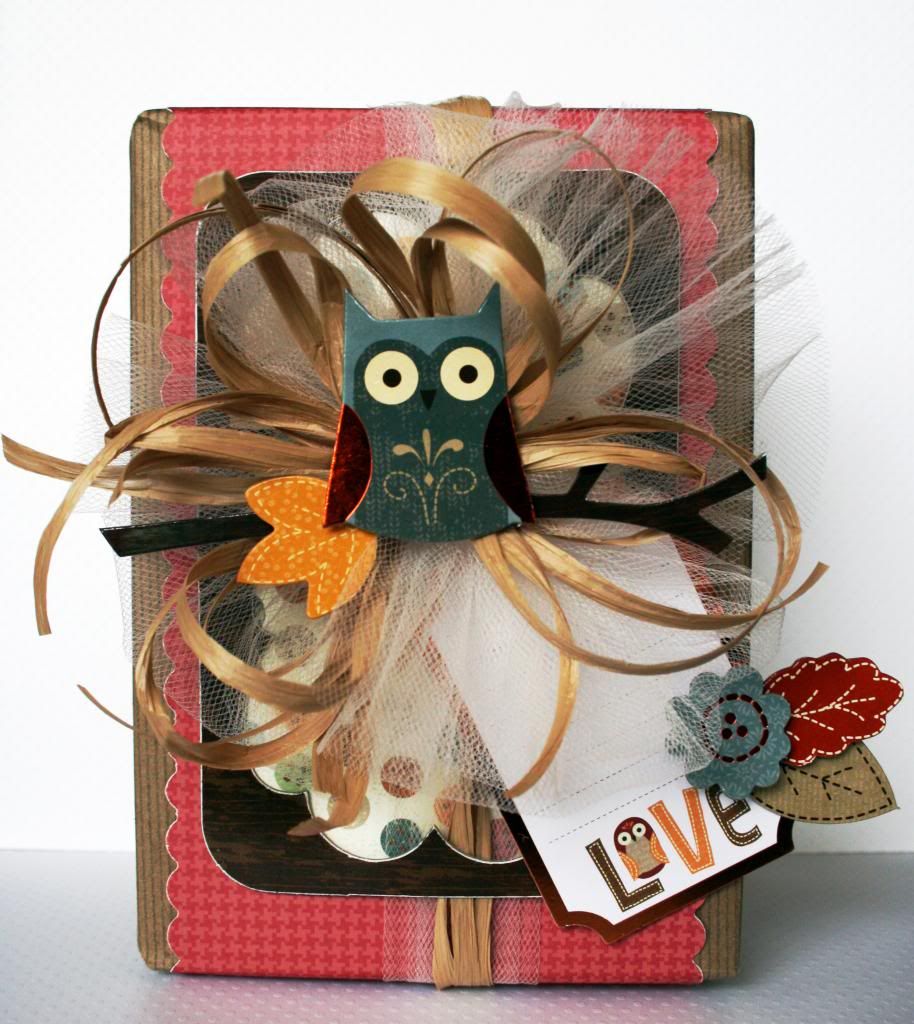
I wrapped this gift box with some simple craft wrapping papers and Little Yellow Bicycle's Acorn Hollow collection.
 
  Don't forget your punches! Try layering a punched strip of paper for a decorating base. A chipboard frame with a co-ordinated paper inside is just the ticket to something interesting.
 
 
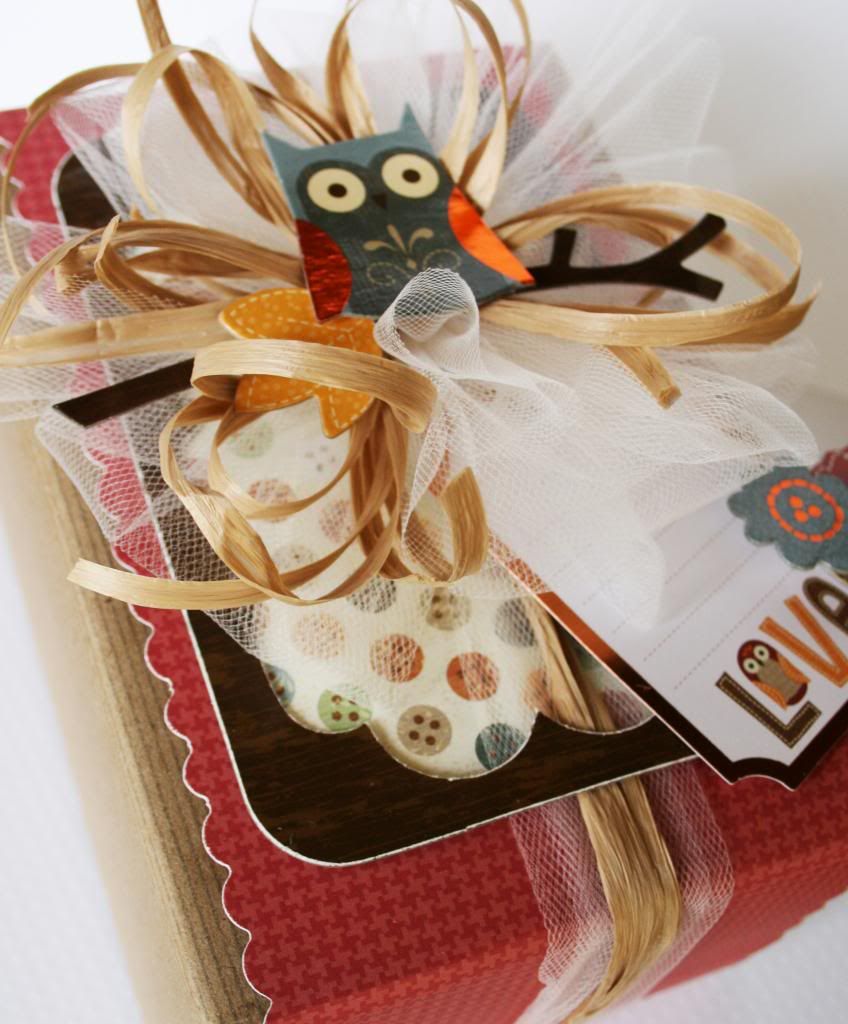
Finish it off with loopy bows in raffia and tulle.  Adding a few more chipboard shapes is a fun touch for the center.
 
 
Finally, don't forget a tag!  The Little Yellow Bicycle journal cards make adorable little tags!  They are perfect for so much more than just journaling!
 
Tip:  The raffia is actually a raffia looking ribbon.  I like it much better than actual raffia.  It comes on a roll, so you never have those weird kinks that yousometimes find with raffia.  You can find it in your local craft stores.  Look in the section with the curling ribbons.
 
Be sure to check out the Little Yellow Bicycle Blog for more ideas from the Biker Chicks!
 
Photobucket

Monday, July 16, 2012

Dress Form

We have been having some painting and re-doing done around our house lately.  In the process, I've been doing a bit of playing!  Finally!  I picked up this dress form a year or two ago, and I had never done anything with it.  Somewhere, I have a picture of the before, but I can't find it to save my life.  :)  Anyway, it was a light seafoam green before I got started.  Now, with a bit of paint, Glimmer Mist and Lumiere it looks like this...


I used a load of tulle, some ribbon and a few flowers on it.  I really didn't mean for it to end up looking so bridally, (is that a word?) but it fits with the decor of the room. 


This is a picture of the waist.  I just hot glued the flowers in place at the center of a sash of tulle.  The flowers and the leaves are from Prima, except for the white one. 


This is the other side of the waist.  It was simple to do.  I just tied lots of bows with tulle and ribbon to the iron. and bunched them up.  You can also get a bit of a look at the iron in this one. 


Along the bottom of the form, I looped sever layers of tulle to make a skirt.  I alternated the look of the tulle detail along the scrolls.  These are also a few bows crunched together to get the look.

 
Just one more.  This is the top and a bit closer look at how the tulle mixed with the ribbons looks.

I'm just loving seeing all the dress forms that are available now.  If you have altered any, I would love to see them!


Photobucket

Friday, July 22, 2011

Tutorial Time at Bo Bunny!

Hey everyone!  I have to admit that I'm getting this up just a little late!  :)  It's been pretty busy around here lately and I'm behind on everything.  You know how that can go in the summertime.  The days just seem to fly by!

I made this card using the wonderful Double Dot Ribbons from Bo Bunny.  I also added some of the Double Dot papers.  I love how there are so many colors of these! 


Go to the Bo Bunny Blog here to see how I made these EASY flowers! 


Hope you are having a GREAT summer! 

Thanks for dropping by!

Wednesday, December 8, 2010

The Kid's Table and Bo Bunny!

Two posts in one day?  It's a record!  Please scroll down for the blog hop!

Remember the dreaded Kid's Table?  You know the one... a card table pulled out of the garage with the left-over dishes?  Sitting... Sighing... and Wondering what was going on at the good table ... why they had the pretty stuff and if they would EVER finish dinner so you could open presents!

Boy... I didn't realize how much I didn't like the kid's table!  lol

Well, I have the solution to the problem.  Pull out your Bo Bunny and make it a table where they want to sit!  Here is a picture of an example of a child's placesetting.  Most of you won't know that I love gingerbread men.  {I'll show you in a new post in a few days! :)}  This little place setting was a natural fit for me.


Start a tradition: The little red wine glass was my grandmother's. When we visited her, we got to drink out of this glass. When she passed away, these glasses were something that I was so thrilled to receive. Every time I pull them out, I think of her. Unfortunately, this didn't help with the kid's table at Christmas because she only had 2! :)  You can bet that when I have grandchildren, I'll share these and start my own traditions, too!


Place Card:  These are so easy!  Just pull out your Bo Bunny Double Dots!  I just love those papers!  The holly leaves were made using the Olivia Wraps.  Just cut out holly leaves and glue dot them under your bow.  I really like the added texture they add.

Gift Box:  This is just a folded little gift box made from more Bo Bunny Double Dot paper.  I used a tiny gift box that I picked up at our local craft store, pulled apart and used it for a pattern.  You could add treats, or you could add some tiny trinket toys to entertain your little ones while they endure the endless wait for opening presents!


Napkin:  Remember your mom walking by and cleaning you up with that horrible scratchy and stiff napkin?  A good solution, when making your napkins, use flour sack cloth or some similar soft fabric.  After all, this table is supposed to be kid friendly.  It's a cute homespun look, too!  If you take the extra few minutes to sew on your Bo Bunny Buttons, it will be something that you can use over and over again. 

Note:  The truth is that I couldn't find a white dinner napkin!  I do like the way it turned out though and I'm keeping it!  :)


Ornament:  Give the kids an ornament to remember this Christmas.  Drop it in a wine glass for added decoration.   You might want to add a tag with the date.  I just hot glued Bo Bunny Buttons to a red foam ornament, tied a bow and added a small ribbon for hanging.  Easy and Fun!

Finally, add some striped straws and if all else fails... remember that first picture?  You know, the one with the huge cookie?  I'm not above bribery!  Let them eat desert first... but ONLY if they sit at the kid's table!

Thanks for dropping by!  Be sure to check out the Bo Bunny Blog for more Place Setting Ideas!

Note:  Scroll down for the blog hop! 


Wednesday, October 13, 2010

Really Reasonable Ribbon Blog Hop

It's that time again!!  Time for a fabulous blog hop and a chance to win a prize!  Really Reasonable Ribbon is having their monthly blog hop and you can win!!  Just go on the hop and follow the instructions for your opportunity to win some BEAUTIFUL ribbon!!  This month's ribbon club has a wonderful Christmas selection.  Just in time for you to get started on those Christmas projects.  There is so much ribbon included and it's all terrific!

Here is a little card that I made with some of the ribbons this month.  The shimmery green and the red are both included in the Ribbon Club assortment.  These ribbons are so gorgeous that I had to make a card that would do double-duty.  The wreath is actually a circle with bows attached all over it and is attached only at the top.  If you pull it off, it's an ornament!  Because the ribbon is so shimmery and shiny, I think that it will look great on a Christmas Tree. 


Here is the BEAUTIFUL Ribbon Club Ribbons!  Be sure to get over to Really Reasonable Ribbon to check these out!  While you're there, don't forget to look around.  There is sure to be just the thing you NEED.  :)


Now for the hopping information.  If you started here, you need to hop back over to the Really Reasonable Ribbon blog to get started.  If you made it here from Cassie's Blog, you are on the right track and your next stop is Mindy's Blog. Have fun hopping!  You are sure to find inspiration along the way!

Thanks for dropping by!

Friday, August 20, 2010

And the Winner is...

Hi everyone!!  I had meant to get a winner up earlier.  It has been a busy week.  My daughter has been on vacation this week.  She has been visiting us!  Those of you with grown children know how rare it is to get them home and all to yourself for a few days.  It has been such fun hanging out and spending time with her.  What is even better?  My son has been home, too!  I'll have him home all next week and then it's back to school.  I'm treasuring every minute!

I have to thank everyone who took time to drop by and comment!!  I so enjoyed reading all of your posts!!  Thanks so much!!

A little clarification, too.  A few of you thought that the ribbon RAK is the picture shown.  That is actually the ribbon club assortment at Really Reasonable Ribbon.  My RAK does include some of those ribbons, but it is not the same.  Sorry for not being more clear!

And the winner of the RAK is...


The 12th person to follow me was:
Yvonne said...


I just love this ribbon. It's beautiful. I am a follower of your blog.
Thanks for the chance to join in.
8/13/2010

Yvonne, please use the link on the sidebar to send me an e-mail with your address!  I'll get your ribbon right out to you!

Hope that everyone has a great weekend!
Thanks for dropping by!

Friday, August 13, 2010

Blog Hop with CANDY!

Yeah! It's blog hop time again! If you are a regular, you know that it means that there is a PRIZE in the offering! All you have to do is go to Really Reasonable Ribbon and go on the hop to win! Don't stop there, though!! There is MORE!

AND... We are celebrating our 300th blog follower, so you have a chance to win some fabulous blog candy!! Be sure to check that out while on the hop, too.

Wanna know what's extra cool? It may be Friday the 13th, but there is no bad luck here! I am giving away Blog Candy, too! Just follow me and let me know that you are now a follower or if you are already a follower, just leave a comment. I will send a Ribbon RAK to one random winner!!

AND... I happen to have it on VERY good authority that there are prizes to be had all along this hop!!! You won't want to miss a single stop!

The Ribbon Club assortment at Really Reasonable Ribbon is so CUTE this month! I couldn't resist the sweet white grograin with the little pink flowers. I made this layout using it.


Here is the complete assortment...


If you made it here from Cassie's Blog, you are already on your way! Your next stop is Kym Weber
.

If you started here, hop back to Really Reasonable Ribbon and start the hop there.

Here is the order if you need it!
Really Reasonable Ribbon

Jacque Beddingfield

Iwona Palamountain

Cassie Box

Robbie Herring

Kym Weber

Mindy Baxter

Gini Cagle

Amber Goble

Susan Dupre

Kerri Michaud

Trudy Sjolander

Cheryl Walker

Erika Taylor


Thanks for dropping by!! Have fun and good luck on the Blog Candy!

Tuesday, July 13, 2010

It's Blog Hop Time Again!

Hi everyone! It's that time again... Blog Hop Time at Really Reasonable Ribbon! This month's ribbon assortment is flat out ADORABLE!! If you love black and white, you are going to want this one for sure! Check it out!


If you have girls, you know that every time you turn around they need a little gifty item. I am always trying to come up with something quick and easy for these little gifts. I call them my Quicky Gifts. You know the ones... the little things that you need for friend's birthday extras, secret pals, teachers, etc. Also, little things to tuck into a gift basket to add a 'little extra'. That is my project for this month's blog hop.


When I saw the zebra print ribbon, I knew that I had to use it. I think it is so cute with pink and it adds a touch of edge for the picture of my daughter and her friend's picture.


This little holder can be used for candy or trinkets and is nothing more than a rectangle of paper for the base. If you can tie a bow and cut paper, this is the project for you. Very quick and easy! The little zebra print bucket was in the Target Dollar Spot. All of the precious ribbons used are in the Monthly Ribbon Club Assortment.

Now... onto the rest of the Blog Hop! If you made it here from Cassie's Blog, you are on the right track and need to make your next stop at Kym Weber


If you started here to get into the order of things, go back to Really Reasonable Ribbon to start at the beginning! Be sure to follow the instructions to win the prize!! While you are there, be sure to check out the fabulous ideas from the design team.

Here is a list of all the stops, just in case you need it for reference.

Iwona Palamountain

Cassie Box

Robbie Herring

Kym Weber

Mindy Baxter

Gini Cagle

Amber Goble

Susan Dupre

Kerri Michaud

Trudy Sjolander

Cheryl Walker

Erika Taylor


Thanks for dropping by!

Tuesday, June 22, 2010

Another Ribbon Idea to Share!

Hi everyone! Hope you are off to a great start to your week!

If you haven't done the challenge at the Really Reasonable Ribbon Blog, you still have time! Use this link to go take a peek! Challenge

I have a fun little idea for you. When my daughter went to college, we couldn't find a lamp that went with her colors in her dorm room. After much searching, I came up with the idea to use ribbons to alter a lamp for her. She loved it! Unfortunately, it never came back home so I can't show it to you. So... I liked it so much that I made one for my scrapbook room.
 This one lives here, so you get to see it!


My favorite thing about this little idea is that it can be any colors you want. There are no limits to this one and it is such an inexpensive way to add some fun to your space.
I picked this little lamp up for $10.00.

Here are some close-ups to show you the details.

All you have to do is cut two pieces of ribbon for each section and tie them around your lampshade.  You can see that I have a knot at the bottom.  I tied the knot first and then pulled the ribbon up (one piece on the inside and one on the outside) and tied a simple shoestring type bow.
Keep repeating until you have them the way you want them to look.
 FAST and EASY!


Here is a close-up of the top.  I did tie each ribbon in the same direction.  I liked the way they kind of lined up to lay nicely by doing it this way.

And a close-up of the bottom.  Just hold the two pieces stacked on top of one another and tie a knot.  You can see that the bottoms are all cut differently, but that is not a problem.

I chose to go with the colors of my scrapbook room and to only use ribbons.
Some other ideas for this one are to add some ric-rac, just use knots instead of bows. What about going for an elegant look? Nothing says elegant like a wide satin ribbon. I think tying buttons to the ribbons would be an adorable look in a baby's room.
 The possibilities are endless!


Be sure to check out the Really Reasonable Ribbon Store and pick out your favorite ribbons! Speaking of endless possibilities, you will find them in the store!

I would love to see your ideas for this project!

Thanks for dropping by!

Sunday, June 13, 2010

Really Reasonable Ribbon Blog Hop

It's that time again! Time for another Really Reasonable Ribbon blog hop! These are always such fun and of course there is always a prize in the offering. If you are starting at my blog, you need to hop back to the beginning at the Really Reasonable Ribbon Blog. You are going to be so inspired with great ideas for using your ribbons along the way!

If you are already well on your way, you made it here from Cassie's Blog, you are on the right track and need to make your next stop at Kym Weber


The prize this month is again a fantastic Ribbon Club assortment from RRR! Check this out...


If you are ready for summer or already scrapping your summer photos, you definitely need this in your stash! You also need to stop by Really Reasonable Ribbon to check out the other ribbon. I have it on very good authority that Bonnie has been adding new ribbons!

I am wild about the ribbons this month! I needed a gifty item so I decided to cover a little paper mache box and to make a matching card. Since I love getting handmade gifts, I enjoy doing my 'gift wrapping' this way. I chose to stick with only one of the ribbons for this one, but keep an eye out... I have more to show you using this great assortment next week.


Here are a couple of close-ups. To make the loops on the box, simply cut little strips and use a quick drying glue to attach them. They will stay perfectly in place and because the ribbon is such a great quality, they hold their shape perfectly!


Here is a list of all the stops, just in case you need it for reference.

Iwona Palamountain

Cassie Box

Robbie Herring

Kym Weber

Mindy Baxter

Gini Cagle

Amber Goble

Susan Dupre

Kerri Michaud

Trudy Sjolander

Cheryl Walker

Erika Taylor


Thanks for dropping by!