Showing posts with label She Art. Show all posts

Thursday, April 18, 2013

Little Yellow Bicycle - Fern and Forest

We are All In a Flutter at Little Yellow Bicycle!
The Fern and Forest Girl collection has lots of embellishments with wings.  Sharon Kropp came up with some adorable little fairies for the collection.  I based the fairy on my canvas on hers.
 
Wish
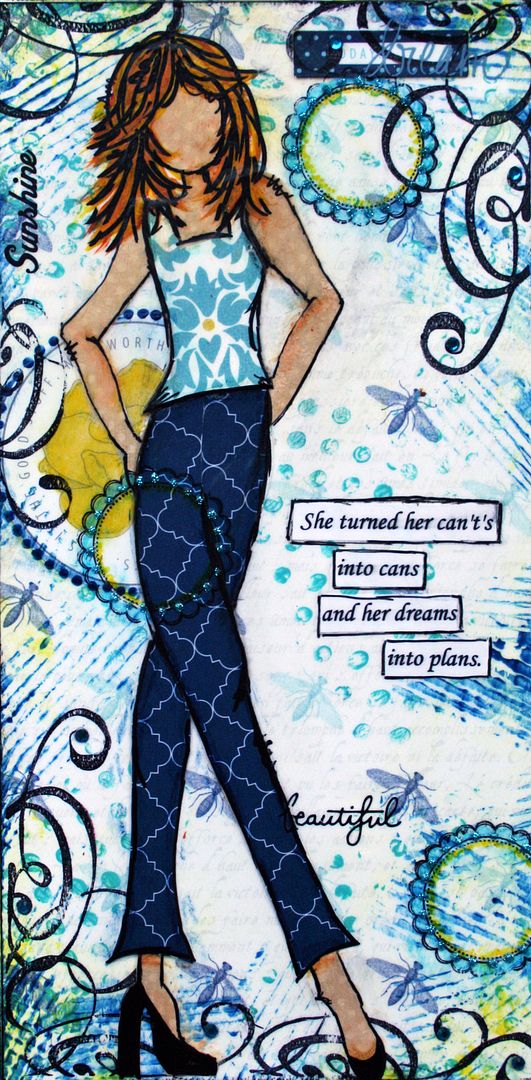
This is a 9x12 Canvas. 
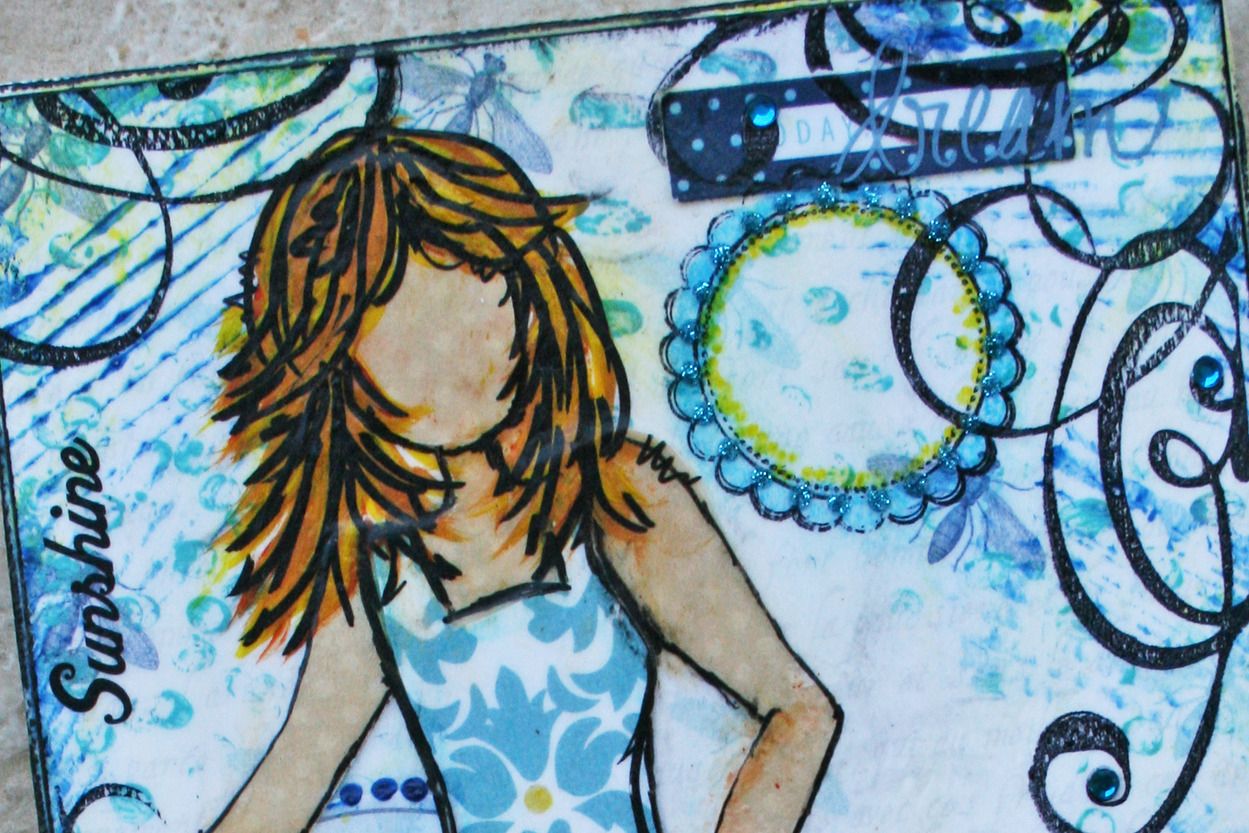
All the colored accents and doodles were done with my Faber-Castell Pens.  Pitt Big Brush Pens for the color accents and a Pitt Artist Pen (bold) for the outlining.
 
 
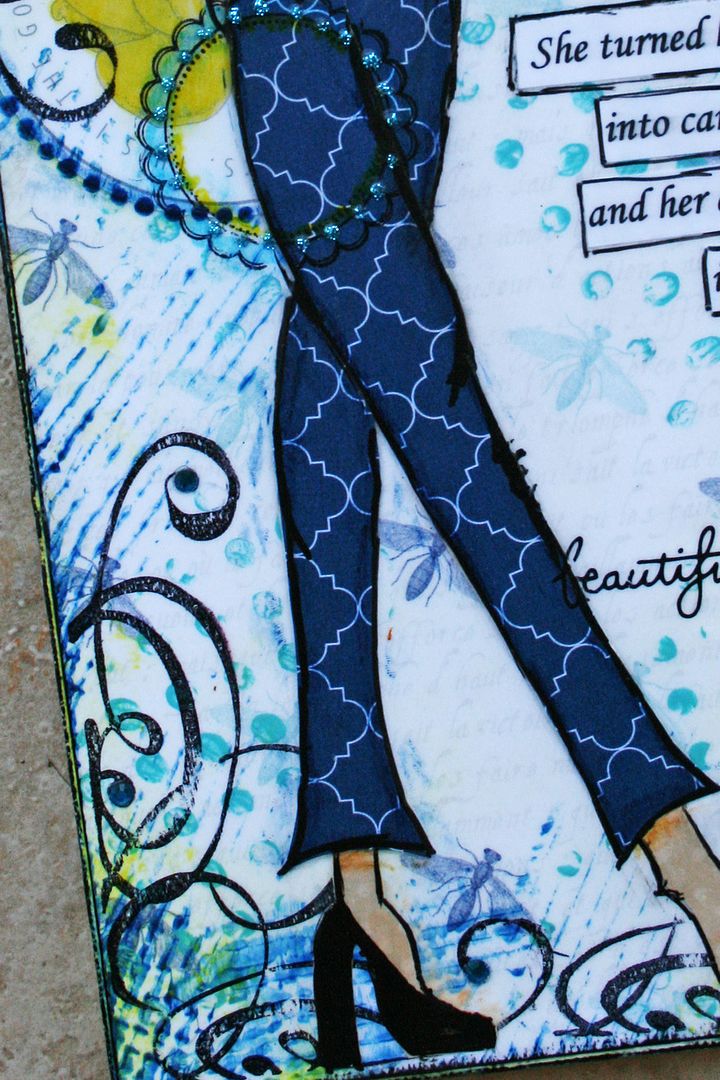
The fairy was pieced using paper from the Fern and Forest collection.  I also used the paper crafting kit to add details.  Her scalloped collar is from a flower that I cut up and tucked under the paper for her head.  The blue ruffle on her dress is a scored and scalloped paper that I tucked under her dress.
 
 
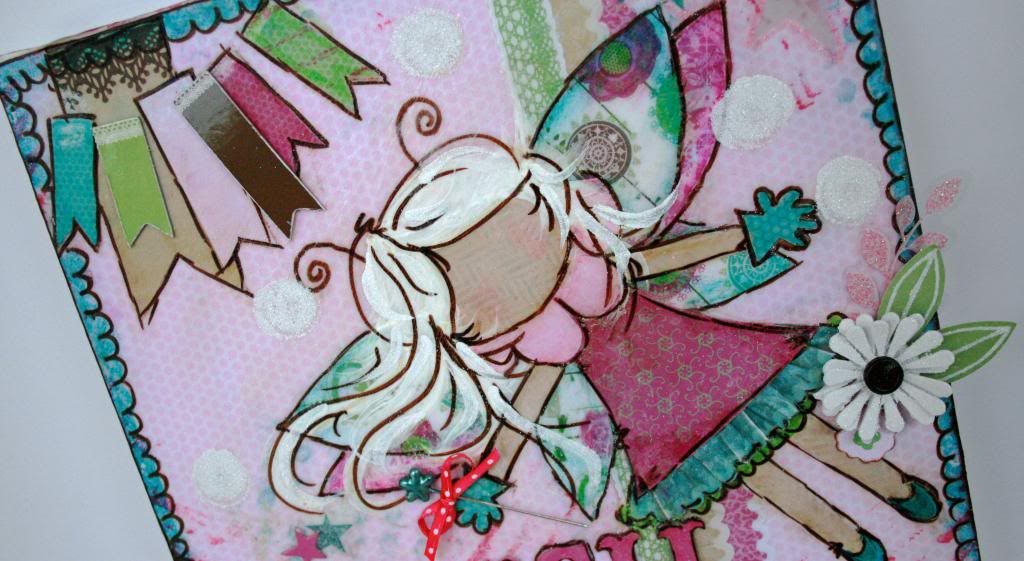
After building the base and the fairy, I added glitter accents in her hair, on the leaves, flowers and scattered around the canvas.  The hair was done with paint and just sprinkled while wet.  The polka-dots are Tim Holts Distress paint, also sprinkled while wet.  Finally, the detailing on the leaves and paper flowers was done with a Souffle Pen.  The ink from the pens dry fairly slowly, so you can add glitter while they are still wet.  (It is quicker drying than paint or glue, so you need to work quickly.)
 
Chipboard accents were added for touches of dimension and layers.  The title piece 'wish' is also from the chipboard package.
 
 
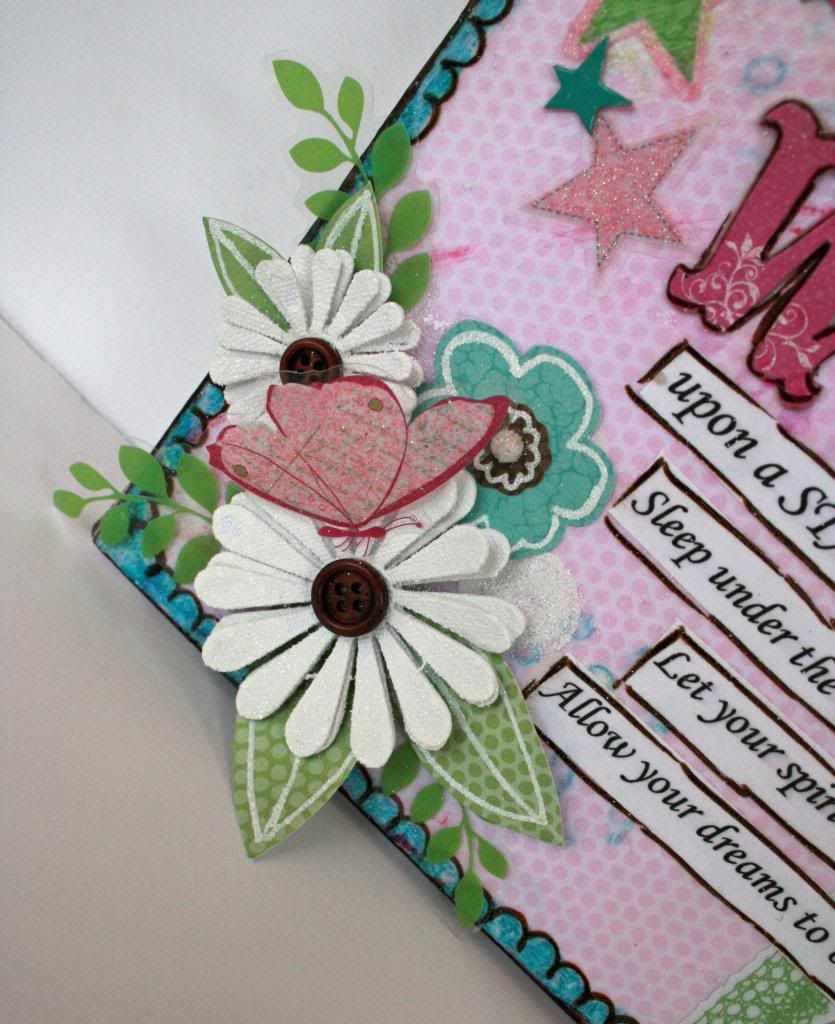
I used lots of Clear Cuts, too.  Some of them (starts and bursts) were added with Modpodge and are flat, and some (leaves and butterfly) are attached with glue and are dimensional. 
 
If you have any questions, be sure to ask! 
 
Don't forget to drop by the Little Yellow Bicycle Blog to see Jen's Flutter Page! 
 
Photobucket

Monday, October 8, 2012

Just Playing!


Lately, I've been playing again with mixed media.  I have taken the She Art workshop and recently purchased the Collage Couture book by Julie Nutting.  Along the way, I am finding what I like!  I'm loving mixed media and making 'girls'.

Julie Nutting does a fantastic job of breaking down her process for her girls in the book and I love the results that I'm getting from using the book to tweak my own style of drawing.
This is a girl that was made for my daughter.  She recently moved and has an extra bedroom that she's using as a home office.  I made this one to go with the colors of her new room.
We are so proud of Jade!  I wanted her girl to remind her that there is nothing she can't accomplish if she sets her mind to it!

I love that there is no "right" way to do these canvases.  Messy is good!  :) 
For the hair, I use a combination of acrylic paints and pens.  The paper is from Teresa Collins.  I LOVE this collection!


I also love that I'm using stamps that have been stuffed in my drawer for a very long time.  The flourishes are from some OLD Fancy Pants stamp sets.  I literally haven't used these in years and it's like going shopping all over again!


So, because I'm loving doing this so much, I had to make another one for Jade.  This one, although not originally planned to be, is a nod to her sassy side.  After the girl was finished, I couldn't help thinking that she was looking pretty sassy, so her quote was meant to be sassy and fun! 


This one totally makes me smile and I hope that when things aren't going so well, that it will do the same for Jade!  :)

I used some old LillyBee papers from my stash for the bulk of this girl.

I have another one done that I will share soon!  The only problem with making these is that I could make them ALL the TIME!  I'm not sure what I would do with them all!  Hhhmmmm... wonder if I could put them on flat canvases and use them for wall paper? 
Photobucket

Wednesday, December 28, 2011

More She Art

First of all, I hope that you all had a
 VERY MERRY CHRISTMAS!

It was a wonderful Christmas for us.  Having our kids home at the same time is always a special treat.  It doesn't happen nearly often enough! 

I have been so busy with Christmas that I haven't had a lot of time for extra scrapping time.  I do have a LOT of projects that I haven't gotten around to posting yet though.

This is another example of She Art.  I lifted the idea for the dress from another blog, but for the life of me, I can't find it!  I have no idea how she did hers, but this is my take on a 'pretty' She Art girl.

I made this for my Mother-In-Law a few months ago.  I wanted to make something a bit more elegant and also something that fit her 'style'.

Believe

She collects angels and I really wanted to give this the feel of being an angel.  I searched and searched for wings, but couldn't find any that suited what I had in mind.  I ended up buying some crystals and cutting them up to make the wings.


You can see a bit of them here.  I just stuck them down and then added Mod Podge to make them really secure so they would stand up to the test of time.  You can also see a bit of the masking and stamping here.  The word 'believe' is a rub-on.


Here you can see that I used a ribbon for her sash.  To get it to stiffen and to stay in place, I first coated it in Mod Podge.  After it was a bit tacky, I shaped it into the look you see here.  When it was completely dry and stiff, I added several more coats of Mod Podge, being careful not to saturate it again so it would hold it's shape.


You can see the dimension of the dress here.  It was done by layering lots of strips of paper and bunching them up.  I kept adding more layers until I liked the look.  The word 'love' is also a rub-on.  I just rubbed it on over the layers.  Worked like a charm.


Other tips:  I used Lumier Metalic paint to get the sheen on the dress and flowers.  The gorgeous corner flourishes are old Basic Grey rub-ons.  Dig into your stash to find things that are left-overs.  If you are doing mixed media, invest in the Farber-Castell Pitt Big Brushes!!  They are worth every single penny of the cost!!  E-mail me if you want to know where I got mine.  I got a great deal on them!

Hope you like this one!  Would you believe I have 6 more She Art girls to share?  Trust me, you'll probably get sick of them before I'm done!  :)


Photobucket

Saturday, September 17, 2011

She Art!

A while back, on Facebook, one of my friends posted a picture of a canvas she had done and mentioned She Art.  I LOVED the look of it!  As you all know, the last thing any of us needs is another hobby!  :)  Well, too bad!!  I had to give She Art a go.  After searching online for more, I came across an online workshop offered by Christy Tomlinson.  I signed up and finally had a chance to start watching the videos.  I love the way Christy teaches.  It's casual, yet packed with techniques and ideas! And... it's FUN!!

I am such a 'gotta measure it' and 'gotta have my ruler' girl, that I knew that I had to just go with it!  Talk about freeing!  I'm still in shock that I did this.  I know that the scale of my girl is off a bit, but I'm ok with that.  I so enjoyed that there were no rules for these girls!

I have to admit that I haven't finished the all of the workshop, but I just couldn't wait to try my hand at a girl.  Here is my first attempt...
 

The part that scared me to death was doing the hair.  It took me a while to get up the nerve to do it!  I'm pretty happy with how it turned out, but I know that I'll like it better after I've done a few.


In this picture, you can see that I used a lot of rub-ons and stamps.  The banner is just MME stickers that I glued on, painted on, doodled on... 


Next up... A tiny bow!  It is mine, so it had to have a touch of ribbon!  I really coated it and stuck it down with Mod Podge, so it won't go anywhere and it's stiff. 

  
Finally, I decided that I was keeping this one.  The sentiment is added last and this is the one I chose for me.


So that's it!  My first attempt, but certainly not my last! 

If you are interested in the class, go to Scarlet Lime for the details!  The class is worth every penny!!