
At 3 Birds Studio, we have been hopping and sharing with Xyron all week! What a great swap with great products!
If you haven't yet, be sure to go to the 3 Birds Blog to see how I used the Xyron Creative Station to make this little album! I have included step by step instructions on the 3 Birds blog.
My blog post today is all about the embellishing!
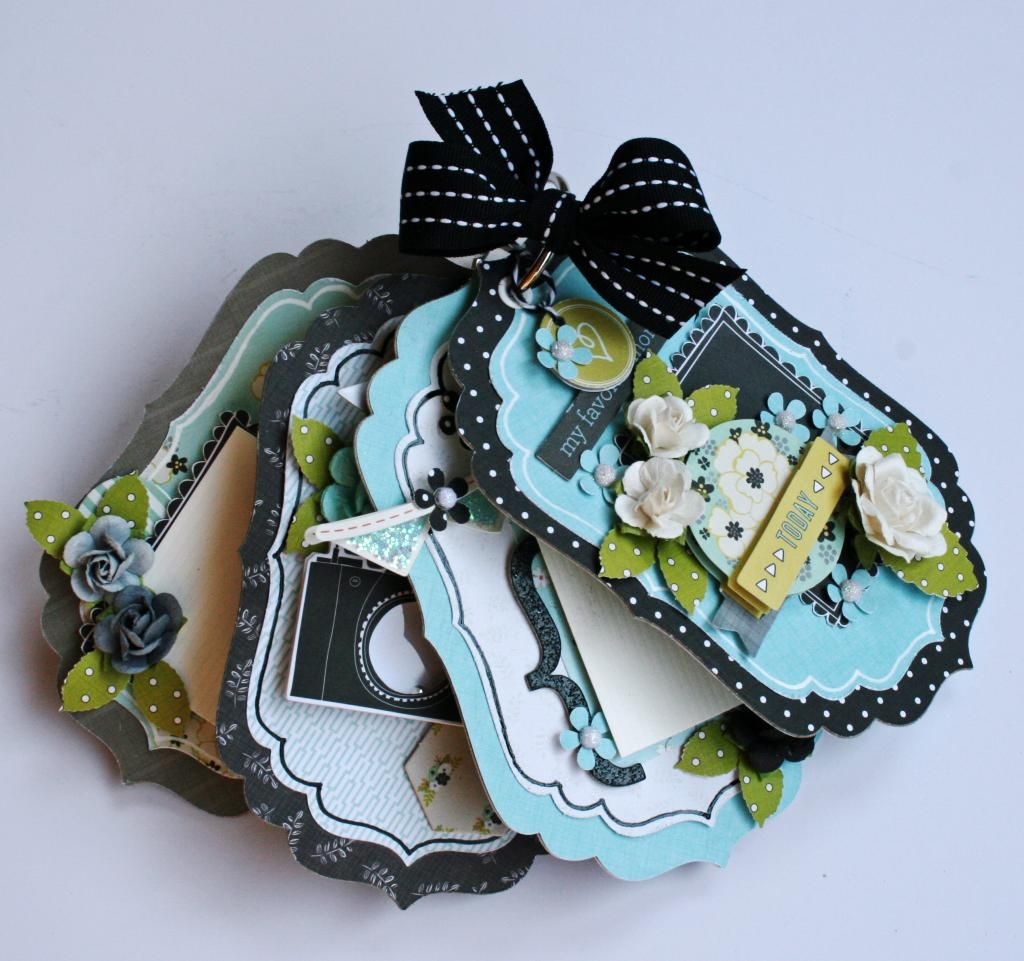
As you can see there is a lot of dimension to this little album. I honestly love adding all the details and the added dimension just adds more interest to me, which is a good thing in my book!
After finishing the cover and adding the bow, the first thing I added was a little chipboard piece that I turned into a charm to hang from the ring. I glued a tiny punched flower to it to make it coordinate with the cover and the inside pages.

When using one ring, you can choose the way your mini album will open. For this one, I chose to have it open vertically.
I love all the little glittery pieces that are included in the 3D sticker set and the chipboard set. So, naturally, some of those pieces had to make it into my album.
I added a few punched flowers and leaves to the little roses and these pages were complete.
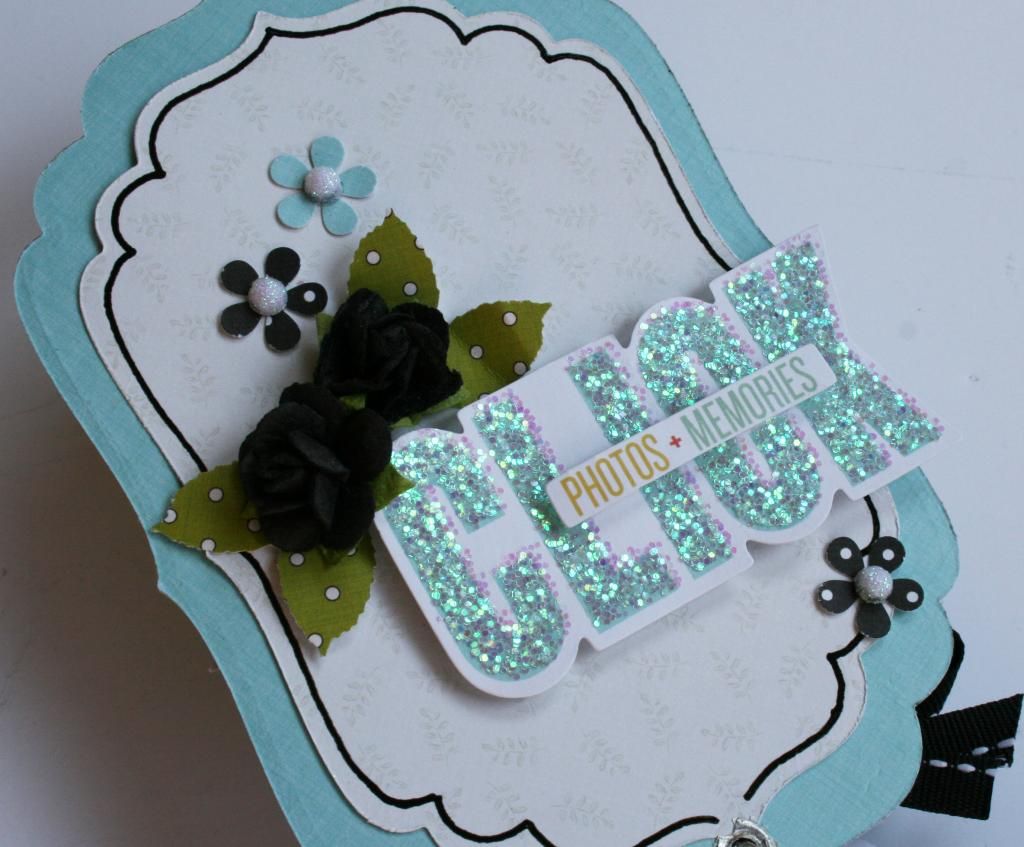

For these pages, I went with some more of the glittery piece, punches and another 3D embellishment. The black circle on the top page was cut from one of the papers. There are lots of fussy cutting options in the paper pads!
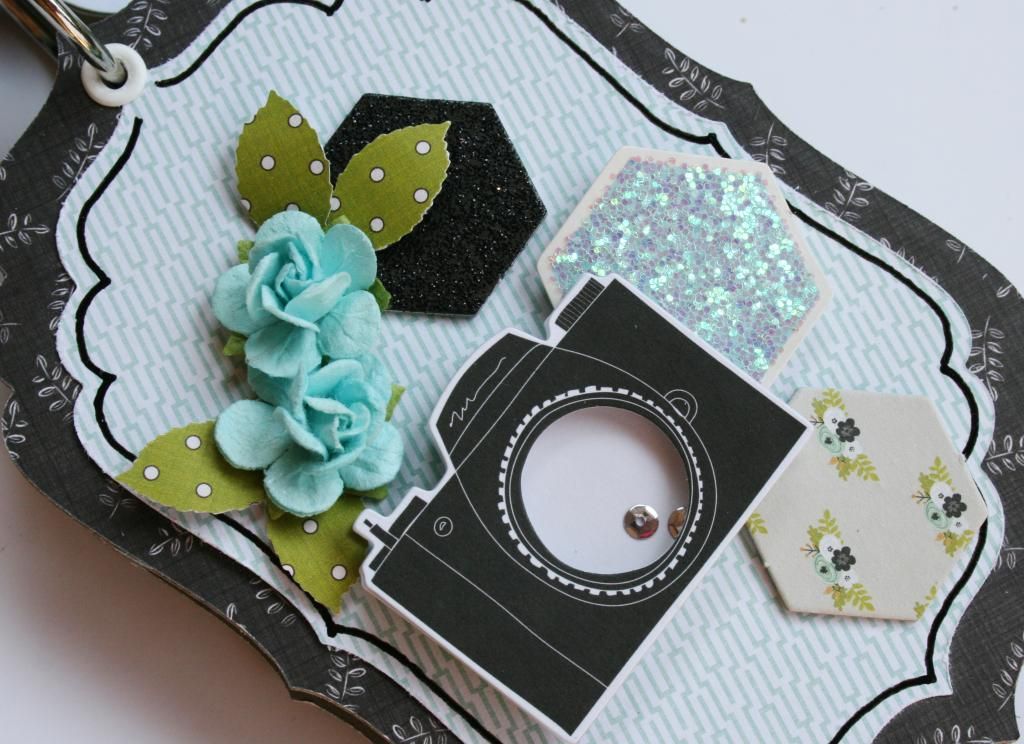
Another glitter close-up! I was on a roll! BUT... what I really want you to see is that little camera! How cute, right? There are all kinds of little shaker boxes included in the 3D embellishment collection!
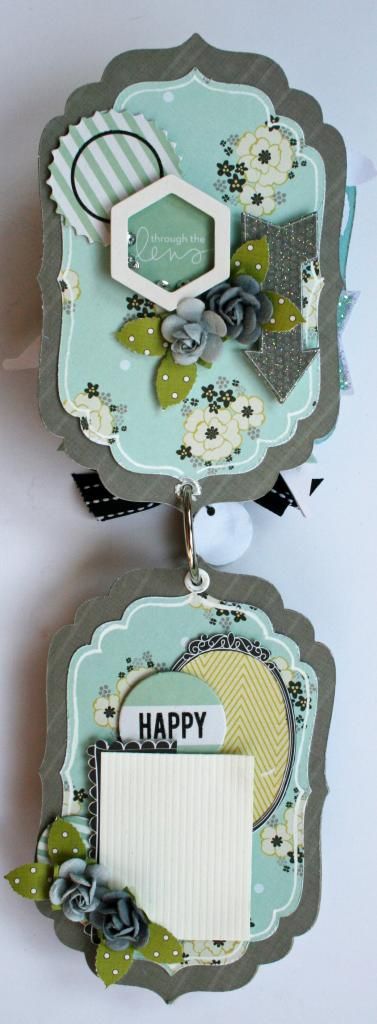
The last pages combine several of the same elements that are shown on the cover and the first pages. One last thing that I want to share with you is that I used things from both the Graceful Seasons and Midday Medley Collections. Each collection stands alone to make beautiful projects, but also has so many coordinating elements, too!
Did you know that you can win some great products from both 3 Birds Studio and from Xyron?
Well, you can!
Head over to the 3 Birds Blog for all the details!
Also, don't forget to stop in at Xyron to see what their team has been up to using the 3 Birds Collection!
Finally, if you missed us on HSN yesterday, not to worry! You can still purchase 3 Birds Products on the HSN website!

Robbie, this album is so beautiful! such a great idea!
ReplyDeleteYour mini album turned out so gorgeous Robbie!!!
ReplyDeleteRobbie, I LOVE your mini... I have a question in regards to the Xyron Mega Runner, which I have been eyeing for over a year now. During one of the demos on HSN, they stated that it works well on chipboard. What's your experience with that??? The reason I ask is that I normally use Hermafix repositionable adhesive due to my shaky hands and frequent need to reposition my elements. I have another brand of large runner, but all my dry adhesive runners pull up the chipboard when I pull away the applicator. Since I use a LOT of 3D embts and chipboard, I've been looking for someone who can help me out with their Megarunner experience. Thanks in advance, and I always love to see minis and 3 Birds projects. Tweet, tweet, tweet from NW Michigan
ReplyDelete